Showing posts sorted by date for query Irvine. Sort by relevance Show all posts

Sunday, 4 June 2023

Tough For Me - A Real Strugg L

Strugg L by Junichi Yananose
This one was an interesting one for me and I have to say that I went through much the same experience as the extremely talented designer/craftsman/solver, Ken Irvine. This means that it is a GOOD puzzle and just the right difficulty level despite having a relatively high level.

Juno has watched the huge increase in complex packing puzzles with varying shaped pieces which have been made more interesting by the use of limited openings as well as a stipulation that the openings need to finish up being covered by the pieces (Alexander Magyarics and Osanori Yamamoto are masters of this sort of design and I have absolutely loved them. Juno always wants to add something new to a puzzle genre and has been doing that in the burr space with the amazing Grooved Board Burrs which have been released over the last few years. So, how could he change the design of packing puzzles? He didn't want to make standard blocks to fit into a box and didn't want to add yet another limited opening packing puzzle. Juno's fresh take on the subject is the use of grooves and pins in the pieces and the box sides. This has the added benefit of allowing the packed puzzle to be completely full. To make it interesting, he also created it using only L-shaped triominoes. This was quite a feat! It sold out in just 5 minutes after going on sale! Amazing for a packing puzzle.

Just 2 moves!
It is rather attractive made from Fijian Mahogany, American Rock Maple and Bamboo and is 88 x 88 x 58mm in size. I was expecting it to be sent out as pieces (I don't think that was ever stated but I suspect that I expected that to be the case because it was supposed to be a packing puzzle). After it arrived, I had a quick fiddle and realised that this was going to be fairly complex to disassemble. In a way I am rather pleased it was sent out assembled.

After my photos and my quick fiddle to see how it moved, I set to properly and really worked on a disassembly. There is only one real pathway through with only a few small blind endings. After about 15 moves there was a move sequence that surprised me a lot - it opened up a lot of other pieces and also seemed to render the puzzle unstable. But despite that key piece rotating all over the place it did not release anything early for me. The dexterity level went up a bit as I had to hold onto several pieces at once to keep them aligned. At that point I found myself going around and around in a loop and could not find the next moves to release the first piece. I inadvertently ended up back at the beginning. Aargh! I am not very good at these! Finally, after about an hour, I had a breakthrough and released the first piece. 

Even after the first piece had been taken out, the others could not just be easily removed. It required another decent sequence for the second and then even the third. This was using linear moves. It would have been possible to cheat with a rotation here but I was disciplined and stuck to the linear moves - those pins and grooves hold the pieces well until all of them have been removed.

6 L's - the holes in the bottom are purely for finger access
I was pleased to have disassembled it and was really not sure that I could put them back inside without Burrtools or my memory of the route but I decided to give it a go. I jumbled them up into a pile and left it for a day before trying to pack them all back in. I was very relieved to read that Ken had managed the assembly but he is a MUCH better solver than I am and that only meant that I had a chance but it was not certain.

After that day and the jumbling, I realised that I did remember the starting position of 2 of the pieces and what the first move was during the disassembly. Maybe if I had waited for a few weeks then it would have been more like starting from scratch but I had a blog post to write! Luckily those were the ONLY moves and positions that I remembered. Assembling the shape after this, outside the box was fun and actually not too difficult. Once I had my 4x4x2 cuboid assembled it was time to try and recreate the disassembly outside so that I could reverse it and put it back inside. I got stuck at this point for a few hours. 

In the end even the assembly was not too difficult. Had I received it in pieces, I suspect that it would have been beyond me but with just the couple of piece clue that I had, this was a very fun challenge. It has sold out now but I am sure that it will come up at auction before long. Well worth adding to your collection!

Keep an eye out very soon for Juno's latest Sequential Discovery Puzzle, the Dial Case


Do you love heavy metal or even some complex plastic? Yes me too. It is with great pleasure that I can let you know that Ali and Steve have just released some new toys on their Two Brass Monkeys store:


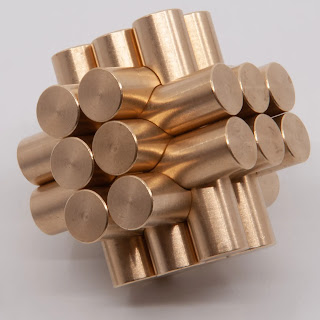
The Burrly Legal Cylindrical 18 piece burr

A stunning 18 piece burr which took years to develop


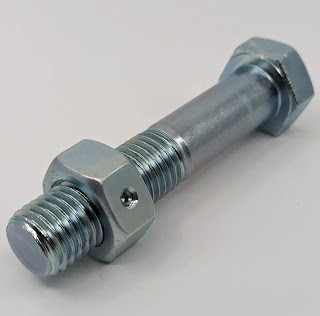
Ali's Bolt


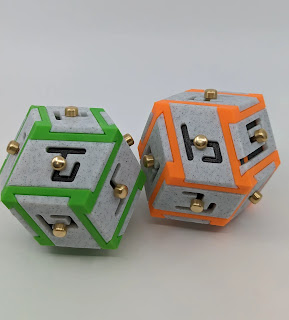
The Rhombic Maze Burr

This is a MUST HAVE puzzle - designed by Derek Bosch, the Brass boys have added to the original with an extra maze plate a new design for the pins and a new booklet with 100 challenges to try your hand at. I had a play with this at the recent Midlands puzzle party and it is stunning. My original review of this puzzle was here

Sunday, 21 March 2021

An Entirely New Type of Puzzle?

The recent collaboration between Chris Lohe and Andrew Crowell
Last week's post showed off the recent releases from Jakub and Jaroslav at the New Pelikan Workshop and I am pleased to see that many of you did read my drivel and have bought the wonderful new toys when they went up for sale. In fact two items are sold out already (if you did miss out on anything then I am sure that they will eventually be stocked by PuzzleMaster). I received all 7 of the puzzles and I am always very aware that Jakub is waiting for my reviews before he puts them up for sale so the pressure to solve and write is very high. Luckily for me this time there were two of the batch that were sent to the Zen puzzler himself, Ken Irvine, for review and I did not have to be too fast with these. Ken is a master of the design and solution of interlocking puzzles and is very uniquely placed to give an opinion of the two beautiful lumps of wood and if you read the blurb on the Pelikan site on them, then you already know that Ken was extremely enthusiastic. I did, however, really want to try them and give an opinion for you all (even if I am not sure why you even read my stuff let alone pay attention to what I think).

First of all, let me say that these puzzles are absolutely amazing and you should buy them straight away - unfortunately the Cyburr has sold out already but in my opinion the Chamburr is the best of the two and certainly MUCH more difficult. Stop reading this right now and rush over and buy - you will not regret it.

I have waxed lyrical about Christoph Lohe and his designs many many times over the years - he has a very unique talent for designing puzzles that are just the right difficulty level and really interesting to solve with some very long and difficult to find sequences but always fun to work through - he is almost a savant. Then we are all aware of the incredible effect that Andrew Crowell has had on the puzzle world. He has taken the rather small rarified area of Turning Interlocking Cubes (TICs) into the stratosphere in terms of interest and difficulty. So...when these two incredible puzzle designers team up I just have to sit up and pay attention! This is should definitely prove to be something simply spectacular and YES it is incredible - it is almost like they have developed a whole new category where the interlocking puzzle is combined with the TIC without making something that is impossible for humans.

Cyburr
Starting with Cyburr (this is the one you should pick up first), we have a gorgeous cube made with a Mahogany frame and Maple burr sticks. It has been beautifully finished and the initial moves are buttery smooth. There are a number of choices possible at the beginning and quickly you can home in on the correct path. Some puzzles I find are spoiled by having too many blind ends or some that go much too far before petering out. I like a fascinating sequence with a few side paths to explore but not too much risk of getting hopelessly lost. During the pathway through this disassembly, there is a wonderful dance as the pieces are weaved around each other inexorably towards an exit. The exit this time seems possible at several times as the burr sticks get less and less interwoven but even when one is separated from the pack then it still cannot be simply pushed out. This is where Andrew's wonderful skill has come in...rotations are required. Not too many that it is possible to get hopelessly lost and entangled. He has designed it so that rotations are actually very difficult to achieve and are only possible with exact positioning of all 3 of the pieces within the frame. This is not going to happen by accident - it requires thought©. The Aha! moment is wonderful. Two rotations are required and the pieces are ready for your exultant photo:

Stunning precision on that craftsmanship
The reassembly is a serious challenge! This puzzle cannot be solved by Burrtools but the process of disassembly should take you back and forth enough to lay down a decent muscle memory to allow you to scramble the pieces and still be able to put it back together again. If I can do it then all of you (who are considerably cleverer than me should manage it). I do agree with Ken that this puzzle is probably too difficult to be sent out as pieces to be assembled from scratch - only a very few of us could manage that. The Cyburr has a sequence 38 moves to remove the first piece which is a prodigiously high number especially as 36 are linear before the first rotation is required. If you see this up for sale again then buy it!

Chamburr
Next up is the Chamburr (I am not sure why it is named this but for me this is the "Champagne of the interlocking cubes" - it is stunningly fun and really quite a tough challenge. I did not know at the time that this was the harder of the two and this was the one that I started with. Again it is beautiful with the frame made from Merbau and the three burr sticks made from a lovely warm Pink Oak. It is slightly less aesthetically pleasing than Cyburr purely because it doesn't have the completely filled face that the other does. But it is stunning. The movements of the pieces are smooth and again there is just the right number and depth of dead ends to explore. The Chamburr is slightly easier at the beginning than the Cyburr but gets MUCH more difficult about ⅔ of the way through. With both of these puzzles, Pelikan has made all of the internal edges of the burr sticks and the frames very sharp which I suspect is to prevent any illegal rotations being found but the adverse effect of this is that finding some of the linear moves can be quite hard as the pieces need to be held just right and everything lined up perfectly for them to slide on each other. This can be a little infuriating at first but it does mean that finding the linear moves is more than just pushing and pulling the pieces randomly. It is more that the moves need to be thought out and planned. After 10 or 15 minutes of play with each of these puzzles I came to appreciate the precision and sharpness of these edges and used them to my advantage.

The Chamburr has a couple of very interesting rotations that are possible at about the ¾-way mark and apart from a bit of a panic when I thought I couldn't undo them, I realised that this made for a fun dead end and quite a bit more exploration without risking getting lost. After realising my misstep, I continued. The linear part of the path for this one is VERY complex and several times I got to a point where I could not backtrack without a huge re-exploration of that part of the path. I must have gone back and forth over that section of the solution 10 or 15 times before I understood the dance path of the pieces and could repeat them easily. After 43 moves (amazingly, all of which are linear) the first piece can be removed. This is a stunning odyssey before the remaining pieces can be taken out of the frame with a rotation:

43 moves to take the first piece out!
Despite the fact that the initial part of the solution is linear, this is by far the toughest of the two. It is incredibly difficult to find your winding path through the moves - these pieces dance about in and out of each other and the frame but the pathway is really well hidden. The requirement for the rotations is the icing on the cake - it makes the puzzle constructable and also means that if you get stuck you cannot just go to Burrtools and make yourself a solution file. You HAVE to persevere with it and work it out. It is worth it - just keep trying and you will understand it eventually.

Reassembly is just as challenging - the rotations are easy to find but then you have to backtrack through that very well hidden pathway. It took me several hours over 2 evenings to get there. This is a candidate for one of the puzzles of the year for 2021 - AMAZING!

At the moment the Chamburr is still available here - buy it straight away and if you find Cyburr up for sale again then don't hesitate.


Sunday, 8 December 2019

Brian and Ken Broke It

Then Brian Teamed Up With Andrew to Make a Cluster - I Said "F$&@"

It's a Soma Cube...but they broke it!
I've discussed Ken Irvine a few times on this blog - he's a sort of evil genius (a name which he is positively delighted to have received) who seems to be brilliant at solving puzzles and amazing at designing them too! In fact, his wood-working skillz are pretty impressive too (Sigh! I wish that I had some talent in some field or other!)

Apparently, Ken had a wonderful idea to fiddle with the classic Soma cube (a puzzle that everyone should have in their collection). He decided that it was much too easy having a 7 piece puzzle to make a cube in one of 240 different ways. In his delightful/annoying way he decided to make it a 6 piece puzzle that only had one assembly! He named it the Broken Soma because he took the 3 voxel L-shape and broke each of the cubies in half before fixing them onto the 6 remaining pieces. Hence it is a "broken soma". Except, we all know the real reason it is so-named...it only takes a short ¼ hour or so before anyone playing with it decides that he has taken a perfectly reasonable puzzle and BROKEN it! It seems bloody impossible! The puzzle was debuted at the Rochester puzzle party earlier this year where several people, including Brian Menold, tried and failed to solve it over the 3-day party. Eventually, Brian solved it after getting home and this seemed to be the response that most of the extremely skilled puzzlers at this event had to this delightful design.

Brian asked Ken for permission to reproduce it to which the response was a resounding yes. I had a little play with Allard's copy at the last MPP and after about 30 minutes was completely convinced that it was impossible - this proved to me that I was quite correct to have ordered a copy myself and couldn't wait for it to arrive (the Royal Mail seemed to have lost track of my package for a week or so). I am always delighted to try anything new from Ken's evil twisted (but clever) mind and of course, anything made by Brian will be stunningly beautiful even if it remains unsolved and in pieces for a while. I bought a copy made from Olivewood and Moabi which looked stunning on Brian's store and is even more beautiful in the hand.

I have carried this with me to work as well as played at home for several weeks. In my usual fashion, I went about it by randomly trying to combine pieces and of course failing every single time. There was always a piece sticking out or a small ½-voxel gap in a wall. I tried combining the half pieces and tried putting them at the ends of edges and nothing would work at all. Ken had certainly broken my Soma! I gave it to people at work to try and they were all convinced quite quickly that it was impossible. This includes a consultant and clinical fellow foot and ankle surgeon who are quite used to taking a fracture random assortment of funny shaped bones or fragments and putting them together into something vaguely foot or ankle shaped - of all the types of surgeon I work with, their 3D visuospatial ability is pretty much second to none. Between the two of them, I challenged them for an hour or so and they also were convinced my puzzle was broken. I also gave it to my anaesthetic assistant and one of my senior anaesthetic trainees to attempt during a rather long case. They are also pretty good at 3D reconstruction (having gotten very used to using 2D ultrasound and creating a 3D mind view from it) and yep...they declared it broken too!

At some point during all this torturing, I sat down and took Allard's advice and actually had a think©! Apart from causing a severe headache, I had a very nice realisation...there is something you need to figure out before it will be solved. You may well solve this by chance, by random piece placement but this is actually quite unlikely. Once you actually think, you realise exactly what is required and you can quite quickly assemble a cube.

This photo really gives almost nothing away!
Just look at the beauty of these woods!
The Aha! moment is simply wonderful. It is not the feeling of exhaustively working through every possibility (my memory is nowhere near good enough for that), it is the feeling you get from a sudden realisation that you know exactly what is required and can do it in minutes. Brian and Ken have created a masterpiece...I would say that every collection should have a Soma cube as well as a broken one. Thank you so much, my friends!

It's a Cluster F$&@!
Another genius who has been collaborating with Brian is the incredible Andrew Crowell. I have tried to make sure that I get a copy of almost everything he designs. This is courtesy of either Brian or the world expert on Turning Interlocking Cubes, Bernhard Schweitzer. Not everything that comes from Andrew's warped brain is a cube - he has designed a few other shapes but in common they always share the common feature of requiring some really complex interesting rotations. I am still struggling with a couple of PackTIC designs despite months of work. When Brian showed off on his site the Cluster puzzle which whilst not a cube still requires a bunch of rotations, I couldn't resist - plus my fetish for gorgeous wood meant that I just had to own a small amount of Patagonian Rosewood.

Surprisingly, this puzzle is still available in Yellowheart or Peroba Rosa for a very reasonable $54 - go and get it now - you really won't be disappointed.

I had left this one until I had solved the lovely fun FantasTIC and then set to. The fact that it is not a cube shape makes it both easier and harder for some reason. I was able to discern what I thought was the placement of the pieces fairly easily and then try and find the order of insertion and the correct rotations to get them in place. Except...this wouldn't work for me. I am a bear of very little brain and so kept trying the same thing. After a couple of days of failing to place the last piece and not realising that the gap was not the right shape, I suddenly took note and decided to start afresh. This time, I realised my stupid mistake and then was forced to hunt for another assembly entirely. Because of the odd shape of the intended final puzzle, I found this quite tough and discovered the alternative placement of the first piece entirely by accident. Aha! Now on to the main rotational placement. I had discovered a very interesting move that would allow entry of other smaller pieces but there seemed to be no way to get both of them inside...stuck AGAIN!

A few days later, I went back to it and thought to myself:
"What if I...?"
OMG! That is amazing! Who would have thought I would have a railway inside the puzzle or is that a Scalextric (remember those?) - there is a totally unexpected sequence of moves in there and it made me chuckle when I found it!

It's a cluster - brilliant - go get one
Well, I had better leave you now - Mrs S has just returned from a few days visiting the out-laws in Auld Reekie and if I don't sit and chat then she may get really upset at the pile of puzzles that have arrived in her absence as well as a few more that will be arriving soon! After a trip to the homeland, she packs a mighty Whack! Ouch!


Sunday, 22 September 2019

I Needed Some Zen Puzzling!

Quadrupled Quadlooplet
Life at PuzzleMad HQ has been pretty stressful the last few weeks! There has been some hard (and occasionally quite sad and harrowing) work at the hospital which has kept my mind from any decent concentration when at home. Plus some general life and health stuff at home has also led to a general inability to work on any puzzles. What I needed was to regain my Zen focus. I don't mean that I should go and read my friend Ken Irvine's blog (which I do religiously)...I needed to do something requiring focus and a certain degree of repetitive movement to help achieve me achieve an inner balance again. I decided it was time for a bit of a focus on N-ary puzzles again!

The first one that I began to work on was from my Azerbaijani friend, Namick Salakhov. Last year (2018) he had 2 entries in the IPP puzzle design competition and I had already bought and solved the amazingly complex Loopy Lattice puzzle and had asked for a copy of his other entry that year. These puzzles are terribly difficult to make and hence the wait can be prolonged. It arrived a month ago - I was surprised by the enormous beauty of it. Called the Quadrupled Quadlooplet puzzle, there are 2 challenges:
  1. Start with the looped rope threaded through adjacent holes of the core plate. Release the rope, and then return it to the starting position.
  2. Start with the looped rope threaded through opposite holes of the core plate. Release the rope, and then return it to the starting position.
If you get stuck or tangled then Namick has included a quick-release link within the string loop which I am ashamed to say that I did use a couple of times. It looks absolutely horrendous but luckily for me, it is quite intuitive and a positive pleasure to work out and I quickly achieved my required trance-like state of puzzle-solving! Very therapeutic.

Phew! That was fun. 
The disassembly was fun but did not lead to a full understanding as I discovered when trying to put it back together. I think that Zachary understood it before me - at least he realised that chewing on the string was very satisfying and had I not snatched it away quickly may have lead to an unsolvable puzzle and kebab shits!

He's studying hard!
After 4 or 5 days of experimentation I think I had the puzzle understood and could move back and forth between end states:

String through two opposite holes.
As usual, Namick has designed something captivating and confusing at the same time but definitely solvable with just a little concentration and help from a cat. His workmanship in this very unique material is wonderful and I look forward to the opportunity to obtain more in the future. 

So far my fevered mind has achieved a very small boost from my first N-ary puzzle. I was still far from soothed and not yet able to concentrate on some of the very complex new puzzles I have received over the last few weeks and months (most of the TICs remain unsolved)! I still needed more relaxation. Next N-ary puzzle to be played with was the White Bow Tie made from 3D printed plastic by Aleksandr Leontev:

White Bow Tie
This version is the smaller version of a puzzle (Black Bow Tie) that I spied in Allard's possession at the recent MPP. This lovely object is a rotational version of the Kugellager. The large one was determined by Goetz to be a 9-ary Kugellager requiring 13,122 moves for disassembly. The one I had bought was a dual puzzle - a ternary and a quinary Kugellager requiring 170 and 1251 moves respectively. I was not sure how it had been made as both possibilities and so I set to find out. There is a lovely sequence of moves to be discovered and of course, it had been supplied to me in the quinary assembly. The interesting feature of the quinary puzzle is how the logical sequence that is apparent at the beginning changes over to another sequence partway through and does it again at least another 2 times. This became quite confusing and caused me to get lost on several occasions putting my move count considerably above the proposed 1251. I discovered that this is not a puzzle to work on when one is sleepy as the zen aspect leads to automatic movements and dozing off and then getting inadvertently backtracked whilst dazed. Having woken back up, I discovered my mistake and continued in the correct direction until I had my 5 pieces and could see how the ternary version could be possible:

Even more brain soothing done here!
A game of 2 halves - the Ternary version is flipped
The ternary assembly is achieved by flipping the ring and assembling from the opposite direction - very ingenious. My savage brow was soothed even more by the 170 moves in the opposite direction! I really couldn't face all 1251 moves in reverse!

Next up was a puzzle that I had initially thought was a disentanglement puzzle but it turns out is actually also N-ary, the Chinese Soft Ring! I can never resist buying any of Aaron Wang's amazing wire and string puzzles even if I struggle to solve many of them - they are all beautifully made and a pleasure to play with. I have one of Aaron's puzzles with me pretty much at all times.

Chinese Soft Ring produced by Aaron Wang
The puzzle is supplied as above with a 3 loop assembly on 2 end rings - needless to say - the string does NOT fit through the little gaps in the rings. There are also 2 more rings and 4 more loops and a sheet of paper with a number of challenges. At the IPP design competition, it was supplied in the 3 loop version.

I am rather ashamed to say that this took me several weeks to understand even vaguely understand how this worked. I honestly thought that it was a simple disentanglement puzzle and set about trying to undo the provided version. I got absolutely nowhere. After a couple of weeks, Michel van Ipenburg shamed me by describing that he had solved it fairly easily and I joined a couple of other people who had failed. In the end, this appears to be a binary puzzle (according to Goetz) and at this point, I had an idea. Maybe I should keep the triple assembled as a reference and try and make a simple one or two with the other loops? It required a little thought© but I managed something easy in an evening of TV (I was supposed to be watching the TV series "Chernobyl" but it was so frightening that I was pleased to be looking elsewhere).

Easy peasy!
OK! I might be understanding
I think I am getting there.
I had quite a bit of help from my own string expert and managed to get up to 6 loops:

Zachary is very good with string!
I said on Facebook that I was thinking of stopping there as it had been quite difficult to get to that point in terms of concentration and dexterity. Unfortunately, the puzzle-solving machine that is Louis Coolen took offence at me being a wimp and taunted me with a photo of his own success. Zachary looked me in the eye and told me in no uncertain terms that we were GOING to do this! The following evening I set to and after only a couple of knots and having to backtrack, I had my Chinese soft ring seven loop set:

Man! That is a really unusual puzzle and very enjoyable to work out!
I even achieved a zen state during it once I had understood what was required.
If you like disentanglement puzzles and are interested in N-ary puzzles then you really cannot beat this as both types in one. Multiple challenges make it even more value for money. I still need to work on the further challenges at some point but I sort of got sidetracked yet again...

Vertical by Aleksandr Leontev
I had been putting this one off for a while because of the sheer number of moves required. However, my mental turmoil demanded yet more soothing repetitive motion. The Vertical puzzle is based on Goh Pit Khiam's Num Lock puzzle but set in a cylindrical frame to be compact. The original was Ternary and I think that this version is too. I discussed a beautiful multiple base version of this made by my Woodmaster friend in South Africa, Johan Heyns but I could not resist a new version. This puzzle is supposed to require 14,999 moves to dismantle.

Tongue poking out!
I started work one evening trying to find the sequence. After about 20 minutes of experimentation, I was on my way and gradually settled into a wonderful rhythmic sequence of moves which I could do whilst watching the TV or otherwise sitting with a blank head! Mrs S did comment on several occasions that my expression during the solve of this puzzle was rather like that of my puzzling guru, Zebedee. We both often sit there with our tongues hanging out having no brain power left over to be able to retract it into our mouths!

At times I was able to solve this one at about 1-2 moves per second but had to rest periodically because my tongue was drying out the most moved piece was actually causing me to develop a callus on my finger which was really quite painful. The puzzle was a mammoth effort spread over 4 evenings. Finally, this morning, I had this just in time for this blog post!

OMG! The effort!
Unfortunately, there is no shortcut to the reassembly! My zen state will need to be re-instated to put it back to the beginning! Lord help me!

I do hope that all this zen-puzzling has helped my fevered mind recover a bit so that I can begin to solve some other puzzles soon - only time will tell.

If you are intrigued by the idea of a lovely N-ary wooden and acrylic puzzle then Johan has one left of his Septenary cubes which require a pleasant 4802 moves to open. If you would like to buy it then let me know and I will put you in touch with him. Don't wait too long!

Septenary cube - last one available


Sunday, 18 August 2019

I Am So Bad at Boxes!

Yes, it's a box and it doesn't look too difficult!
I am sure that the majority of you will recognise the box pictured above and you will all laugh at me when I say that I could not open it! For those who don't immediately recognise it, it is a burrset made by the Doctor of Wood, Eric Fuller. A few months ago he released a bunch of these in different woods and due to work pressures, I was not quick enough off the mark to get one of the more gorgeous sets. However, I was just able to buy a copy of the Cherry, Ash, Walnut and Birch set just before they all sold out and have to say that I am not in the least disappointed. It is simply gorgeous even in the more mundane wood choices. Eric has put all of his usual magic into the manufacture of this set - the joinery is simply perfection itself and it looks beautiful. The lid lifts off to reveal a lovely ordered set of burr sticks which have been perfectly engraved with their piece number for selection according to the booklet of challenges.

27 beautiful burr sticks plus a "filler"
How many burrsets does one need? This is slightly embarrassing to answer - at the moment, I must say that at least 4 is the correct number!

The "42 piece burrset" by Jerry McFarland - aka the Caramel Case
314 solid burrs as well as many many additional holey burrs! Plus Jerry added an extra stick

The Ultimate burrset - by Jack Krijnen
637 challenges varying from Level 1 to level 8

The Level 5 burrset Mr KY Wu
162 possible level 5 assemblies

Eric had made this set using the exact same pieces as the Ultimate burrset which I already had above. So why did I buy it? Apart from being unable to resist Eric's work, this was named the Pen-ultimate burrset because it had been modified. The ultimate set was based on sticks made from 2x2x8 stock. The extra length on each stick made the assembly challenges quite a bit tougher in places as the lateral movements during the solution can be quite restricted. For this set, Eric had created the burr sticks from 2x2x6 stock and to enhance the puzzling the set had been analysed by the amazing genius that is Ken Irvine (check out his brilliant new blog here).

So having established that I already have more six-piece burr challenges than I will ever be able to solve (have I told you all that I am rubbish at assembly puzzles?), the next question must be where is that booklet of challenges for Eric's set? Yes, I asked that too! I had not actually read the full description of the item before clicking buy and only after it arrived did I realise that this Burrset was also a box. Apparently, there is a hidden drawer in the box which contains a booklet of challenges - hence this is a box too. It is very well disguised but when looking and feeling the box closely it is obvious where the hidden drawer is and of course, it is locked tight. So no puzzling until I can open the box...GULP!

I take out all the burr sticks from the set and admire them and search for hidden mechanisms inside...NOPE! Then I realise that stick 0 and the red stick are both solid and hence one is superfluous...or is it? Eric would not just put an extra stick in for nice packing in the box. After all 28 sticks pack as a nice 7x4 array but if there were just 27 sticks then that could easily be nicely arranged in a 9x3 array and not need the extra stick. Plus, why is one made from a different (and rather gorgeous) Padauk piece? It's pretty clear by the presence of a magnet embedded in it that that is critical for unlocking the drawer. There must be a hidden mechanism that requires the use of the magnet. I set to exploring what I could find with this magnet and there were several very nice Aha! moments. I found hidden magnets, I found that things could be done by using magnet on magnet and there I got stuck! For ages and ages! All over the internet, I saw puzzle friends opening their drawers and starting on their burr puzzling and I couldn't begin. My howls of anguish spread wide and I was encouraged by others to continue and not over-think it. The puzzling continued...but not with success.

Eventually, Eric was on FB and saw that I was on-line. He sent me a message and asked what I had found and could do. I gave a hypothesis of what else I thought I ought to be able to do and he indicated that I was correct...but my set would not do that. I was sorry to inflict pain on Eric but his response was one of absolutely superb customer service, he told me that in my set I obviously needed a stronger magnet and the following day he posted out a replacement key-piece (no extra charge at all). A week later I received another stick with a MUCH stronger magnet embedded in it. I immediately put it to the test and the much-expected movement that I had been unable to perform with the smaller magnet was now easy for me. So I did it and tugged on the drawer and...and NOPE! Aaaargh! As I said, I am RUBBISH at boxes. Yet again, I spent several evenings with my usual game of doing the same trick again and again and again and, like a mad man, expecting something different to happen at some point. Of course, it didn't and I still could not play with my burrs! Eventually, I caved in and asked Eric for a bit of help, wondering whether there was another issue with my burrset (it is very common amongst us addicts to state that if we cannot solve a puzzle then it must be broken - that gets stated many many times at the Midlands Puzzle Party).

Eric confirmed that there was more to the opening than I thought and gave me a particular but not descriptive clue which I (surprisingly) understood but could not immediately follow through with. He then said something key:
"Remember that I like to make things look like they don't move when they do 🙂"
Within a few moments of that I responded:
"Holy shit! Just found it! Damn! That's well hidden!!!!"
I have to say that I feel that I got my money's worth out of this puzzle and that is before I even got to play with the burr sticks!

OMG! At last!
Now I was able to explore the set further. There was a nice Cubic Dissection logo sticker in the booklet and the booklet itself provided the full analysis that Ken had made of the Ultimate set with shortened sticks and also including the assemblies that do not end with solid burrs:

There are rather a large number of challenges to work through:

  • The Ultimate burrset with stick-length of 8 had 535 unique solutions with voids whereas the Penultimate set here has 708 - that alone will take me most of the rest of my life!
On top of this, there are an enormous number of other assemblies possible which will provide interesting puzzling - potentially another 20,322! Homing in on the slightly more challenging ones, Ken's analysis states that there are 3,479 piece sets that require a minimum of 2 moves and a maximum of 3 moves to remove the first piece, 51 sets that require a minimum of 4 and a maximum of 5 moves for the first piece and 3 sets that require 5 moves.

Not only is the analysis an amazing and very complete piece of work, but it has also been beautifully set out in the booklet and, as long as you have good eyesight (a problem for us "older" puzzlers), then it is a work of art as well as a fabulous puzzling resource:

At last! Very small print but gorgeous and a lifetime of puzzle challenges in there! Don't tell Mrs S!
Finally, I have been able to challenge myself to assemble something. As you would expect from Eric, the burr sticks fit together absolutely perfectly! It is a pleasure to play with this set - I will assemble a few and then it will be stored for my retirement when I have a whole lot more time on my hands.

A burr assembled and the Cubic dissection sticker proudly stuck on the interior of the lid


Still unsolved - probably a box!
Finally, as proof that a puzzle is a box...Juno's Slammed car which has now sold out after it won the Jury Grand prize in the design competition in Japan, was sold to me as a Sequential Discovery puzzle which I adore. However, Juno insists that it is also a box which we have established today that I am truly awful at solving! He says:
"The puzzle has an internal cavity and it is also categorized as a puzzle box. To make the definition of the puzzle clearer, we put a loaf of bread in the cavity and it helps you to realize the goal of the puzzle."
The loaf of bread is another dig at me after George Bell stated that a puzzle is a box if you can put a loaf of bread in it and there have been several of Juno's puzzles where he has had a joke at me with this. I received my copy of this a couple of months ago and have watched in amazement as everyone has solved it around me (including my completely blind friend Ed) and I zoomed off to almost the end of the challenge and have been stuck there for weeks. Yep! It is definitely a box - not because of the bread but because I am completely unable to solve it! I will keep on working on it and hopefully before the year is out will have opened it - some puzzles take me months or even years of effort! Thanks, Juno!


Sunday, 27 January 2019

A Fascination with Cubes

Mayer Cubes - 4x4 Interlocking cubes
Mrs S is often exasperated with me for the constant procession of packages containing yet more and more puzzles! She cannot seem to grasp why I keep buying them when they are "just all cubes". When I tell her that they are all different and provide new challenges and fun she reiterates that there is no difference between them and that they are "just all cubes". Looking at today's blog post, she might have a point - they are a lot of cubes but certainly not "just cubes"!

At the end of last year, I was reminded on Facebook of the existence of the fabulous puzzle designs for 4x4 interlocking cubes designed by Derek Mayer. As far as I know, only one was ever produced commercially and that was a very long time ago by the Pentangle puzzle company (sadly now no longer open). Looking back using the Internet Wayback machine, they used to sell what looks very like Mayer cube 9B. In the entire 8 or 9 years, I have been puzzling they barely ever had any stock of anything and all I was able to do was drool wistfully. When I saw (and commented) on some of the designs someone had posted on Facebook, my very good friend (and interlocking cube expert) Bernhard offered to build a few for me with some offcuts of nice wood that he had left. The very first delivery of 2019 was a series of 4 of the best Mayer cubes. From the left, there is Christmas cube 3, Mayer cube 9B, Mayer cube 10C and Mayer cube 7B.

Mayer cube 9B
I quickly set to with 9B and, as always with Bernhard's craftsmanship, everything was very nicely finished and beautifully tactile. A few moves were found quickly and I proceeded with my usual to and fro to ensure a muscle memory developed of the path back to the beginning. Considering it is only a 4x4 puzzle, this was remarkably complex. At some point during the process, I must have been holding the puzzle the wrong way and it sort of collapsed on me. Mrs S, who had been watching me play for a few minutes, burst out laughing at the sort of horrified look on my face! I had absolutely no idea how it went back together.

Lovely pieces!
According to the Pentangle site, the real challenge is the reassembly. Hell yes! They are not wrong! I could easily work out where everything was supposed to go but for a very long time, I could not reassemble the damn thing. Eventually, after about 3 hours, I finally managed to get it back together with a huge sigh of relief and then proceeded to make a Burrtools file for my (and Derek's) collection.

Mayer's Christmas cube 3
Next up, after a few days breathing space to collect my nerves, I moved onto the Christmas cube 3. It did not take long to take it apart and yet again, collapsed into a small pile of wood but this time without the gale of laughter from "she who mocks me".

More lovely pieces!
Somehow I was able to reassemble these fairly easily - it is a really nice sequence of moves which I find quite soothing to make over and over again. Of course, a Burrtools file will be essential for the collection. Next up I moved on to Mayers cube 10C:

Mayer cube 10C
This seemed very unstable from the moment I picked it up and I realised that one of the glued joints had come apart on a piece. This happens not infrequently and I am fully equipped with clamps and wood glue. Under the beady eye of "the frightening one" I carefully glued the piece back into the puzzle and clamped it being very careful not to get any glue on the granite worktop! No matter how many times I tell her that wood glue is easy to remove, she always gets upset whenever I bring glue into the kitchen (Whack! Ouch!). This time no glue escaped the cube but it did seem to escape the confines of the pieces that I had glued deliberately together - I prefer to glue within an assembled puzzle to ensure that everything is perfectly squared off as even a tiny error in angulation will mean a puzzle becomes impossible to assemble. Unfortunately, the little escape of glue onto an adjacent piece had the disheartening effect of rendering the second move impossible - I had glued the pieces together! In fact, I did not know what the second move was supposed to be - Aaaargh! I was too ashamed to email Bernhard for help straight away and an in-depth internet search revealed a photo of the second move on an auction site. At least I knew what was supposed to move and which direction but how to achieve it? It took me 2 evenings of many different attempts before I worked out where to put my pressure and during a particularly riveting episode of Silent Witness on TV I pushed really hard to achieve a sickening crack and a fully functioning puzzle.

Yet more lovely pieces!
After that, a quick disassembly was possible and I established that I had only broken the incorrectly joined pieces and then a rather prolonged reassembly occurred over the next two evenings! Delightful! Another Burrtools file to be made!

Mayer cube 7B
The last one I had was 7B. This one was left until last because of its' instability. When I picked it up and rotated it around a bit, 2 pieces quickly dropped out. Rather put off by this I decided to put them back and wait until I could be seated in my comfortable chair. When I got around to it, I immediately and carefully removed the 2 pieces that fell out the last time and continued to explore.- promptly another 2 pieces fell out of the core and the rest of the cube made a sliding movement and collapsed on me! OMG! I had no idea where the interior pieces came from. It didn't take long to separate the last pieces and examine what I had. I don't think I have ever seen an interlocking puzzle with simple sticks of length 1, 2, 3 and 4 in it. Very weird!

Lovely but odd pieces!
I did worry that there must have been another joint fracture in the post but there is no sign of that on any of the pieces at all. This puzzle is essentially a frame with a tiny packing puzzle inside - it is not difficult to reassemble from scratch but still quite enjoyable. Another Burrtools file done! Thank you, Bernhard, these were great fun and are a really nice addition to my collection.

This pushes all my buttons!
Next up, it was time to try a more complex cube (maybe Mrs S has a point?) - I had bought the Pushbutton burr from Tom Lensch after the IPP had finished last year. This was a design by the amazing Ken Irvine which had been entered into the IPP design competition in San Diego. Tom had made it beautifully from Canarywood with Indian Rosewood push buttons. It is wonderfully heavy in the hand and looks stunning. The dark buttons need to be pushed in just the right order and one ends up with a nice spikey cube. Only after all the buttons are pushed out is it possible to move any of the frame pieces and then a really pleasant sequence for the removal of frame and buttons occurs one at a time. It is quite therapeutic to do it and I left a nice carefully arranged line of pieces on my lap and the arms of my chair ready for the same sequence in reverse to put it back together again. Suddenly both cats zoomed across the room, over my armchair and across my lap. I screeched due to a claw or two in my delicate parts and they zoomed off after each other again! Once my eyes had stopped watering, it was clear that I was going to need to assemble the puzzle without help from my arrangement - the pieces were everywhere!

There is no way I will be able to assemble this!
I tried to put it back together for days! It is possible to get most of the way there with relative ease but for me, no way I could put it back together. Time for another trek to Burrtools. I have disassembled this puzzle multiple times and still cannot remember the sequence and orientation of the pieces - one day I will manage to work it out from scratch...hopefully!

I thought this was the Sequence cube
I also recently received yet another cube (OMG! She is right!) from Aleksandr Leontev. I had thought that it was the incredible Sequence cube with an enormous level for the complete disassembly (8190.4094.2046.1022.510.135.121.126.62.30.14.6.2). It is an N-ary puzzle which I adore despite some very disparaging comments on them on Facebook. I set to work on it during the week and quickly got lost and produced many many more moves than were needed! After 3 evenings of toil I had the first piece removed:

All pieces moved 1 unit
First piece out - Phew!
After removing the first piece, I continued the sequence (I did it several times because I a) got lost and b) hit a dead end and back-tracked several times. I could go no further and so I emailed Aleksandr. It would appear that the sequence cube cannot be built because it is too unstable to work with and this particular puzzle is a variant with only one removable piece - this puzzle is the 136 minutes puzzle with 8189 moves. I assume the name is for how long it should take to get from beginning to end - it certainly took me MUCH longer than that! I also have an extra piece which you can see in the first photo. Using this piece turns it into the 205 Minutes Box puzzle and requires 12,282 to assemble and disassemble - Do I dare to attempt it?

Move 1 done - 12,281 left! GULP!
The question is...what puzzle should I attempt next? I seem to have gotten a bit rusty at twisty puzzles - it took me nearly 2 minutes to solve a colleagues 3x3 Rubik cube which she had brought in to work for me to fix for her. That is shameful! I think I should move onto a puzzle that has been taunting me for a while - the Elite Skewb. I had absolutely adored the Master skewb puzzle when I reviewed it way back in 2013.

Elite Skewb
4 layer version of the Master skewb
I had been looking at it with fear ever since I received it from Calvin in late 2018. It was time to get to it! Despite having no idea how to go about solving it, on Friday I threw caution to the wind and did this:

What have I done?
In reality, I did not just scramble it. I was seeking algorithms and got lost on my second attempt and the scramble just happened by accident! Lord help me!

Hmmmm! There appears to have been quite a lot of cubes here! Is Mrs S actually correct?