Sunday, 5 November 2023

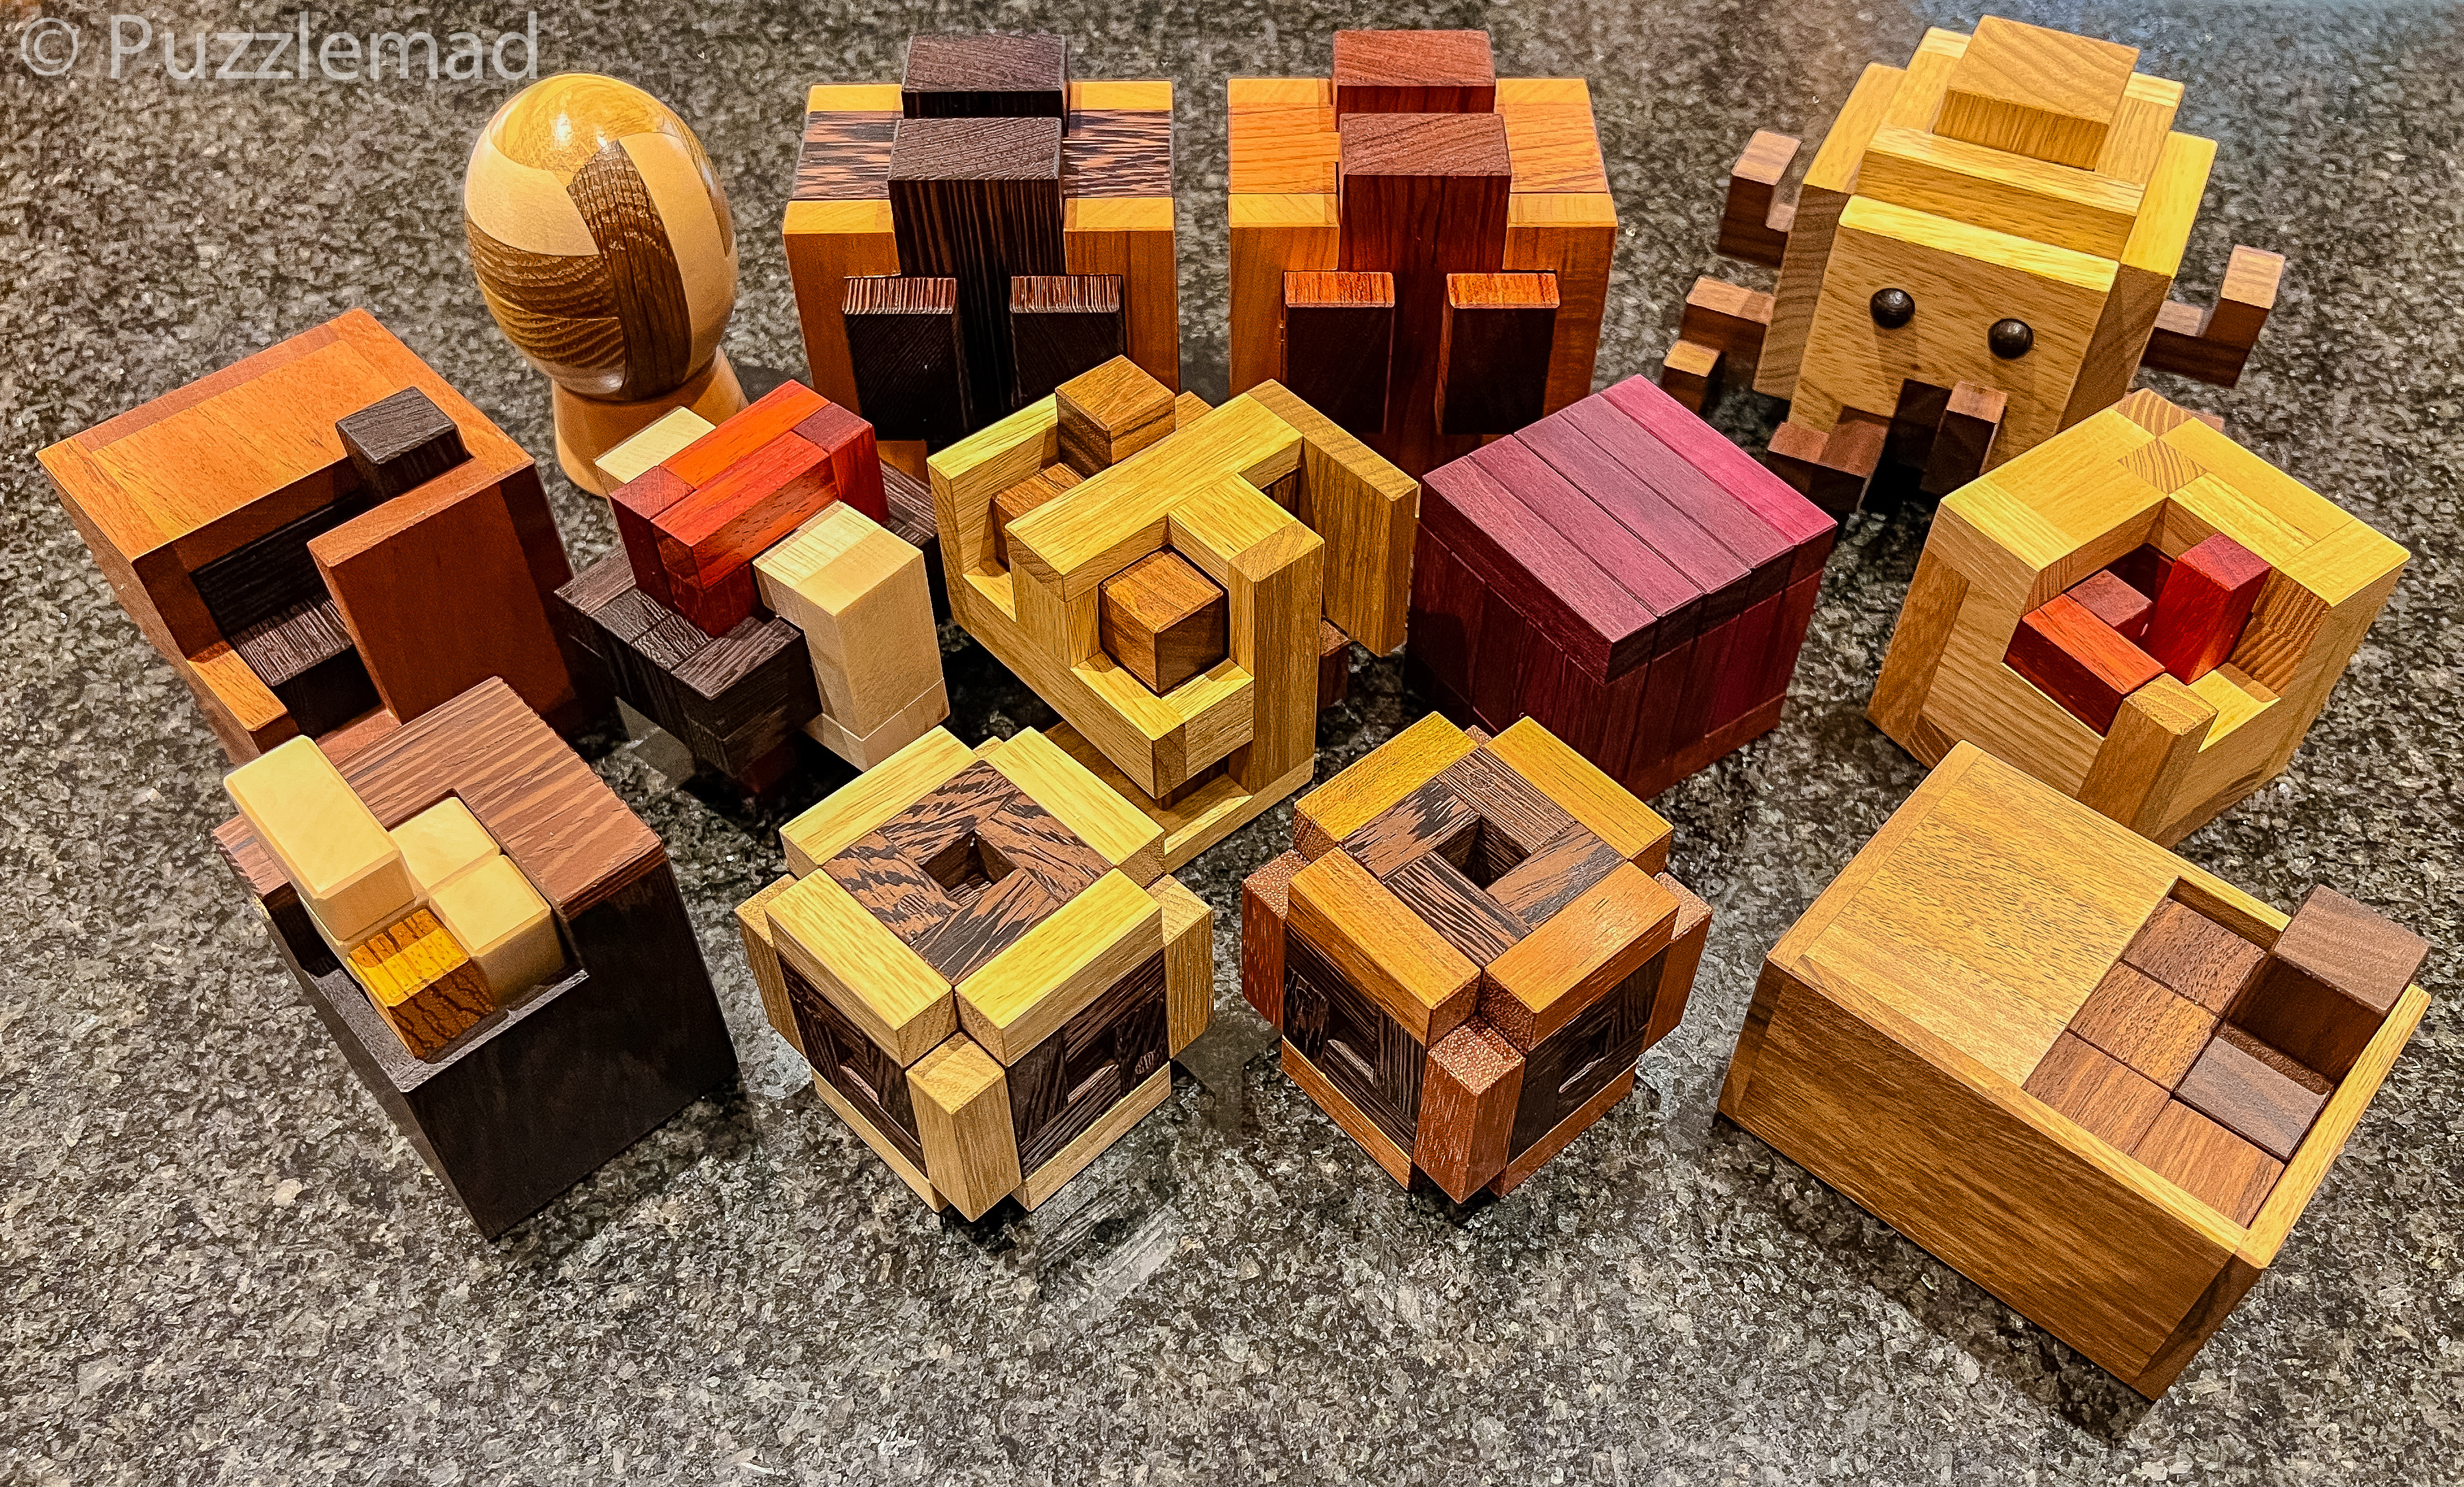
A Bumper Pelikan Crop!

The biggest bunch of Pelicans ever!
From back left:
Egg - Pelikan (mixed woods)
Hooks - Alfons Eyckmans (Wenge & Cherry or Bubinga & Cherry)
Octopus - Pelikan (Limba, American Walnut and Wenge)
Infinite - Alexander Magyarics (Mahogany & Wenge)
Captain Hook - Alexander Magyarics (Maple, Wenge & Padauk)
Tigridia - Alexander Magyarics (Limba & Ovangkol)
Gem - Osanori Yamamoto (Purpleheart)
Den 3 - Osanori Yamamoto (Acacia & Padauk)
Waltz - Osanori Yamamoto (Wenge, Maple and Zebrano)
3 Piece Burr Flower - Osanori Yamamoto (Wenge & Limba or Wenge & Jatoba)
Dick-Flop - Dr Volker Latussek (Walnut & American Walnut)

In no particular order but mostly the order I worked on them or solved them in:

Octopus

Octopus complete with 8 tentacles!
It seems that no new Pelikan release is complete without one of their own designs, beautifully visualised as some kind of animal. We have had Turtle, Snail, Ladybug and Crab so far, all of which reside on display in my living room. The arrival of the Octopus in the PuzzleMad asylum/loony-bin was greeted by me with a whoop of delight and by Mrs S with a groan of "Oh no, not more!!". She did admit that it was very beautiful. 

This was the one I began with because it's just irresistible. It's pretty big at 13.3x13.3x9.8cm and made of Limba, American Walnut and Wenge. The beady eyes just look at you. Like the crab, it is not just a simple slot together Kumiki puzzle. It is a burr with pieces that interlock in all directions. It all fits beautifully together and the first sliding move is easy to find but after that it gets more awkward. I was able to remove the first two pieces quite quickly and realised that I had not really paid attention to the orientation they came out - the shape of them meant that they rolled off the cat who sleepily acted as my tabletop. Having realised I was going to be stuck soon, I just proceeded with the disassembly. Usually after half the pieces of a burr have been removed it suddenly gets easier but not with this one. I really struggled for another 20 minutes to find the way to remove the final pieces. The main challenge with this will be the reassembly after scrambling the pieces. I almost gave up and went to Burrtools but luckily before I lost the last remnant of my mind, I finally found the correct assembly. 

This puzzle is an essential purchase if you collect Kumiki type puzzles or if you have the rest in the series. For the rest of you it's worth getting because it's adorable and very clever.

Egg

Egg by Pelikan
I had to check with Jakub about this one as it looked familiar but I barely remember yesterday, let alone something I saw in 2016. This is a re-release using European woods of the beautifully turned Egg puzzle. It comes complete with its own lovely turned stand. These puzzles from Pelikan are wonderfully tactile things to hold and caress. The egg is NOT coordinate motion like some of the other spherical puzzles made previously. When it comes to disassembly, the puzzle is not particularly difficult - it is just a matter of finding the correct places to put your fingers to hold it and and push/pull in the right directions. It is not immediately obvious where to put your fingers to do it and it is so wonderfully smooth that you get no clue from running your fingers over it. If you have it just right then you are rewarded with a beautiful sliding motion as it smoothly separates. After a few minutes you have four pieces which look nearly identical and which will only fit back together in one way. Re-assembly is just a matter of thinking it through. This is a joy to fiddle with and looks lovely on display.

Dick-Flop

Dick-flop by Dr Volker Latussek
It's just 6 tetracubes from the Soma cube
Here we have another masterpiece from the warped brilliant mind of Dr Volker Latussek! This is what he had to say about it:

"When Dick Fosbury died in March this year, I had no idea that I would find a small series of packaging puzzles and name them FLOP after the high-jump technique named after him. A sports journalist ran the headline "Fosbury Flops Over Bar" after his 1968 Olympic win, comparing the jumping style to a fish flipping onto its back and curling its body after being caught."

DICK-FLOP with its six tetracubes follows FRITZ-FLOP with only five pieces. The boxes are each completely filled and the opening is restricted so that some of the pieces have to flop out of the box.  This is the fourth in his Flop series in which he takes a subset of the standard Soma cube pieces and insists that we stuff them into one of the standard shape challenges that come with the Soma cube. Except.... he makes it much more fun by making us do it into a box through a limited entrance hole. And then, not completely happy with that restriction, he ensures that the entry hole is not a whole number of voxels wide which forces some very interesting and difficult to find rotational moves on the non-planar pieces. It looks like the entrance is 2mm too small to allow two voxels through.


The assembly configuration (Volker always stipulates the assembly shape) is a "near miss" and when you take the pieces out of the box, you get a small hint at the deviousness of that man! Some of the moves just to get the pieces ready for play need them to be perfectly placed before it can happen. The incredible precision of the manufacture by Pelikan is simply stunning - when some of the pieces move and you can almost feel the suction holding them in place as the tolerances are perfect to a tiny fraction of a milimeter.


A quick play with Burrtools told me that there are 78 possible ways to assemble a 2x3x4 cuboid from the pieces provided and I was definitely going to struggle to try them all from memory. I then scrolled through them to find only the ones that have a planar piece arranged vertically along the end (i.e. it can be dropped in last) and after about 15 I stopped counting and decided to peek with squinted eyes at the solution. I just managed to restrict my view to 2 piece positions in the end shape and from here restricted the number of assemblies to be tried down to just 3. I was rather surprised at one of those piece positions that I had peeked at but it really helped me. Even having just 3 assemblies to choose from, actually getting them inside the box was still a massive challenge. It took me about 3 days!

This puzzle is an essential buy for anyone enthused by packing puzzles or the Soma cube. It has been stunningly created by Jakub and team and will be a huge challenge to any puzzler. The Aha! moment is wonderful. 

The Fritz-flop and Soma-flop are still available from the Pelikan website and you should definitely buy the whole set for an amazing challenge!

Captain Hook

Captain Hook by Alexander Magyarics
Captain Hook is a very interesting board burr made from Maple, Wenge & Padauk. The tolerances are absolutely perfect - this puzzle slides so smoothly. It is something quite new from Alexander Magyarics, whom I am beginning to wonder whether there is anything he cannot turn his hand to and master. I know that you are all familiar with his amazing 3D and 2D packing puzzles and he has designed a few burrs with frames or boxes over the years but I am not aware of any board burrs from him. This looks very like a standard 6 piece board burr when viewed assembled but within a few moves it quickly reveals that it is not what it seems. The movements are interesting and in one case a little unexpected with a very nice pathway to be found. No big blind ends to get caught in and after 10 moves the first piece can be removed. After that 2 moves each for the next 2 pieces and the fact that it is a 5 piece board burr is revealed. I don't think I have ever seen one before. I tried to reassemble it immediately after I had taken it apart and, whilst I had memory of the relative positions of the pieces, there was a critical tricky step that I could not achieve straight away. There is a very well hidden essential move to allow the disassembly and reassembly and if you haven't memorised it then it will cause you to think© for a moment. 

Infinite

Infinite by Alexander Magyarics
That left side when viewed straight on looks like an infinity symbol
Here we return to classic Alexander Magyarics and it is really, REALLY, REALLY good! It is a beautiful packing puzzle made with a very chunky Mahogany box and just 3 lovely Wenge pieces to be packed. Just 3 pieces? They aren't even that complex! How hard can it be? Oh boy! This is a TERRIFIC challenge. The entry-ways into the 3x3x3 voxel box are quite restricted and must be completely occluded once packed. In fiddling with the pieces I was able to find quite a few arrangements of the pieces into a 3x3x3 cube but none that I found would fit through the openings. 

Not solved but fun

Retrospectively, I found 59 cubes with the relevant solid areas using Burrtools but this was unknown to me at the time. Usually I start outside the box and find the required shape but there were too many possibilities and I needed to combine the very restricted entry requirements with my assemblies to narrow it down. The fascinating thing for me is that the smallest piece has the most limitation and ultimately is the reason for a very interesting solution. I found 2 "almost there" solutions with single holes visible through the entryway and I got stuck for quite some time at this point. I then went to Burrtools in desperation and found that it was unable to find a solution which means something special. I relaxed my rules and started again - it took me another whole day of play to find the solution with a wonderful Aha! moment. This is one of Alexander's best designs - make sure that you find all the near solutions as well as the correct one.

Hooks

Bubinga & Cherry
Wenge & Cherry
Hooks by Alfons Eyckmans
I am always delighted when a Pelikan release includes something from Alfons Eyckmans. There are two versions of this beauty - one made from Wenge & Cherry and another from Bubinga & Cherry - they are gorgeous! Alfons is the absolute master of interesting burr design. Many people are not keen on burrs and cannot understand why I (or anyone else) love them. I always say that it is like exploring a maze that changes as you work your way through. Often there are hidden pathways that are tough to find and sometimes blind alleys or loops. I do agree that many of the very high level burrs are beyond most human's abilities to follow but this is where Alfons is a master...the designs are always interesting and fun to explore. The Hooks burr is one of my favourite types - a caged 6 piece burr which takes the idea of a standard burr and extends it. The cage is incomplete being formed from 4 "hooks" on a base and looks like it should not make a huge difference. The pieces are 3x2x7 voxels which allows for much more interesting interaction. There are a few moves possible early on and no long blind alleys. Quite quickly some complex fun compound multi-piece moves occur and this opens up even more possibilities. Process seems swift until suddenly it's not. After 11 moves, I was stuck and could find no way to progress. I must have either missed something along the way or be missing something crucial to progress on my existing path. I got stuck here for a few hours going back and forth - at least it was creating a muscle memory to help with the reassembly. With only 6 pieces and such an open frame/cage it is possible to see inside the maze quite well. Eventually after multiple failed attempts I realised that I had left a single piece in the wrong position and it had blocked the next move. Having worked that out, the progression was fast and fun and the first piece was removed after a total of 18 moves. The remaining pieces remain stable in the frame for the rest of the disassembly.

Having spent so long searching for the pathway, I was able to reassemble it without help but making a Burrtools file is always fun. I think that most burr aficionados should be able to reassemble this without help.

3 Piece Burr Flower

Wenge & Jatoba
Wenge & Limba
3 Pice Burr Flower by Osanori Yamamoto
This stunning design by Osanori Yamamoto has been beautifully created by Pelikan in Wenge & Limba or Wenge & Jatoba. As the name states, it looks like a flower on each face of the cube structure but it has been made from 3 rather complex burr sticks which interlink with each other inside the cube. Once you have found the first piece to move, the pieces then slide on each other and the flower opens up to reveal the interior. Over a rather delightful 6 move sequence the pieces get further and further apart until the first one comes out and then the other two can be separated. It is not terribly hard to find that sequence but then the real challenge begins - can you put it back together after scrambling the pieces? There are only 3 pieces and the way they fit together at the end looks straightforward but it took me a good hour to find the correct order and position for the pieces to fit back together. This is a very clever puzzle utilising what feels like a knot inside the faces to control the movements. 

Waltz

Waltz by Osanori Yamamoto
Another fabulous design by Osanori Yamamoto, stunningly visualised in Wenge, Maple and Zebrano. This one is almost as if Osanori-san has seen the wonderful 3 piece challenge by Alexander Magyarics and said to himself: "I can beat that"! It is another packing puzzle with a limited entrance and a requirement to block the entry once solved....but this time, just to make it even more interesting, there are only 2 pieces to be packed in the 3x3x3 cavity and filled the 2x2 entrance. Not only are there only 2 pieces but it quickly becomes apparent that one of them HAS to be the entry blocker. I was rather over-confident with this one and thought it would  be relatively easy. Oh no! it wasn't easy for me! I spent a day failing completely and did wonder whether I was going about it wrong - I looked at the name and thought about the cardinal feature of the Waltz and then decided to explore rotational moves. I was successful and managed to assemble the puzzle with the entry filled but something didn't feel right. This was especially true when I found that I couldn't take it apart! Aargh! In a bit of a panic, with a fair bit of dexterity and swearing, I was able to unravel what I had done and decided to try again the more conventional way. But this time I was determined to think© about the name as well but not be so stupid. The cardinal feature of a Waltz is rotation with minimal rise and fall. The 18 moves to achieve the assembly are a masterpiece. The gauntlet has been thrown down and is there anyone who can design something more simple with more beautiful moves than this? Over to you Alexander-san!

Gem

Gem by Osanori Yamamoto
This gorgeous gem of a puzzle by Osanori Yamamoto  is simply stunning made here from Purpleheart. I have previously bought and solved this in April where it was an extra puzzle that I chose to "make up the postage" from Japan! Osanori's version was a gorgeous creation and Pelikan have lived up to the same very high standards. When I bought the original, Osanori-san told me how pleased he was because it was his favourite puzzle.


The original was sent out as an assembly puzzle but this one arrived already assembled. Either way, it is a fun puzzle to explore. If you are good at assembly then it might be a good idea to get someone to dismantle it for you before you play. It consists of 3 rings of wood that are interlocked and  inserted into slots in the cube with one at 90º to the other 2. When disassembling it the sequence it is fun that you cannot see the shape or how the rings are interacting inside the cube. The sliding of the pieces over each other shows off the extreme precision that this has been made with. Having taken it apart, leave the pieces scrambled for a while and then try it as an assembly puzzle

The solution took me only about half an hour but again a lovely aha! moment made better by the silky smoothness of the pieces and how they glide over each other. I could see why this was one of Osanori-san's favourite puzzles. It is delightful. Another piece of Japanese puzzling heaven.

Den 3

Den 3 by Osanori Yamamoto

In this packing puzzle designed by Osanori Yamamoto the aim, as usual is to assemble the pieces (3 of them this time, made from Padauk) into the nice chunky Acacia box. I must point out the incredible detail that Jakub and team have put into the box - Acacia is a relatively plain wood in terms of colour but with having very nice grain and shading. To make this one even more spectacular the top and bottom faces have been assembled with a diagonal line of differently placed cubes of wood - this makes this wonderful puzzle even more precious for a man addicted to gorgeous wood! The cavity of the box is the usual 3x3x3 cube but, with this one, the areas that must be occluded by the pieces are quite extensive over quite a lot of the puzzle which should limit the number of possibilities to go through. I used Burrtools to count the possible assemblies after I solved it and there are 124 ways to assemble a cube from the 3 pieces of this puzzle but when restricting the positions to allow the occlusion of the holes, this number shrinks down to a more reasonable 22. This number is still too high for me to go through and try them all (I find that I can't remember what I have tried after just 3 or 4 attempts) and necessitates using the restricted entry to significantly decrease the cubes to be tried. 

The solution of this took me an embarrassingly long time to find. I think I played with this on and off for 4 or 5 evenings before I found a cube that met all my criteria and then really struggled to place the pieces inside the box. I ended up solving it outside the box starting from cube shape and attempting all the moves that should be possible and gradually dismantled the cube. It should not be that difficult with just 3 pieces but I kept getting stuck 10 or 12 moves in. The disassembly of this puzzle has an incredible level 26 (19.4.3) - if you do manage to solve this then you can be very chuffed at your puzzling prowess. 

Tigridia

Tigridia by Alexander Magyarics
The final puzzle I played with in this new batch was Tigridia by the amazing Alexander Magyarics (last, mostly because my initial play revealed it to be a very difficult challenge). Beautifully made from Limba & Ovangkol, it consists of 4 pieces to be placed as a 3x3x3 cube inside one of the most complex boxes I have seen in one of these puzzles. The entryways are very limited but there are 3 of them to be used. There are lots and lots of holes in the box which need to be covered by the final filling. Your usual approach outside the box quickly reveals that there are a LOT of possible cubic assemblies (Burrtools later told me that there were 64) and obviously each one that you find will need to be tested in every possible orientation. I very quickly got quite confused and lost track of what I had been trying. Most of my potential assemblies, when I found one that also fit the brief to cover the holes, quickly revealed themselves to be impossible to move inside the box and could be discounted. After a couple of days trying and a deadline to hit, I went to Burrtools to at least give me the correct cubic assembly and then I could work out the method to place it inside the box. Even this proved to be a problem! I had the correct cube made but I really could not work out how it could be inserted inside the box, After a very frustrating and then satisfying hour, I found the critical move and it was something rather special that is only possible with a box with this many holes in it. The Aha! moment is wonderful when you find it but that might well take you a VERY long time.

I am rather humbled by the fact that Ivan Danik (the Puzzle Guy on YouTube) managed to solve this one and did not find it terribly difficult! I found this one amazingly hard. I agree with him that the frame is stunning!


Pick what you love guys and get them all tomorrow (6th November at 10am central European time) at the Pelikan store


Wednesday, 1 November 2023

A Kickstarter Opportunity

Honeycomb by Oskar van Deventer
I received an advance copy of the Honeycomb puzzle designed by the great Oskar a month or so ago and the Kickstarter for it just went live today. The cells of the honeycomb are threaded and can be removed one at a time (at least up until several have been removed). Scramble the pieces and see whether you can reassemble it in place. Obviously, if you have taken a picture then that would be a big help but try not to do that.

The kickstarter is at:
https://www.kickstarter.com/projects/puzzlemaster/the-honeycomb-metal-puzzle-brain-teaser-from-puzzle-master

It is beautifully packaged like all the Puzzlemaster own brand metal puzzles and will make a nice addition to any collection.

Nice box
beautifully made


Sunday, 29 October 2023

Triforce From Hanayama

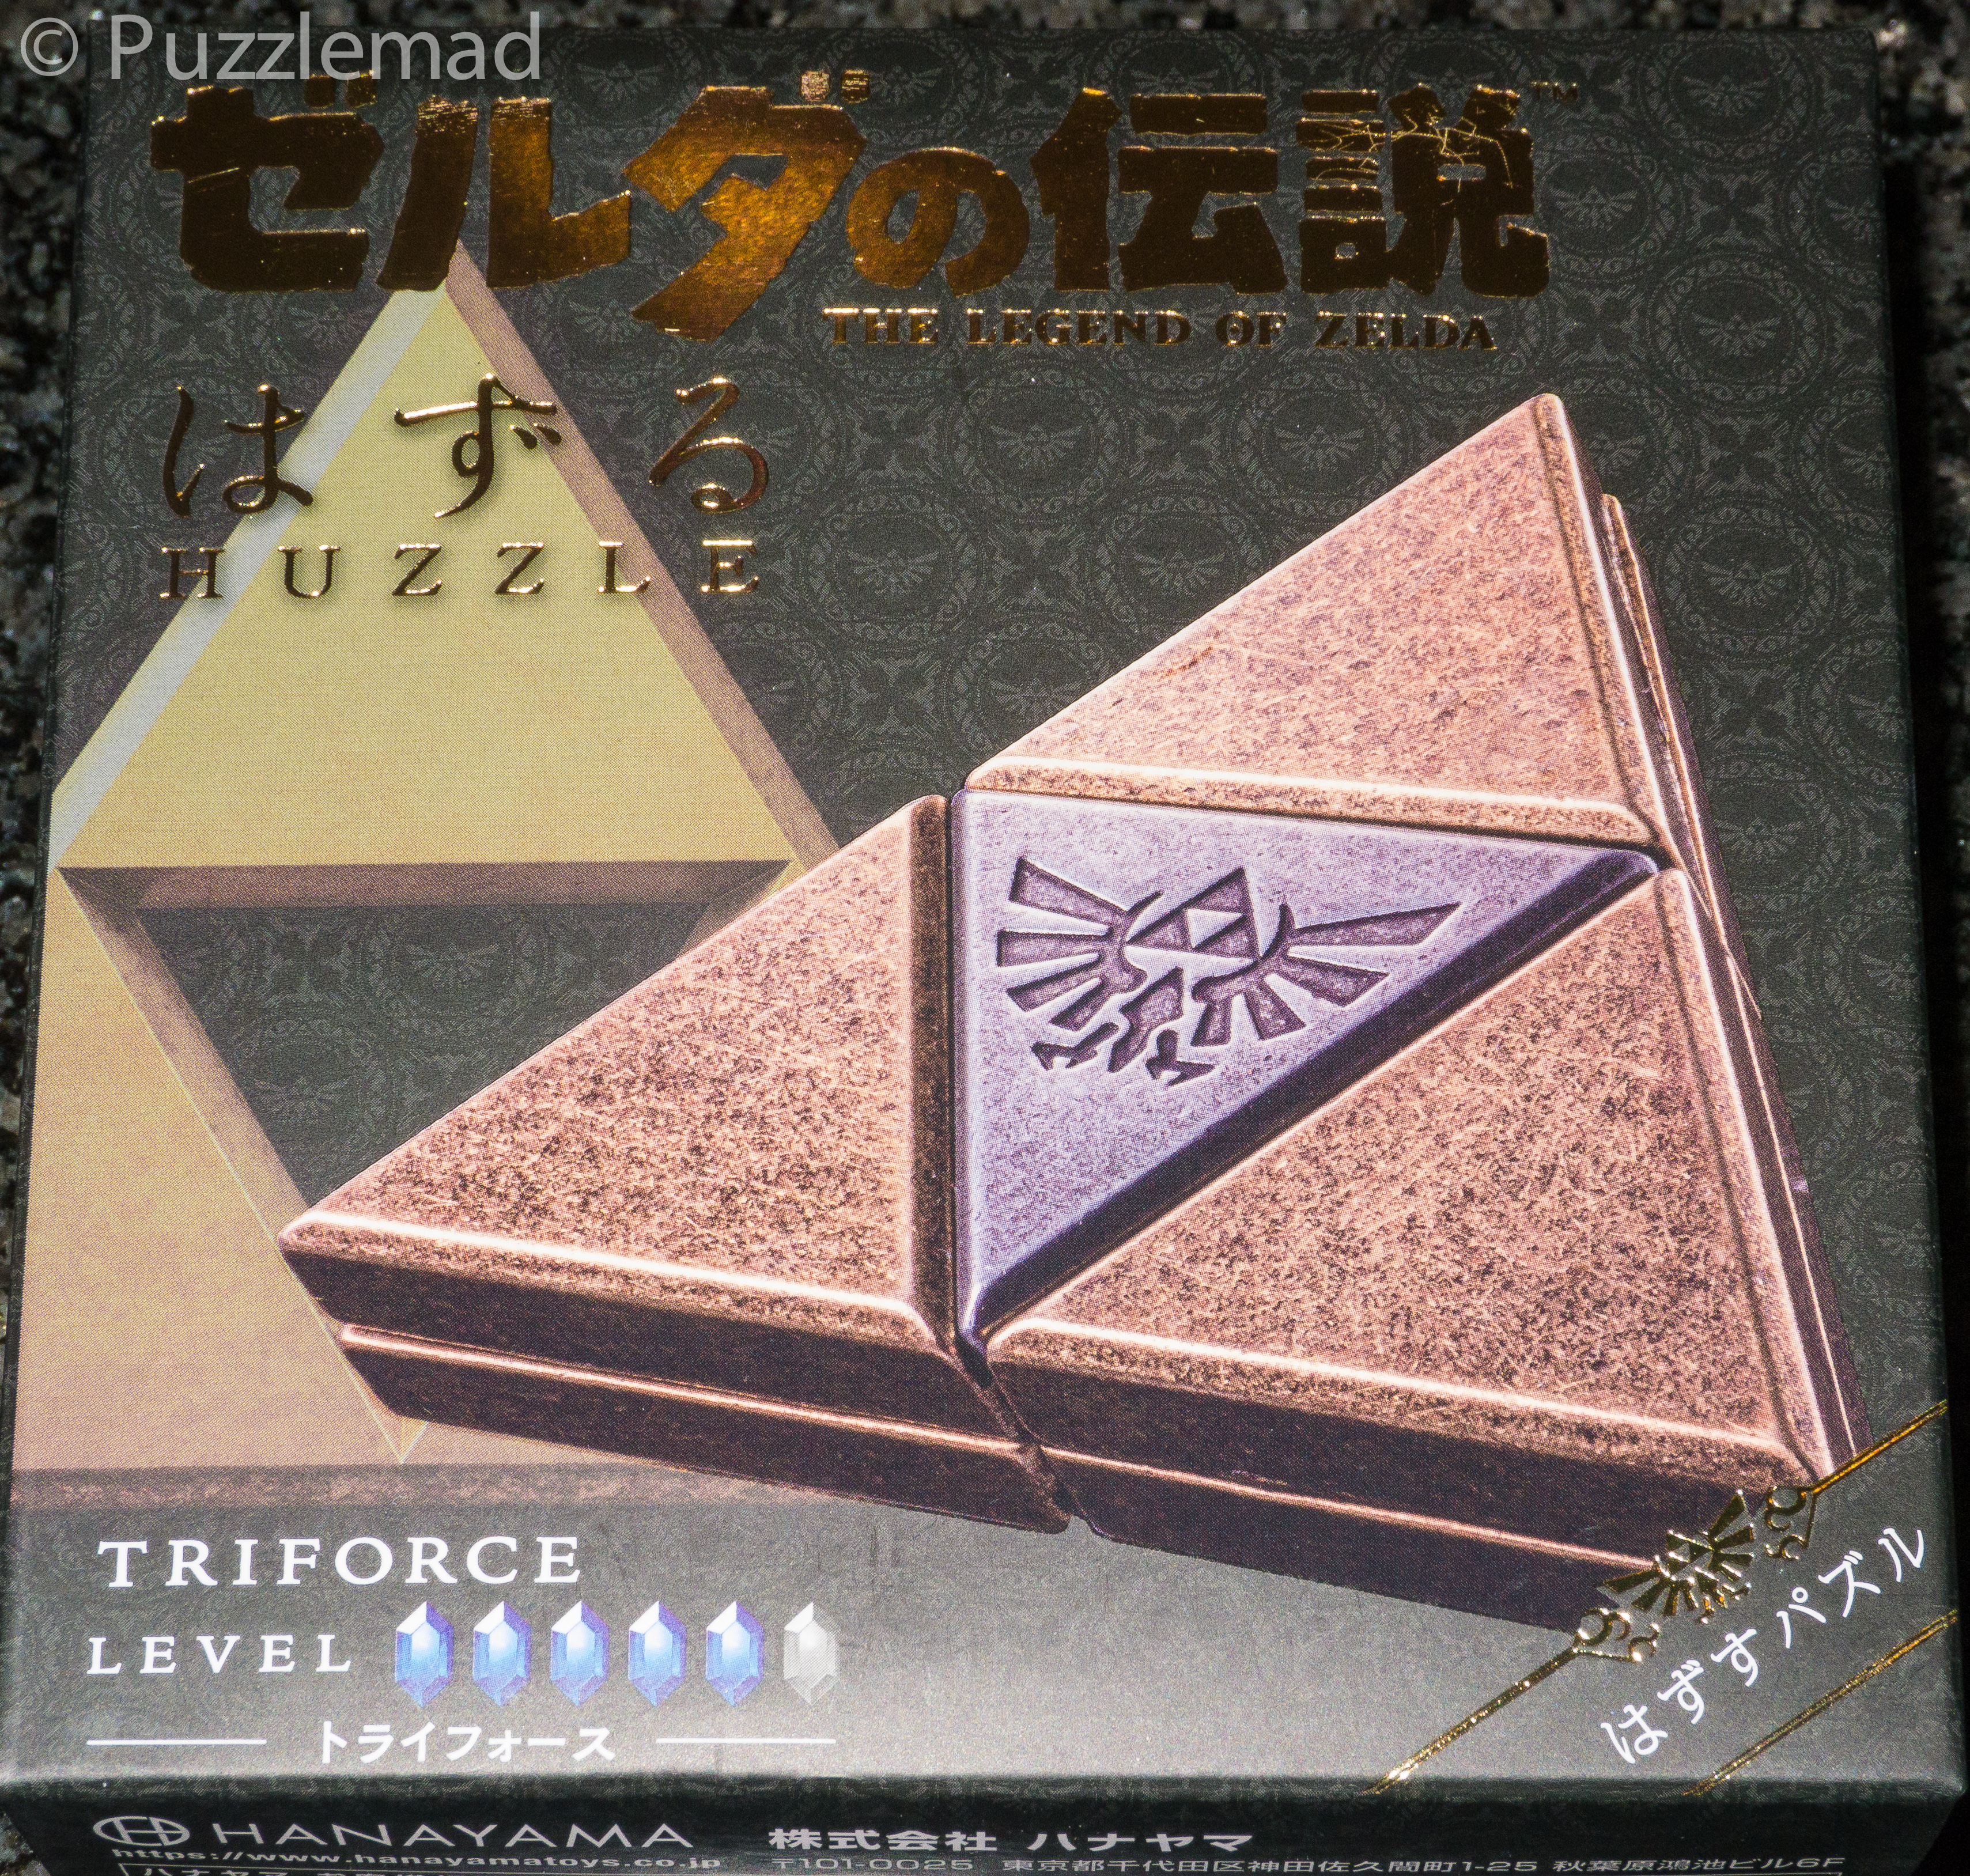
Hanayama Triforce
Just a very quick review today. At the last MPP, I got the opportunity to buy (thanks Steve) all three of the latest Hanayama Legend of Zelda related puzzles (Triforce, Hyrule Crest and Master Sword). They do seem to have increased in price considerably compared to the other Hanayama cast puzzles, presumably there is a premium that the Hanayama company are having to pay to Nintendo for the rights to use those names and the imagery that goes with it. Whether the extra cost is worth it to you will be something that you have to decide but, let's face it, most of us are completely addicted and cannot really resist a new one and, in the grand scheme of our puzzling habit, these are really relatively cheap. 


The Triforce has been rated with a difficulty level of 5 out of 6 by Hanayama and, by PuzzleMaster, as 9 (gruelling) on their odd scale of 5 to 10. I must say that I completely disagree with these ratings. I would place it as a 2 out of 6 or 6 out of 10 (PM).

The puzzle is quite attractive made from 2 colours of matt metal (brass and pewter colour) and looks like it has been aged. The puzzle is a diminutive 6.2 x 5.3 x 1.2cm and feels well made. The Zelda Royal Hyrule Crest insignia is on the front of the centre piece.

Obviously, the aim is to separate all four pieces and then put it back together again.

Initially, when playing there is absolutely no movement at all apart from a very slight wiggling of the pieces which might give you a hint of what is supposed to happen. At this point nothing else is possible. With a little "manipulation" there suddenly is more possible and then you seem to be almost there. Almost...but not quite. There has been a good amount of sliding as the description mentions but the pieces are still locked together. Thinking© further along the lines of what was the initial move will quickly have you separate the pieces. The picture of the pieces doesn't really spoil it but I have hidden it behind a button.


Having scrambled the pieces for a while then reassembly takes a little thought to work out what orientation and position everything should be but not a huge amount. I did find for a few days that it made a rather pleasant worry bead to fiddle with. This one will not give any seasoned puzzler much of a challenge (do please ignore the difficulty rating) but it is another one for a collection and is a nice one for newbies. The Zelda theme may attract a bunch of non-puzzlers to try it and maybe they will be hooked in our hobby too.


Sunday, 22 October 2023

A Cube Without Edges

Solves With ONLY The Edge Piece Series!

The Crazy 2x2x2 trio
They all look identical but the numbers on the face describe different turning
I have had a bit of a splurge on some twisty puzzles recently and have been exploring them this last week or two with some success (to my great surprise). Here I discuss the Crazy 2x2x2 (0,0,0 version) and how it looks ferocious but solves with the simplest technique and a lot of thought.

I pretty much always have a standard 3x3 and 4x4 Rubik cube in my bag at all times. Partly because people finding out about me for the first time always ask whether I can solve a cube and then I have to show them when they don't believe it. I also have it to make sure that I don't forget my basic techniques and it does make a wonderful fidget toy.

One thing that a lot of non-puzzlers seem to think is that "there is a single magic algorithm that you can do over and over again" and the cube will miraculously get solved. I have to disabuse them of this idea but always tell them that it is possible to solve the entire thing using just one simple technique but it requires a lot of thought and planning. If I am to solve a cube quickly (ish - I have no interest in learning dozens of algorithms to discern and move quickly) then I solve layer by layer with a very basic system for the top layer which is obviously the hardest. Doing it this way, I average about a minute and I'm happy with that. Alternative techniques include the Rubik ultimate solution described by Philip Marshall and evangelised really well by Rline with his Twistypuzzling YouTube channel in which one solves all the edges first and then the corners. This technique relies on two simple algorithms - the 4 move edge piece series (EPS) and the 8 move corner piece series (CPS). It requires a bit of thought and understanding but is the simplest way to do it. I also use a block building solution, a corners first solution and for fun I do it using the EPS only.

YES! You can solve the Rubik cube with a single algorithm of just 4 moves!

Scrambled 

I was quite surprised when I started to investigate this puzzle which, as a 2x2, has no edges and I realised that it does have edges in a way and that it absolutely requires to be solved using JUST the EPS!

The 0,0,0 designation means that 3 of the 6 faces are 0 faces i.e. turning those faces leaves the centre circles unturned (the red, green & white), whereas the other 3 have 1 faces and the circles are fixed to the outer parts. The result of this is that the blue/orange/yellow corner never separates from its' circle and you can only really scramble it or solve it by turning the 3 zero faces.

Does this sound confusing? It is a bit of a mind-bender but is not that tough if you have mastered the EPS completely.

 So what is the EPS? It is a simple 4 moves (up, up, down, down) or the other way around. If done just once then it does what it says on the tin - it swaps three edges amongst the front edge and the UR and UL edges. It muddles up the corners but in Marshall's method we don't care about the corners yet. That does seem very simple but the fun this happens when you do it more than once. On a solved cube if you do the EPS three times (D, D, U, U) then it leaves all the edges alone and moves the corners:


Having done the EPS 3 times, the top 2 diagonally opposite corners have swapped and the two from corners have swapped up and down. 

This can be used to move corners where you want them to be using just a 4 move sequence and some setup moves - it's ingenious and devious!


This all sounds great - you can move edges around easily (and orient them) with the 4 move sequence, you can move corners around using the same sequence multiple times but what about orienting those corners? Yes, you guessed it, that same sequence can be used to rotate the corners without moving them. It is destructive when done once but if done 3 times or done in the opposite direction immediately afterwards then the destruction is undone:

EPSx2 starting L - destructive
Turn U face anticlockwise
EPSx2 starting R - undoes it
So now you can see how it can be possible to solve every part of a Rubik cube using just that 4 move algorithm. It's not easy the first time that you do it but it is fun. How can this be applied to the crazy 2x2x2?

During my initial look at the crazy 2x2 I realised that the blue orange yellow corner was the source of the craziness - it was fixed to the central circle and I effectively could not turn the blue, orange or yellow faces since doing so would move that fixed corner around and would prevent any useful moves on new faces. I needed to orient the puzzle with that corner bottom? back and then solve it moving just the 2 front and the top faces. This is an odd way to look at a cube - I had to stop thinking of it as having a front, left and right face as I normally do. 

Having scrambled the crazy 2x2 it became clear that the circle centres are effectively edges. The white and yellow opposite colours are attached to each other. If I rotate the white face then the white circle pieces don't move. If I turn the red face then it moves the white and yellow circle pieces attached to that side but moves them together, the same is true when turning the green face. Therefore the circle pieces in a pair are effectively and edge but marked by the colours of the face at either end. It takes a while to get your head around this but once you do then start solving edges first:

Pseudo-edges all solved
Opposite sides (corner block visible)
Interestingly, it is possible to get the same sort of parities with this one. The first happens to me almost 50% of the time:
2 pseudo-edges to be swapped
This is a "parity of false equivocation". Each of the faces' edges have the same two colours on them for each side (i.e. there are 4 white/yellow edges and the same for each colour pair) it is possible to place them in any of 4 positions on each face and all that is required is to take one from a top edge and place it in the other top position. It is, again, just a matter of the simple EPS.

Once the circles (edges) are solved then the aim is to solve the rest of the puzzle by turning only those front three faces. It sounds awful but it really isn't too hard. Using the EPS only in multiples of three the corners can be moved around into position until they are all in place.

Again, every other solve there seems to be a parity - I am left with 2 corners that need to be swapped. If you know the Rubik cube then you know that swapping 2 pieces is impossible - there is ALWAYS another piece or pair of pieces that need to be swapped...even if you cannot see it. In this case, the parity is caused by the edges first solution to the cube. If you try to solve edges first on a 3x3 then it frequently turns out that all the edges are in place apart from 2. The reason for this is that when solving edges first, it is possible to have the top face turned 90º without realising it and the solution is to turn it that 90º and then re-solve those edges. It is very easy and the end result is all the circles (edges) solved.
Equivalent 2 top edges swapped
All edges solved
In the crazy 2x2 it is impossible to discern this scenario until we find 2 corners alone needing to swap. Unfortunately, the solution is to go back and resolve those edges/top circles again with the top face rotated 90º in either direction. Having done that, the next time that the corner positioning is done, all the corners will be placed correctly.

Corners ready for orientation
In the beginners method we would use the down face but cannot turn that here. We need to orient those corners using just movements of those 3 faces. Easy peasy! Remember what happens when the EPS is done twice? It rotates a corner and destroys a bunch of stuff. Turn the top face until the next corner is at the front and do the EPSx2 the opposite way and it undoes that destruction (see the pictures at the top of the post).

If the rotated corners are on the bottom face then rotate the cube about that fixed corner until the required corners are on the top face and do it all again. This is continued until all the corners are done.

Solved it! Effectively, you have solved a 3x3 with hidden edges and used just the EPS. It is great fun and a lovely, not too tough, challenge. I urge you all to go back to your standard 3x3 and learn the EPS only solution. It is not hard and just needs some thought and planning.


Sunday, 15 October 2023

Did I Pack My Dowels Properly?

Karakuri Packing by Yasuhiro Hashimoto
During my week off a couple of weeks ago, I was "forced" to construct and mount a bunch of new Billy bookcases with doors in my second puzzle room. Whilst this is a wonderful thing and I WILL be forever grateful to the present wife for allowing/forcing this on me. But...it did mean that the week of leave was filled with DIY and chores and gardening (plus a little private practice which helps me pay for my rather expensive addiction) and I did not get to do much puzzling and did not manage to generate a nice cushion of solved toys to write about.

Watching this is like watching paint dry!
The first day back at work did give me a little time (actually quite a lot of time) to try and get something in the bag for the blog. That day was a vascular list to be done down in the bowels of the hospital (no sunlight, cold and with no prospect of a break or early release. The case was a very elderly frail lady with a rather large aortic aneurysm to be repaired endovascularly using a rather complex multi-branched fenestrated graft. Now, I know that you don't really want to know about that but it helps explain the very depths of my boredom. I am a bit of an excitement freak - I like big juicy and bloody operations that require me to concentrate and keep resuscitating as well as anaesthetising. I do a lot of large open vascular operations, big spinal operations (including scoliosis repair) and lots of revision arthroplasty which tends to prevent not only boredom but also puzzling. That fateful Monday, I discovered (again) that absolutely NOTHING interesting happens during a FEVAR! Nothing happened of any interest to me (apart from intermittent requests to stop the patient breathing for a minute at a time) for over 7½ hours. When you do your very first one it is moderately interesting but now after a decade of doing them, I have lost the ability to watch them moving a wire back and forth on an Xray screen for hours at a time. I only have a tiny mind according to "she who frightens the bejeezus out of everyone" and that tiny mind had left the building about 4 hours in. It was puzzling time!

In my bag there are always toys just in case. Sometimes it is to torture colleagues , sometimes to torture med students whilst I do a chore that can't involve them and I'm always hopeful that I might get a little time to play myself. The Karakuri packing puzzle from Yasuhiro-san had been waiting my attention for months. Allard had absolutely loved it and others I had met at the MPP had also said that it was fabulous. That Monday was my time and the pressure was on - I had to solve it before I lost my mind completely and also because the delightful Libby was watching me as I worked on it and asking rather pertinent questions. I couldn't allow myself to fail under Libby's gaze!

The Karakuri packing puzzle had won a Jury Honourable Mention award at the 2023 IPP design competition and I really had to see why. It has been created for us by Mine from some rather beautiful woods and consists of 5 oddly shaped pieces (one of which has a dowel sticking out) and two 2 voxel dowels. The box has a 3x3x3 cavity which is partially sealed by a 1 voxel lip and the pieces have 26 voxels plus the captive dowel would make 27. There are enough dowel shaped holes drilled into the pieces which would allow the 2 dowels to be included inside and also a hole for the captive one. Part of me did wonder whether the captive dowel was just supposed to protrude into the missing voxel but this would not be elegant and I very quickly abandoned that idea. Neither Mine-san nor Yasuhiro-san would make/design anything inelegant.

As I explained to Libby, the first thing to do is work out how to make the cube shape that might fit inside and then see whether the dowels would fit and finally assemble it in the box - easy peasy she said! I proceeded to make multiple attempts in front of her and she quickly realised that this was a proper challenge. I pointed out that having found a few cubic assemblies, it was possible to discount some because they required one of the pieces to be oriented in a position which was physically impossible to insert into the box. I quickly narrowed it down to a couple of possibilities and had to stop someone breathing a few times which gave me a breather to think about it (pun intended).

When I got back to the puzzle and the patient could breathe again, I made a rather special discovery...there was always one particular piece that would not fit in the box. Or, if I did fit it in early then it blocked the rest. Time to think©. I knew there was a rather special Aha! moment to this puzzle that separated it from the standard packing puzzle. I always seemed to get stuck on one particular piece which made me wonder about special techniques and, in front of Libby, I got struck by the Aha! moment and did something. The pieces all slid into place and both me and Libby had our wonderful jaw-dropping moment. Of course, she managed to look attractive doing it whilst I just sat there looking stupid with a big grin on my face. This is very very clever. I think it took me about 30 minutes including several breath-holding phases which is just about right. I think it is probably not very suitable for a newbie or non-puzzler but is an essential purchase for everyone else. The assembled puzzle is behind a spoiler button even though there is almost nothing really there to provide any info. Don't look if you are worried.


If you get a chance to play then go for it.

In the meantime, I was forced to start clearing my desk which I had not seen in months

This was from months ago and it had gotten worse
Finally after multiple moves up and down stairs, I could see where the desk had once been:

Hooray! Nearly there - soon my ears will stop bleeding.
I did find a puzzle stand without a puzzle:

I had no idea what this belonged to
The helpful guys on FB chipped in to tell me that it was from Juno's SDCB but Shane, being even more helpful said that it was to display a VERY special "Rubic cube" - please note that was his spelling and, if you know Shane, then that's pretty good for him! So I found a bunch of VERY special Rubic cubes to show the stand off properly:

The one in the stand is one of just 3 Hexaminx crystals ever produced, to the left is a Master Rex cube and the right is a Master curvy copter (both very rare and special). Behind it is Kevin’s burr designed and made for me by Jose Diaz (later produced in greater numbers by the late Eric Fuller).

My new cabinets now have a few lovely cubes inside:


Sunday, 8 October 2023

It Would Be Nice To Have Enough Hands For This Burr

Handy Burr by Jerry McFarland
Jerry McFarland has an attention span problem! He makes fantastic puzzles which are always immediately recognisable - I am sure that all serious puzzlers could look at the photo above and know the creator without reading the caption. He gets inundated with requests to make his toys by the puzzling community and happily starts manufacturing puzzles and earning some money and then he quickly gets bored and distracted. Before he knows it, he's thinking about something new and abandons his order book to play with his beautiful wood and, if you've been following his creations from the last few years, his very strong magnets. 

He contacted me a few weeks ago to ask whether I would be interested in looking at his latest creation - the Handy Burr and I practically bit his keyboard off and sent him a bunch of PayPal. The puzzle winged its way across the Atlantic faster than I've ever seen and I got my grubby hands (due to DIY) on it in just 4 days! I did not get much chance to do more than fiddle and admire for the first few days because of said DIY but I could tell straight away that the magnetism was strong in this one.

It is a beautiful cuboid containing 23 pieces of wood and an unbelievable 32 magnets (16 of which are in the key piece - Jerry says this must be a record). There are 2 obvious pins in the puzzle too with some obvious tracks for the pins visible in the key piece. The wood choices are stunning - Mahogany, Bubinga, Walnut, Cherry, Maple and Bloodwood.

Jerry had been initially working on a 3D coordinate motion puzzle but this did not work out so he moved on to a springy puzzle with magnets and this is definitely that.

I started work after I had finally finished constructing my cabinets (still empty) and found that there are 6 pieces that can be pushed in varying directions and need quite a bit of pressure to push them - those magnets are STRONG! If you loosen your grip even momentarily then it all springs straight back into the original shape. Having played with quite a few of Jerry's creations over the years, I sort of had an inkling what to do and managed with 6 fingers plus holding on to various other bits of the puzzle for stability and suddenly the key piece sprung upwards. Progress!


It only sprung up one voxel and the magnetic pieces stabilised. I was then able to work on manipulating the pieces and getting the key piece extended further and further until it stopped dead. Time to explore and find the release mechanism. Here I got stuck for a while and in the end I reset the puzzle by pushing it all back to the bottom and manipulating the magnetic sticks as I went. The final push of the key piece flush with the top releases the magnetic pieces all together and there is a truly wonderful CLACK! as it all reset.

I got stuck here for rather a long time - back and forth to the almost released position and stopped dead in my tracks each time. I couldn't seem to find the correct path - Jerry had hidden it all just out of sight inside. Despite doing this dozens of times, I never tired of the wonderful noise of the reset (this is a feature of a few of his magnetic puzzles).

After a whole day of trying the same thing multiple times, it was time to think© which did hurt quite a bit. I know that Jerry is quite sneaky and I got wondering in the evening whilst watching TV. What if I??


I tried my new idea and found that I needed more than 2 hands - Jerry had sent me a couple of little envelopes with clues in it and afterward I had finally saved it, I opened the envelopes and had a proper laugh out loud moment. I had looked at she who must be feared during the evening whilst wishing I had more hands/fingers/useful body parts. Each time I thought of asking her, I decided that was probably not a good idea. 

😱😱😱

Eventually after I dislocated a digit moving it into an appropriate place, I suddenly had the key piece free and I could see how well disguised the path had been.

Key piece removed (JM mark revealed with serial number on other side
The cat was not impressed with me dropping more wood on his head but he puts up with it. I put it back together immediately and then found that I could not repeat the process - that will teach me to watch TV at the same time as playing with something complex.

The following day, I managed to work it out again and was delighted with how it resisted solution but when you do the right thing it shoots out. I couldn't resist a full disassembly:

Awesome puzzle!
After taking the above picture I did scramble all the pieces and then attempted the reassembly - Jerry very helpfully writes the frame piece portions on them to ensure that the fit is good when reassembled and then I got a bit stuck on the assembly of the mechanism and had to create it outside the frame before attempting the final assembly - picture of mechanism is hidden behind a spoiler button:


This is a very satisfying solve and after reading the supplied solution sheet, I realised that there is another aspect to it that I had not seen. I tried the suggested approach by Jerry and this was even better and adds more understanding to the name. Jerry will be making a few more of these in the future and it will be worth while contacting him to ask to reserve one.


Sunday, 1 October 2023

An Edgy Puzzle - But Still Intuitive

Son-Mum 4x4 cube (v1)
The Son-mum 3x3 cube was released back in 2018 and I loved it for the challenging thought processes it required and the nice parity that I had to think through. It was even mentioned in my puzzles of the year as one of the best challenges.  Then a few years later, those evil twisted men and women at MF8 decided to create a new "harder bigger" version and the 4x4 version was released. I bought it at the end of 2021 and had a little fiddle and shied away from it as impossibly difficult and likely to end in tears for me and laughter for Mrs S. I kept looking at it lying on my desk where it taunted me for nearly 2 years and upset Mrs S because she couldn't stand the mess that my desk was in but I could not bring myself to pick it up. I spent a bit of time on holiday in Scotland 2 weeks ago and having limited space to pack puzzles for the journey, I brought a couple of twisties with me as likely to keep me busy for a while. When I finally got around to pick them up, I actually realised that I had not solved any twisties at all for a very long time and was a bit rusty. I needed to play with this as a 3x3 and a 4x4 a few times to remind myself of the very basic techniques (you really should all try to learn how to think about the basics - it really is NOT difficult to solve basic cubes once you have an understanding about the simple edge piece series and corner piece series and how they can be used - I have discussed them previously with multiple other puzzles and Rline has a wonderful set of video tutorials here.

So what is special about this puzzle? First off, you can quickly see that the centres are formed from 16 pieces instead of the usual 4 and it looks impossible to separate many of them. Here is where the fun starts - of course you can do a standard 4x4 scramble but then it is possible to do a 45º turn of the middle layers and then continue to turn the faces - this not only splits up the centre pieces but it also allows the edges to be swapped with centres and the outer edges to be tilted. Here is the puzzle after just 3 turns with a 45º turn done:

This is why I kept picking it up and putting it down
Interestingly, there appear to have been no English language solution videos posted on YouTube which may have given an indication of the extreme difficulty of the puzzle - at least that was my thought process. 

As usual with any new twisty puzzle, I experiment with the edge piece series and the corner piece series to see what they will do when you add in the fancy moves that each new puzzle allows. Interestingly, the corner piece series was absolutely no use to me whatsoever! It either did nothing and the puzzle just remained solved at the end of the simple sequence or there was no real pattern to what it did (in fact one attempt was blocked by the bandaging caused by the 45º turn). Then, as usual, sob, I lost track of what I had been doing and ended up with a partially scrambled puzzle that I could not back out of. Damn! Oh well, I had better get on with it...

OMG! That was probably not a good idea!
This thing would now barely move - so many of the turns were now blocked by either a twisted edge piece lying across a face (see the red/blue edge above) or by a pair of tilted centre pieces lying across a face (see the green centre piece at the top right). What the hell do I do now? There were no instructions anywhere so I guessed that I had better figure it out. First step, get it back to cube shape - so blocked up that no algorithms are possible so just use intuition. To my huge surprise, it was just intuition to achieve this up to a certain point. Once a few pieces had been aligned either properly in a centre or on an edge then more faces would turn and it was time to try and put the edges where they should be. Here we just have to use the edge piece series aka "up-up-down-down". Yes, it's just a 4 move sequence - it cycles 3 edges around. I realised that if you can do a 45º turn to put an errant edge pair back and then cycle a centre pair out then gaps start to be filled:

Errant edge pair in a centre
Edge pair turned 45º onto an edge
Edge pair now front left & centres in place
If the centre stripe is turned back that 45º then then one edge part and centre set are in place. This will need to be done repeatedly and where there are single edge pieces out of place they will need to be turned and moved until they can be lined up in a pair and then rotated into an edge using the edge piece series. It is surprisingly fun and apart from the frustration of the bandaging forcing a bunch of preparatory moves to clear the way, it doesn't take long to get a near cube:

Sort of cube shaped
Here is where I have really struggled. I have edges and centres where they are supposed to be but a bunch of the centres are tilted. I have not managed to find an algorithm to easily flatten them and had to make something up. If there are 8 or 16 of them tilted then that makes either 4 whole faces or 4 half faces on a layer out of kilter and all that is needed would be to turn the slice 45º, use the edge piece series to place an edge in it and then turn another 45º to place the centre that came out into the next position along. If you do this 8 times then you have broken and recreated every edge and centre in a slice. Sounds awful but is, again, entirely intuitive. What I have not worked out how to do with ease is what to do when there is not a multiple of 8 tilted edges. I can fiddle with my 45º turns and break up the flattened centres and with some thought I can make it so that a multiple of 8 are left tilted (I either add some or fix some). It works but I don't really know a definite sequence. Either way, it is, yet again, mostly done by intuition. Once the centres are flattened it looks less horrific:

Nice and flat
Now it's time to recreate the 2x2 centre pieces
To most puzzlers who don't do twisties, it still looks awful but from now on, it is actually really simple and fun. All that is needed is to pair up the single cubies. In the picture above, there is an orange pair top right of the centres and another pair bottom left but inset a little. Another 45º turn and a face turn will allow them to be linked together:

45º slice turn
After turning the front face and replacing the slice
Once each centre 2x2 is formed then it is moved out of harms way and another one worked on until they are almost all done. There is plenty of leeway here as there are only ever four centres that are affected by that simple sequence and when you are down to just a few then placing two identical colours in opposite faces is trivial and means that 2 centres can be worked on in isolation.

After that...you just have a 4x4 cube to solve which, if you are working on one of these, shouldn't be any difficulty. I had been expecting some sort of parity like I saw with the 3x3 version but this does not seen to occur with this puzzle. The 4x4 parities are still a possibility but nothing new.

All in all, I was rather surprised at my ability to solve this monster. I had been frightened of it for nearly 2 years and the lack of anyone on YouTube showing it off made me think it was impossibly tough. However, it is surprisingly a lovely process and requires nothing more than intuition and the Edge piece series. Thank heavens to Rline for showing that sequence to me all those years ago and making me truly understand the power of those 4 little moves! If you can solve a 4x4, then you should buy this puzzle.

After this one, of course I couldn't rest and I went to work on another monster! the Master Mixup type 1:

30º mixup turns will lead to a monstrous challenge!


I have been a very lucky boy - Mrs S got very angry with me! Yes, that is lucky. She got so fed up with the state of my desk that she "forced me" to go online to Ikea and buy some more bookcases. Whilst on annual leave I have been arduously constructing and mounting them and am just about ready to start clearing my desk into them.

Puzzle room number 2 is ready
All nice and level no thanks to Barratt homes!
In the process, I discovered that my house was built by 14 year old apprentices with no skills! The floor is horrendously off level! It has taken a lot of effort to get these cabinets level. Lucky me has 3 double Billies on the opposite wall and now 2½ on this wall plus a closed one for less beautiful toys.

Thank you to Mrs S! 😇😇😇