Sunday, 26 June 2022

So Tough I May Just be Bones When It Is Reassembled

PuzzleMaster and Jerry Loo's Skull
This blog post was produced a day earlier and in a hurry because I am working the weekend yet again - the solution to this one nearly killed me and I have not even attempted to reassemble it yet! It may remain in pieces for the rest of time which is unfortunate because Mrs S actually likes the look of it.

This fabulous creation which has been mass-produced thanks to PuzzleMaster's use of a Kickstarter campaign is now available for everyone to try out but you should all be warned... the level 10 is very well deserved! This is a seriously complex and difficult puzzle. 

It had originally been designed by Jerry back in 2019 in a simpler form called Cranium which was iterated over a period of time until it reached the current (considerably harder) form. Later that year, one of the earlier versions was produced by Eric Fuller in a very limited edition (this one had 26 pieces and was called the Berro-skull). As it got more and more complex, it was only ever made by 3D printing and never in any significant numbers. Jerry has been known to produce small batches of stainless steel puzzles, one of which I reviewed (along with the PuzzleMaster anodised aluminium version) here. He did attempt to produce the 67 piece skull in steel himself but could not find a way to do it himself and his local fabricator could not work with such tiny pieces. Luckily for us all, Leon Stein (owner of PuzzleMaster) decided to spend the time and effort working with Jerry to get this produced and functional. The end result is stunning!

I backed the Kickstarter campaign but it is now also available as part of the PuzzleMaster own brand metal puzzle collection at a very reasonable price of $144CAD. Believe me, for a puzzle of this complexity with this many well-finished parts in any material, this is a very good deal. In stainless steel this is bordering on unbelievable! You could say it is a steelsteal. It is a substantial item at 7 x 6 x 5.1cm and weighing in at 800g. Mrs S straight away told me in no uncertain terms that it was not allowed anywhere near the kitchen work surface or floor tiles - if I break any of them then she would break me! For heaven's sake, don't show her the picture at the top of this blog post!

I was again too frightened to start on this for a very long time but eventually screwed my courage to the sticking point and had a fiddle. Much to Mrs S' amusement, there was no progress for an embarassingly long time. I was able to find that the wooden mouth shape was easily removable and also found another move of a single piece but nothing would slide off/out. Bugger! I think it must have taken me another 4 or 5 days before the next move became apparent to me much to my relief. This wasn't because of any flaw in the deign or manufacture - I was just rubbish and did not attempt the correct move for a long time. Having found that next move, pieces started to be removable...lots of them and I got "the fear". I quickly backtracked and put it back together again and left it for a while. Several days later, having found some more courage (I seem to recall that gin helped), I did it again and went a bit further by removing about 10 pieces. This was fun! Great fun! Then I tried to backtrack and had a pair of pieces that I could not replace - I am blaming the gin but you may think it was me being a simpleton. I was able to put it back together with that pair of pieces left outside the puzzle and after a bit of a panic, I could work out from the holes left where they went and reassembled it properly. 

That experience frightened me quite a lot and I left it alone for several weeks until my workload meant that I had to find something to solve soon or there would be no blog post this week. Once my fear of no blog post and exceeded my fear of the puzzle, I started again and decided that the best thing to do was to lay all the pieces out as I removed them and backtrack regularly during the disassembly. Of course, once I was about 10-12 pieces in, I was unable to return to the beginning and there was a huge flurry of effing and blinding as I desperately tried to work it out. Yes, I scared the crap out of myself again and decided I would take a few videos of the dismantling so that I might possibly stand some chance of reassemble. The video had to be taken over several attempts due to the need to feed a very loud Burmese cat, having to deal with Mrs S making very disparaging comments about my prowess and due to my general incompetence. I got stuck on the disassembly on numerous occasions and on several occasions had to desperately try and work out where some random piece of metal had come from after it fell out from inside with me having no clue of the original position. When I looked back at the videos to try and see where these pieces had come from, I realised that quite a bit of the recording was 1. out of focus, 2. out of site of the camera and 3. not helpful with my mystery pieces.

After about 4 hours of swearing and being laughed at I could take a photo - this is the pieces carefully arranged in a rough order that they came out in 3 batches - believe me, this is NOT a spoiler!

This may be how it stays forever more!
I have wrapped the pieces up in the white pillowcase that I have used to provide contrast for the photo to try and prevent the curious cat rearranging the order or even running off with any pieces. I hope that I can one day reassemble it - I am desperately looking at my rubbish videos to see what I can do. The review left on the PM site from Tyler (a well known puzzler and friend) states that if you take your time about the disassembly then you should manage to put it back together. I tried to do that but at some point lost track and just proceeded anyway. I think that I might be in trouble - wish me luck! There are hundreds of solutions on the PM site here but predictably this one is not amongst them - GULP!


Sunday, 19 June 2022

Qiyi Clover Pyraminx - Looks Fearsome But...

The Old Up-Up-Down-Down Works a Treat!

The Clover Pyraminx
An edge turning tetrahedron
This might be even more incoherent than my usual drivel. I have actually managed to have some time off and went to Edinburgh to visit some friends as well as relax and visit the Outlaws. A very nice relaxing time in all and a few very nice expensive meals as well. I have just arrived back home having driven 250 miles and am trying not to disappoint all you suckers lovely people who, for some reason, keep reading my rubbish. 

I had bought a few new twisty puzzles some weeks ago to try and catch up with the backlog of new toys that have come out and are being shown off by the return of Rline to YouTube. Amongst them was this Clover Pyraminx, a tetrahedral version of the edge turning Clover puzzles I have reviewed before.

I love edge turning twisty puzzles for several reasons...primarily because a lot of the solve process for them tends to be very intuitive right up to the very end game and also because they shapeshift and jumble, taking parts out of their natural orbits and often leaving all sorts of fearsome looking "sticky-out bits".
After just 4 moves!
Having seen the frightening shapeshifting, I quickly went back to the beginning and did my usual first approach for these and attempted a non-shapeshifting scramble using entirely 180º turns. It is a lovely turner but you do need to watch your thumbnails as the edges get caught and attempt to rip your nails off (YeeeeOuch!). It doesn't take long to get a nice mixed up puzzle and as expected the solve is a pleasant logical one of performing 3-cycles on the petals until they are all in place again. To you non-twisty puzzlers it sounds impossible but it really is just pure logic. The first 2 times that I did this, I magically ended up with an easily fully solved puzzle after just doing my logic solve process. At this point, my luck ran out because the centre triangles were scrambled when I had finished. For some silly reason I had just thought that solving the petals was just automatically solving the centres at the same time. As has been said by almost all puzzlers around the world: "you are not terribly bright sometimes"!

Oops! Now what?
I sat and stared at this for quite some time with absolutely no clue how to control the centres without mucking up the petals. In desperation I descrambled and resolved and from now on every single time left me with 3 centres swapped around. Not always the same ones but always three of them. It was time to Think©. I use the copyright symbol even if Allard cannot/won't do twisties because I know that if he really tried then he could easily do them. After some fiddling with the Up-Up-Down-Down combination for a while I had a Eureka moment (No, I did not make Mrs S sick by running around naked). A simple set of 4 moves moves 3 petals and leaves one centre piece from one face on an otherwise untouched 3rd edge. If I turn the third edge and undo the original 4 moves then I reverse all the petal moves but have created a 3-cycle of the centres. It is a COMMUTATOR and I found it all by myself - I am a genius! Ok, maybe not (that term refers to Derek) but having found my little set of moves I was now able to solve the simple scramble every time - Yay! Time to take the next step and do a full jumbling and shapeshifting scramble:

Oh dear! That wasn't a good idea!
Yet again I nearly lost my thumbnails and suddenly wished that I hadn't done that! The usual first stage is to return it to the original shape (it always leaves you with pieces out of orbit but you can sort that later). The process of returning to tetrahedron had me stumped again for quite some time. My first time I managed to almost do it before realising that every single edge was perpendicular to the correct orientation and I had created an unsolvable position. I corrected that and tried again. Each time I could get almost there but was always left with a protrusion (not bad for a man my age!) and yet again I had to think© - luckily for me the thinking© did not have to be deep. If I do my Up-Up-Down Down moves with a partial edge turn and it sinks the protrusions back inside...Mostly!

Where did that come from?
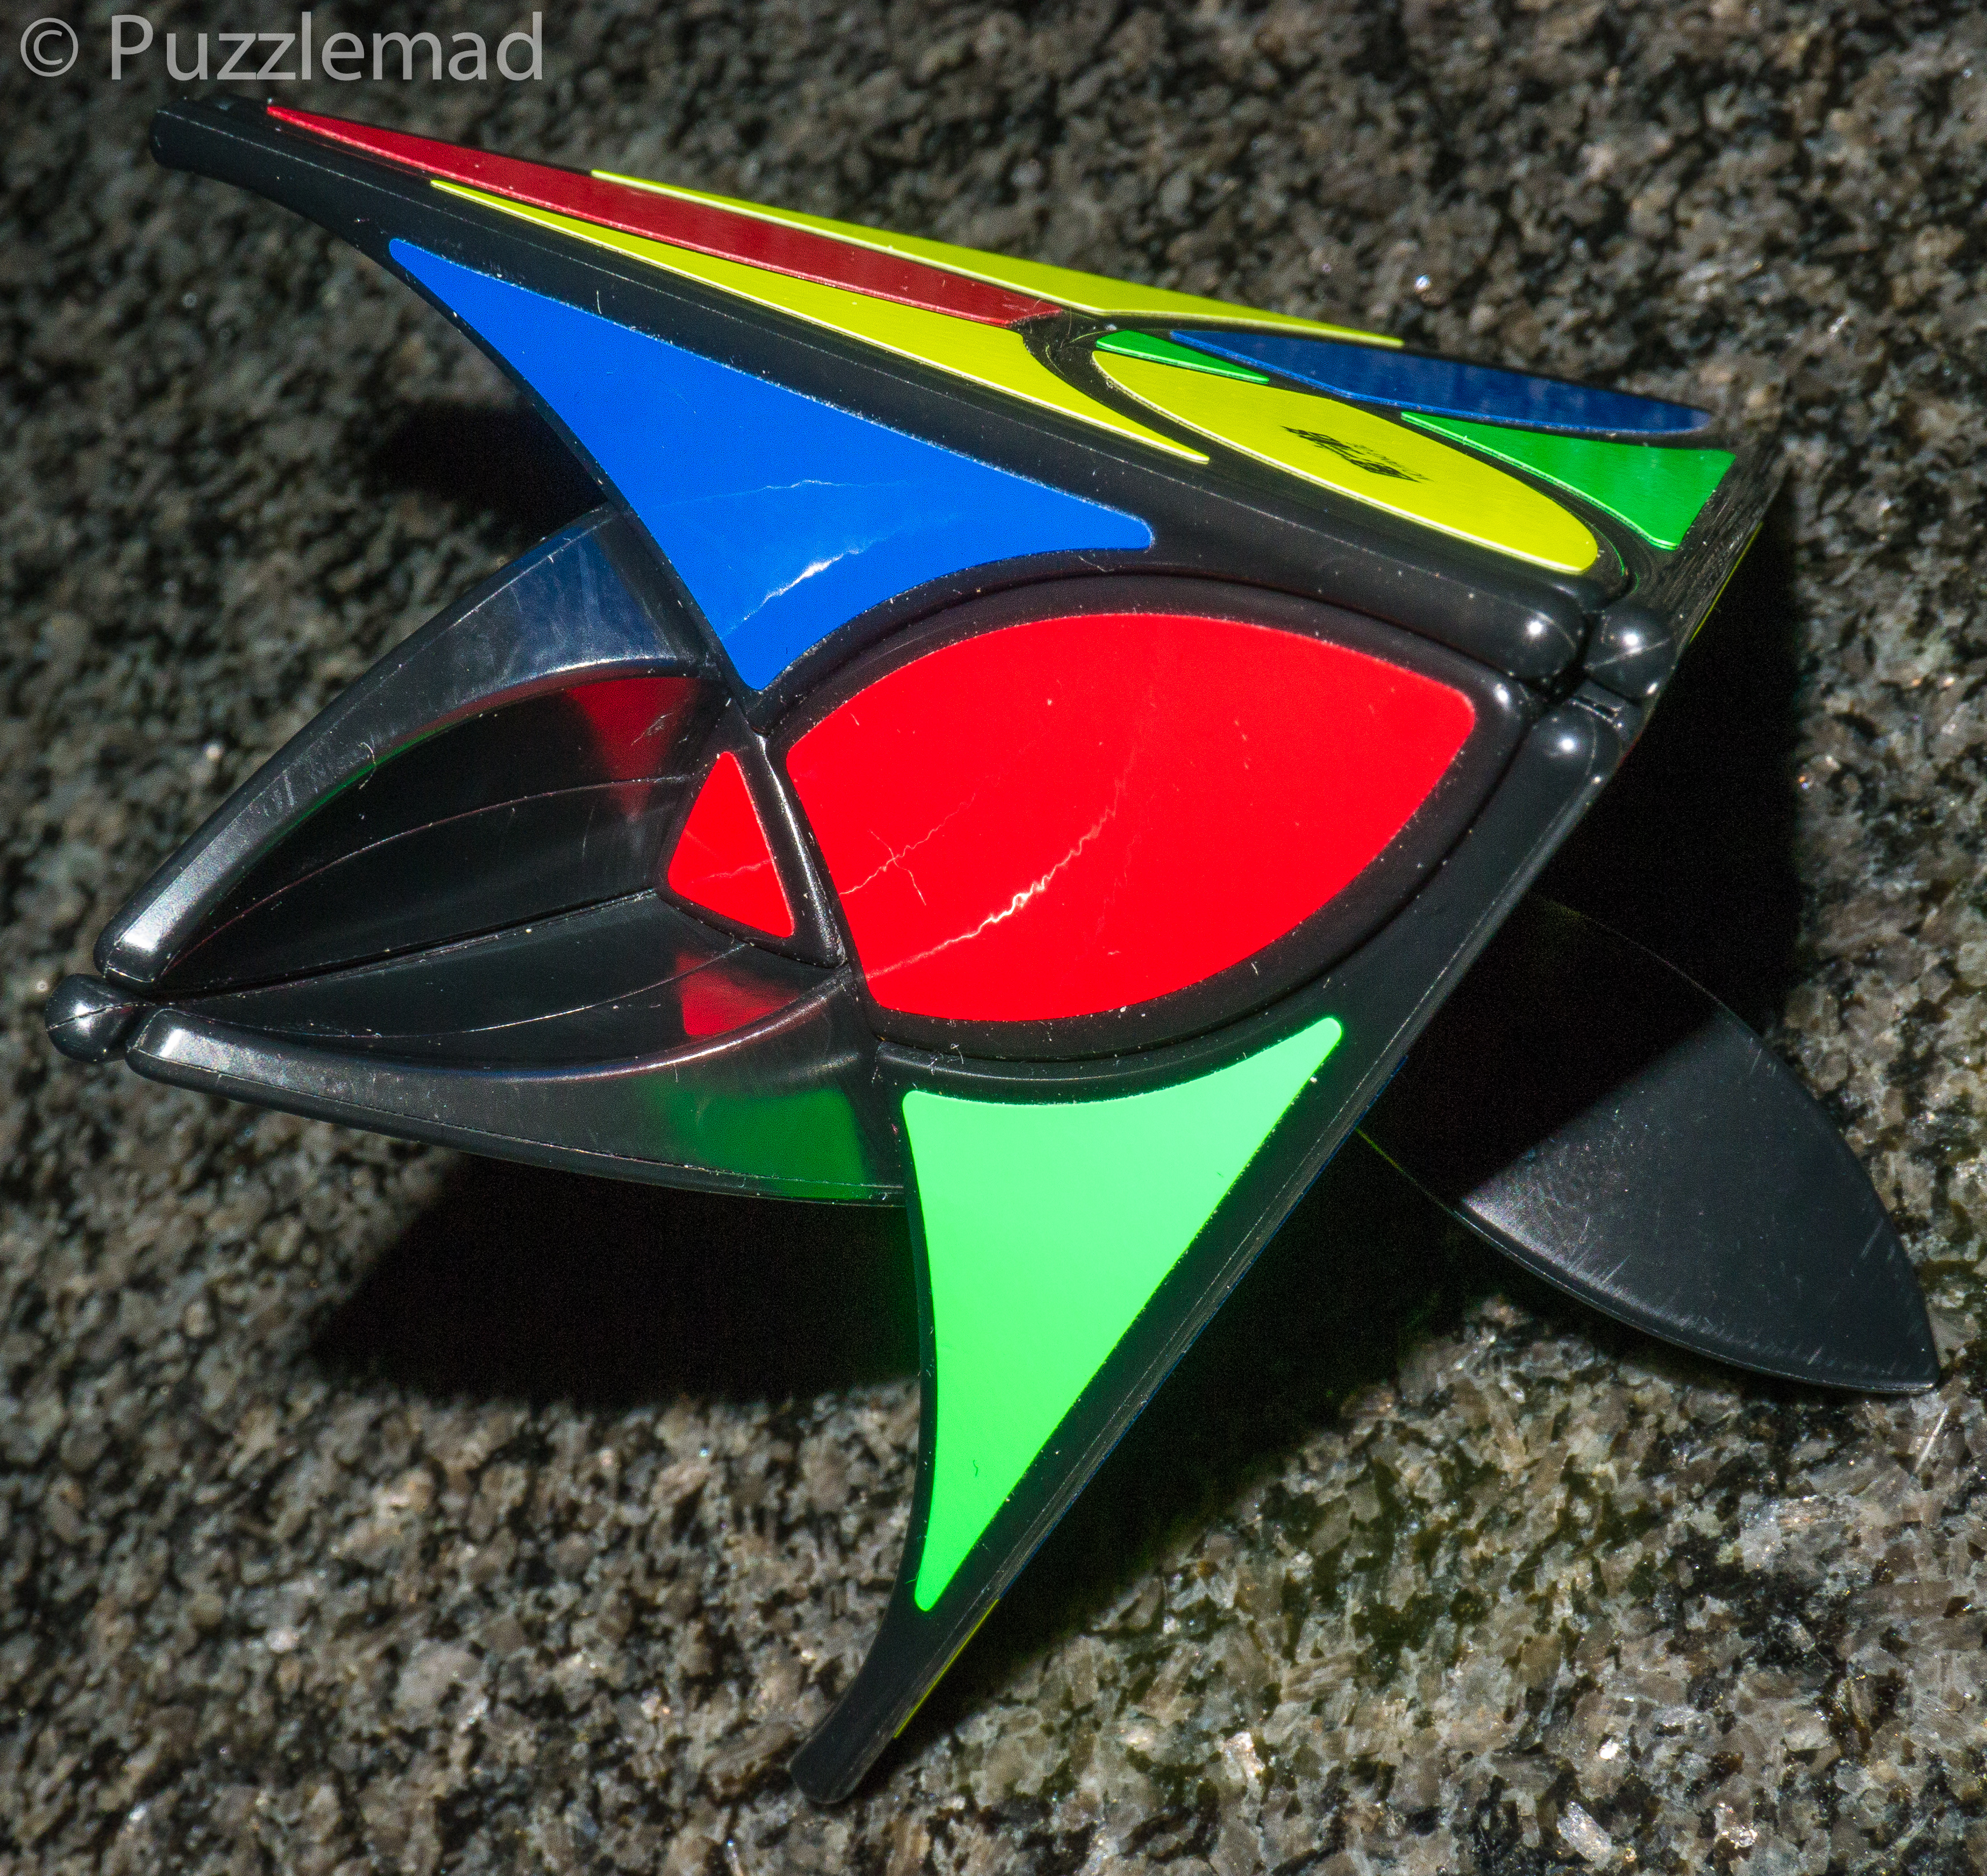
I managed to get it back to tetrahedral shape except there were black pointy bits sticking out and it was not terribly obvious where they had come from. They had no stickers on them and therefore were obviously internal pieces that had been left outside during scrambling and partial solving. Where did they belong? The clue to that came from looking at where they always appeared. They were always found in the place of the centres and I could eventually (after banging my head on the wall for a bit) workout that the centres were now inside the puzzle.

If you twist some of the edges until you find a little clue:
The centre is hidden in a little cavity inside the corner - in the picture to the left the red triangle is inside the puzzle and only revealed by partially turning an edge. So, how to I swap those? On various occasions, I have managed to get anything from one to 3 separate sticky-out bits on various faces. The secret to beat it? Yes, you are good at these! It is the Up-Up-Down-Down moves again. This time you need to do it with 2 edges hard turned out of place and then performing our magic sequence which returns the puzzle to proper shape. Phew! That wasn't too bad was it? Actually, it nearly killed me - all of these discoveries were over a period of 10-14 days and had my colleagues at work laughing at me when I either swore at the bloody thing for having protrusions or swore at it for injuring me. I really suffer for you guys, you know!

Once I had my shape again, I was able to do my intuitive solve using the magic sequence. This, I knew would only get me so far as some pieces will inevitably shifted out of their natural orbits and would not have been returned by the removing of the shapeshifting. Eventually, I ended up with something like this (sometimes on several faces)

Nearly solved but 2 petals are out of orbit (ignore the centres)
With the Curvy copter or related Clover cube (both cubic edge turners), this sort of issue is sorted by carrying out double jumbling moves to swap orbits until they are back in the correct orbit and then can be moved into place by intuition. There aren't enough faces to do that here and I had to adapt the magic technique to allow the fix to happen. Again we have a 3-cycle of pieces using the simple 4 move sequence but starting with a partially turned edge:

Turn one edge and then cycle those petals
Using the front left and right edges and starting with the left one, I can do a Down-Down-Up-Up and those 3 petals cycle around until they are correctly placed. After that is done with all the orbit errors, then the centres may need to be solved and you are done! Fantastic! I worked it out all by myself with only a little (alright, a LOT) of help from Allard. My colleagues were amazed and everyone thought I was brilliant.

And then I tried to do it a few more times and found something awful:

It's a 2-cycle! That's impossible!
My colleagues laughed at the look of horror on my face when I came up with this scenario. I had just 2 centres swapped and as any twisty puzzler knows, a 2-cycle is against the "law of the cube". This is just impossible. 

After my initial blank thoughts, I went back to some of my early blog posts and realised that I had an error caused by a "False equivocation". This occurs when you place a piece into position because it looks like it should go there but in reality it is out of place. This can occur either because it looks identical to some other piece or because it has no stickers to tell you where it belongs (this was the case here). I realised that I had put the blank sticky out bits back inside the puzzle but they were placed randomly into whatever vertex I found. I realised that I had inadvertently swapped 2 of this blank internal pieces with each other and had no way of knowing. The manifestation on the outside was a pair of swapped pieces but in reality it was 2 pairs of swapped pieces and this is perfectly possible and relatively easy to fix. I used my earlier fancy move to take a vertex out and swap it with a centre and then replace it with a different vertex before putting the second one back where the first had been. This invariably left me with a 3cycle of centres to do and my puzzle was done. Hooray!

This is actually a wonderful puzzle - it is not too difficult for any experienced twisty puzzler and has some interesting features to make it a must-have in the collection. I would also say that anyone who is just starting out on twisty puzzles should also obtain a copy - solve the Clover cube or Curvy copter first and then move onto this one. It takes you several steps further in your solving and learning process without being too frustrating. Just watch out for those thumbnails! It is available from most good puzzle stores - PuzzleMaster have it here, or you could try the Hong Kong stores. Well worth your money!


Sunday, 12 June 2022

Cannon Puzzle

Puzzlemaster Cannon
A real quick one today as I had to write the work rotas yesterday (including August and September with the school holidays). It took me 8 hours or more and I am fed up sitting on my arse in front of a computer!

When the PuzzleMaster Kickstarter campaign came to an end, they offered the chance to buy some of their metal puzzles and add it to the rewards that you had purchased. Most of them I already owned but the Cannon was a puzzle that I had seen before and played with (loaned by a friend several years ago - thank you Michel) but never managed to obtain my own copy. I couldn't resist it at $30CAD. This is a remake of a classic puzzle and it has been very well done. 

The puzzle is rated as 7 on PuzzleMaster's 5-10 scale and I think this is about right. It is beautifully presented and really nice and shiny in Brass with the painted red cannon trolley. The aim is to release the cannonball from within the barrel of the cannon - it is sort of a very simple sequential discovery puzzle. I did find it quite humorous that there are instructions telling me that the trolley is only for decoration/display and not to be dismantled to solve the puzzle.

In all, it took me only about 5 minutes to solve but part of that will have been because I had played with the other version, The manufacture of this is spot on - tolerances are perfect and, if you have never seen it before there are a couple of very nice Aha! moments during the solve process.

The cannonball blends in with the granite
Keep it away from cats and toddlers!
Whilst it is not difficult, it is a lovely classic puzzle that everyone should have in their collection - it is perfect for showing to non-puzzlers to get them hooked on the aha! moment. Unfortunately it is sold out  at Puzzlemaster for the moment but it is available from Brian and Sue Young in Australia here and if you don't own the Houdini's torture cell yet then go and buy it with the Cannon together (a special deal here).


Sunday, 5 June 2022

A Cat for the Mantlepiece? Yes Please, Juno!

Mittan
Yes, Junichi and Yukari Yananose have done it again! They have created a masterpiece that is fun to solve, a nice challenge for a puzzlebox newbie like me and have also made something that Mrs S approves of and wants displayed in the living room.

Back view
Mittan is the name of their own rather lovely Ginger cat (I have a photo so I know that she is lovely). I cannot resist these puzzles from Juno and despite the relatively steep price, I immediately decided it was a must buy. I also knew that Mrs S, as an archetypal crazy cat lady, would not object to this one (I haven't actually told her the price though). We originally started with our lovely Burmese cats in the hope that having real cats might decrease or even stop the ever increasing accumulation of cat substitutes around the house (this was silly of me in retrospect). The entire house has cats stuff everywhere and now it has one more item. Juno absolutely despises the puzzle flippers who only buy to make a profit and hence the price was made high (the woods and work carried out were quite expensive) and for this reason he also made a larger number than usual - 150 in total (as of writing this there remain 13 in stock). The woods making up this startlingly beautiful puzzle include Zebrano, Golden Sassafras, Fijian Mahogany, American Black Walnut, Europian Beech, Amoora, Silver Ash and metal parts (including magnets). It was initially available with the opportunity to buy either dark, medium or lighter Zebrano but the dark has sold out. I actually chose a medium to have a very marked grain pattern. I was not disappointed - it is stunning and even Mrs S liked it.

There are two aims with this puzzle - to see how they managed to put a bell on(?in) the cat and to find the fish that Mittan has eaten - it is supposed to be a Taiyaki (a sweet in the shape of a sea bream). I am not going to take you through the solution - you need to buy it or borrow a copy and do it for yourself. 

The solution of this actually took me a whole week! It arrived unbelievably quickly considering the distance that it had gone and I set to straight away. There are a few pieces that are obviously intended to be manipulated and quite quickly a sequence of interesting moves builds up. After a short while you get to do things that you really shouldn't be doing to a cat but try to bear in mind that it's not a real cat and carry on. After the first few moves, I had a couple of pieces and got stuck. It is quite different to the other SD puzzles from Pluredro and nothing I had done before was terribly helpful. Eventually, I worked out what the next move needed to be and I had a new tool and a possible place to use it. My initial attempts at using that tool completely failed - the rest of the puzzle needed to be in the correct positions for it's use to work. Eventually the dismemberment continued...poor Mittan!

Continuing my odyssey into cat dissection, I reached a point where I had more tools and an obvious way to use one of the new ones but it was locked tight. This needed some of Allard's thinking© and I proceeded to dribble into my coffee in the evening. One more Aha! moment produced a critical movement......of about 4mm before it stopped dead. Flummoxed again! I tried the same move over and over and over again in the hope that maybe I had done it wrong the first 8 or 10 times. Needless to say, nothing changed with subsequent attempts and I proved that I met the criteria for madness...again!

At some point I did wonder to myself whether the prize inside might have blocked the mechanism but I know Juno too well. This just does NOT happen with his puzzles. I was missing something. In fact, I missed it for 5 evenings of increasing desperation. Finally, whilst idly playing with all the pieces in a pile, I made an unexpected discovery. Now that should not be there! Unless, of course, Juno had put it there for a reason! I looked for any way that I could use my discovery and I was rewarded with a sudden movement of the piece I wanted. I finally had the bell from/for poor Mittan. It is hidden behind the spoiler button (it's not much of a spoiler but don't risk it unless you really want to).


Once you have found the bell, you have also found the fish that Mittan had eaten:

Yummy!
At least he didn't put a loaf of bread in it - this proves it's NOT a box
The reassembly back to a complete cat with all the pieces inside is a nice sequence which only partly needs to be a reverse of what you did to open it up. I loved it and have done the whole thing multiple times since my first solve. The clever (and not hugely difficult) solution is fun to do and does have an element of the worry bead in several parts. I did not show the dismemberment to my own boy despite him sleeping on my lap through much of it. I didn't want to give him nightmares as he already wakes me up at 5am every day demanding food and attention!

Having finally finished playing with this wonderful creation, which, I must say, was worth every penny of the price. I asked Mrs S whether I should put it into my display cabinets with the rest of Juno's puzzles? She actually said that it should go on display on our mantlepiece alongside quite a few other animal figurines and puzzles:

An embarrassment of cats!
There are several cat puzzles on show (Maahes the line from Stephan Baumegger, Burrlephant from Jerry McFarland, Jack Krijnen's Bison from Jakub Dvořák and the Elephant also from Jakub Dvořák. As you can see, there are quite a few porcelain cats and the elephants that I inherited from my late mother (she grew up in Kenya and had elephants in her garden as a kid).

I think I might just attempt one of the new twisty puzzles next. I do still want to try and review puzzles that are a little less expensive to help the puzzlers out there who may be a little more price constrained than me.


Sunday, 29 May 2022

Masterpieces Ahead

Upcoming delights from Pelikan
Last week I tantalised you all with the news that there was soon to be a new release of lovelies from our wonderful friends and enablers at Pelikan and luckily for me I have been home alone all week whilst Mrs S is up visiting the out-laws. It hasn't been all plain sailing and puzzling as the usual chores that she would have done have been left to me as well as work as always. I also have to pay especial attention to our rather disturbed cat who is still missing his brother and is prone to wandering the house wailing at all hours of the day and night. But even with those distractions I still managed to work my way through all seven of them and I present my reviews for you here and then once I have edited and sent them to Jakub the puzzles will go on sale probably within a week.

The releases this time are:
We have (from back left):
Hippo designed by James Fortune
Stir the coffee designed by Dan Fast
Boo Burr designed by James Fortune
Four Mirror One designed by Osanori Yamamoto
Fermat meets Fuller designed by Dr Volker Latussek
One Flower designed by Osanori Yamamoto
Time - 4 - T designed by Alexander Magyarics

Time - 4 - T

Time - 4 - T 
This was the first puzzle I worked on because I am always intrigued by everything that Alexander designs. This diminutive and very pretty puzzle is made from Maple and Purpleheart and is vibrantly gorgeous despite being only 42mm across each side and 15mm thick. It's as portable as any Hanayama puzzle and much more pretty. Alexander has been emulating Osanori Yamamoto again with a puzzle consisting of 4 shapes trapped in a frame requiring them to be removed. This is a new idea for Alexander and yet again he shows his mastery of all aspects of puzzle design. Also on show is the Pelikan boys mastery of woodcraft - despite being so tiny, every piece has been made with supreme precision and the movement of everything is smooth and perfect. I did wonder whether rotations might be essential and I will let you discover whether or not that is the case. This is not a difficult puzzle but it is delightful to explore with some nice Aha! moments as you work through.

Simply perfect and precise
Having dismantled it, I would advise leaving the pieces for a few hours before trying to reassemble. It is definitely achievable and leaves you with a great sense of achievement. This is a delightful beginning to my week of Pelikan play.

Four Mirror One

Four Mirror One
This lovely puzzle by Osanori Yamamoto looked very familiar to me but I could not recall where from. After taking my photo and having a fiddle, I realised that I had another copy of this made by Brian Menold way back in 2015. This version by Pelikan is made from Wenge and Ash with a very striking grain enhancing the beauty. At that time, I had managed to disassemble the puzzle within a few minutes and found the reassembly the real challenge. Back then I must have been much better at puzzling because this time taking it apart took me about 30 minutes. Like many of Osanori-san's delightful frame-based creations, there are multiple rotations required to remove the pieces and with this one there are a huge number of rotational moves possible in multiple positions. On a couple of occasions, I had rotated several of the pieces but found myself unable to move further but also could not remember how to return to the beginning. There are no fancy hidden rounded edges here that allow special moves - it is a matter of making the right amount of space to facilitate a rotation before then moving on to the next piece and eventually orienting one of the pieces into the position where it lines up with a T shaped gap and gan slide out. After that the removal of the rest is easy.

Fab - all the T's are identical
Just like last time I played with this puzzle, I left the pieces for a few hours before the reassembly was attempted and this was again a significant challenge for me. It took me even longer than the 40 minutes back in 2015 - I am slightly ashamed to admit that it took me nearly an hour! Great puzzle - if two separate craftsman make it then it probably is good!

One Flower

One Flower
The second of Osanori-san's designs in this release is another frame and burr piece puzzle. This one is utterly gorgeous made from Padauk and Garapa. There are 2 pieces that straddle the frame and there is a decent sized hole in that frame for the pieces to come out but the pieces are almost the same size as the hole and need to be moved into a certain position for them to be releasable. Easy peasy, I thought! Move them around - rotations will be required as usual and this should not take me long. Wrong! At each corner of the frame is a square peg which severely limits the rotations (and other types of moves) and I found myself completely blocked. I realised after 15 minutes of trying the same thing over and over again that I must be missing something. Alternative directions of rotation maybe? Nope! I put it down for a while and only when returning to it on a second day did a thought permeate my dense skull. This must require something special - what if I try... Aha! I don't recall Osanori trying this before.

Nope! No spoiler here - not showing the pieces
The reassembly is fairly straightforward since there are only 2 pieces and a frame but the delight in the special sequence remains. This is one that I will probably be handing out to friends and colleagues to play with and will enjoy watching their confusion when want they want to do won't work.

Stir The Coffee

Stir The Coffee
The first of two absolute masterpieces in this release, Stir The Coffee is a significantly complex burr puzzle intended for people who really enjoy burrs - it is not for the beginner. I have known Dan Fast for many years (it may be nearly a decade now) and he comes across as a loud, brash Canadian with big opinions (you only need to view some of his videos on his CrazyBadCuber channel to realise this). But one consequence of Dan's personality is that when he starts a hobby or project he totally immerses himself in it and ABSOLUTELY masters it. He has been playing with Burrtools for a good few years now and has created some fabulous designs which he puts on Puzzlewillbeplayed and Facebook. Dan's own personal preference is for really high level burrs but he is in touch with the rest of the puzzling world and realises that such puzzles are a very small niche. As part of his mastery of the art of design, Dan has worked out exactly what the average burr puzzler wants...a challenge with a moderate level that remains stable during play. He also has a superb eye for aesthetics and makes shapes that are just beautiful. At a level of 54.4.2, this puzzle was a higher level than I would normally like (I find that anything above 30ish gets too complex for me to keep a track of the moves and possibilities) but yet again Dan has shown his skill - despite requiring so many moves, there are remarkably few false paths and those that are there, are short or circular leading back towards the original path. The challenge here is to discover the correct moves which are remarkably well hidden. The structure is extremely stable throughout and the pieces dance back and forth to stir the coffee in the rather beautiful cup before the simple but stunning teaspoon is removed and then you can empty the cup.

It's a masterpiece
The disassembly took me a good few hours in total with several periods of going round and round in circles trying to find the moves that I was obviously missing. Despite the extremely high level, it was always possible to backtrack to a place I recognised and start again. Only once I was very near the finish did I get lost but then the only way was forward. This is an absolute masterclass in burr design - Dan has got it absolutely right with a beautiful look, a high level but very achievable for anyone used to playing with burrs. Of course, Jakub and Jaroslav have brought this to life in a simply spectacular way. I cannot wait to see whether they produce anything else.

Fermat Meets Fuller

Fermat Meets Fuller
I have to start the review with these simple words:
"Buy this puzzle! It is incredible!"
Dr Latussek has a very strange mind! I do not understand how he designs these things - Burrtools is no use for them, he must do this in his head. This is not normal, there is absolutely nothing in my head at all let alone complex geometric manipulations. Volker has created several packing puzzles over the last few years and I have only ever managed to solve a couple of the simpler ones - it is telling that one had "for kids" in the name. So when I received the Fermat for Fuller, a few things raced echoingly through my empty noggin. First was the memory that I had not yet managed to solve the original Fermat (I had reviewed it unsolved here and Allard had reviewed (solved) it here), and secondly I wanted to know why it was meeting Fuller? 

Volker told me:
"with FERMAT I wanted to learn how triangular parts interact with one of my typical boxes. When I talked to Eric Fuller about this, I came up with the idea of dividing a cube into six triangular parts and in placing this cubic dissection I had a long and clarifying conversation with Eric Fuller some time ago. Then I had the idea to dissect a cube (cubic) into triangular parts (Fermat). Fermat meets Fuller was born." 
Pelikan has created this using American Walnut and Merbau (which has stunning grain with amazing looking end-grain faces. The precision required for this puzzle is something to behold - it is simply perfect! Only Jakub and Jaroslav can do this in large numbers! 

Delivery configuration
I even struggled to dismantle the delivery position
I took the two loose pieces out of the box and saw the other four in the base and tried to remove them - I couldn't take them out - this was going to be a challenge! Once I had removed them then I had seen the kinds of manipulations that are possible and hoped that would arm me for the solution. I am terrible at this kind of challenge and did not hold out much hope but once I had seen the possible moves and that there was actually quite a bit of room in the box and a relatively large opening, I had a few ideas.

Needless to say, my ideas all failed for the first couple of days of trying. The next thing to do was to look at how many ways the base layer could be arranged, and then see how I could place the extras in the top layer - this is the real challenge - placing a base layer is fairly easy but this really blocks any space left for getting later pieces inside. After 3 days of failure I was becoming increasingly desperate and was losing hope. I then had a large Eureka moment (no, I did not leap out of the bath and run around naked - even with Mrs S away). I had found an arrangement that would leave a very nice gap to place the final pieces but then had to see whether I could place the first pieces in that position. I was stuck...until I realised that the relative thicknesses of the thick, medium and thin triangles had all been very specifically chosen. These pieces had been designed to allow one very very special sequence of moves. IT IS STUNNING! Volker has out done himself - this puzzle is a design masterpiece and is an essential purchase for any serious puzzler. As I said earlier: 
BUY THIS PUZZLE! 
Believe me, you will not regret it!

Hippo

Hippo

Peekaboo
Recently Pelikan have produced a series of wonderful puzzles that contribute to Goetz' Burr zoo and I was very pleased to see them continue this with the Hippo. This one has been designed by a relative newcomer to puzzle design, James Fortune, who I have been watching on Facebook for a year now. James has also set up a shop selling his designs that he has 3D printed (I have not tried any of these but they look amazing). For a design to be accepted by Jakub and Jaroslav, it must be pretty special - they always prototype them and check for poor design features like lack of stability or not a fun solve. The Hippo is a wonderful creation which is perfect for all puzzlers interested in burrs. It is beautiful, having been made from Maple, Purpleheart and Walnut with a wonderful bevelled finish and a lovely surprise once you find the correct start of the pathway. It is this first step that I struggled with the most. There are a couple of moves that are nice and easy to find and they are the wrong ones because they lead nowhere. I had taken this to work to play with and during a lunch break people watching me were extremely disappointed to see me go around and around in circles getting nowhere. Luckily I had to work again and used that as an excuse to stop making a fool of myself. 

Eventually I found the very well hidden first moves and I was on my way. This puzzle has a level of 7.8.8.3.24.7.3.2.3.2.3.2 which is absolutely perfect. There are a few blind ends but none terribly deep and a lovely wide circle where a lot of possibilities lead you astray. I managed to get the first piece out relatively quickly once I had found the initial moves but the removal of the next two pieces took me a VERY long time. I could always return to the beginning but I was missing a well disguised move which I finally found yesterday. Usually with these, they become very unstable after a few pieces have been taken out but this one does not. It becomes sort of "squishy" and there are a few possible rotations that need to be controlled but with a little effort the removal of all the subsequent pieces can proceed without collapse right down to the very last pair. This is nothing short of extraordinary! During the solution, the hippo moves about a little but remains fairly static with just the sticks moving around him - he really gets in the way! There is also a particular feature of a couple of the burr sticks that links them together - it does look like they should separate on several occasions but they are firmly hooked up.

Beautifully made and a beautiful design.
I currently have this in pieces next to me and have created a BT file (a huge part of the fun) and look forward to reassembling it and trying again. If you enjoy burrs or want to try them out then this is a perfect puzzle for you.

Boo Burr

Boo burr

Booo!
This is another creation from the prodigious mind of James Fortune and is also a member of the Burr zoo. It is simply gorgeous made from Wenge, Zebrano with Maple pieces hidden inside. I was a little mystified at the name initially but the reason for it becomes apparent very quickly when (at least the way I had it orientated) a white piece unexpectedly drops out of the puzzle into your lap onto a sleeping cat who shot of reminding me that he had a VERY sharp claw that I needed to clip. Yeeeouch! Picking up the fallen piece, I see why the puzzle is called the Boo burr. Genius. Getting to that first piece removal only requires 5 moves (the whole puzzle has level 5.17.4.5.2.4.3.1.2.4.2.1.2) but finding the sequence took me a while. Again the critical position to find is quite well disguised. Once out there are quite a lot of possible paths and I struggled to work out where to go. I think I found the next piece removal by luck more than anything as it required a further 17 moves. From there on, the path is a nice gentle exploration of burr moves which, again, leaves you with a stable, if squishy, puzzle for the entire remainder of the disassembly. The seventh piece removal provides another surprise:

We have two ghosts in the burr!
I will need Burrtools to reassemble it but that is just as much fun as the exploration and disassembly. Another fabulous burr from Pelikan that will keep all us burr enthusiasts very happy!

So we have yet another phenomenal release coming up from Pelikan soon and there are definitely puzzles that you won't want to miss out on. The Fermat for Fuller and Stir the Coffee are essential puzzles in my opinion - absolutely masterpieces of design and craftsmanship! After that, you have quite a few wonderful puzzles to choose from - do you like burrs? Then the creations by James are just the right difficulty level. Do you like these stunning sequential movement puzzles? Then the designs from Osanori-san or Alexander-san are brilliant! Keep an eye out - I don't know when they will go up for sale but it won't be long!

Sunday, 22 May 2022

Cast Cyclone

Yes, it's another Hanayama review! I have felt a little guilty over the last year or so because I have focussed a lot of my attention on craftsman made puzzles and this might have excluded a number of puzzlers because this is a rather expensive hobby and not everyone has the ability to spend hundreds or even thousands of pounds/euros/dollars/AUD on toys. I am well aware that I am in a very privileged position and am trying to make up for it a little by reviewing at least a few more reasonably priced puzzles for you. The Hanayama cast puzzles are probably the greatest example of a quality item available for a small price. Over the last 11 years I have managed to buy almost all of them and do try to keep up with the recent releases - this is me catching up.

The Cast Cyclone is a level 5 on Hanayama's 6 point scale and I think they got it just right - this is a proper tough puzzle but definitely solvable if you fiddle, look and think©. Designed by Kyoo Wong, this looks gorgeous with 4 interlocking rings that have single gaps at one point on their circumference. One ring is a gold colour and the others are shiny chrome. All four interlock with each of the others. This, along with the sheer width of the ring means that movement of the individual pieces is really quite restricted. If you look carefully at them then you can spot some obvious differences between them (2 are labelled Cyclone and 2 have Hanayama engraved on them) - I would advise you to really look closely because the subtle differences will make all the difference between success and failure.

This is a disentanglement puzzle and will require planning to dismantle. Looking at the gaps in the rings, it is clear that these need to be aligned to allow individual rings to slide off each other but the bulks ends at the gaps prevent them from reaching the appropriate position easily. It also becomes quickly obvious that these may not align at 90º to each other when they slide. I began playing with this one about 2 weeks ago and had to be careful because it is pretty jingly and might cause upset in the Sadler household. For 2 weeks I got absolutely nowhere. I knew roughly what I wanted to achieve as my first move but I could not work out which combination of pieces and orientations would actually achieve it. This impasse pretty much lasted the whole two weeks until suddenly I did something ever so slightly different and a sliding move started to occur. I had no idea what I had done differently so I backtracked and undid that critical move. Of course! I couldn't do it again! I spent another 3 days before that move worked again. At least, I did not waste any time trying it with the wrong pieces - that first move requires extremely precise positioning and having done it a second time, I was careful to watch it and still cannot manage to reproduce it regularly. That sort of exact placement is exactly why Hanayama make such perfect puzzles.

That initial slide move was very exciting for all of about 5 or 6mm! The pieces slid along each other and stopped dead - they would not separate due to being blocked by the rings of the other pieces. Now what? At this point there is an obvious feature that you are desperate to utilise and the obvious sequence is started and gets you... nowhere! I got stuck here for a while and eventually realised that the next move was being done correctly but needed a tiny tiny bit of force. This is the only negative feature of this puzzle - I personally think that you should never ever need to use any force as it leaves a puzzler questioning whether they have done it correctly and may prevent them ever finding the solution if they are not willing to use that force. This is not the first time that a Hanayama has needed force - the Cast Helix which I reviewed way back in 2013 here had a similar requirement and I was quite critical of that one for the same reason. For an experienced puzzler or a collector then the Helix and the Cyclone are good puzzles to continue challenging yourself but a novice stands a high chance of getting stuck.

Having realised what was required, I was well on my way and the remainder of the disentanglement continued with only a little interruption for thinking© and I quickly had my 4 pieces laid out for the photo.

That was quite fun and took me much longer than expected
At this point, my hands were a little sore so I left the puzzle for a few days which was probably rather foolish. I am well known for not being very bright and I have proved it here - I cannot reassemble the puzzle - I had not paid attention to the orientation of all the pieces as I separated them and now the reassembly seems to get stuck no matter what I do. It is not the force move - I get to a point where that looks like the next thing to do but there is no way that is happening - it would require a LOT of force which is not right.

This is definitely a nice puzzle for the experienced puzzler but probably not a good idea for kids or novices. I reckon all the readers of this blog (all 10 of you!) should be perfectly able to solve this one.

Next week, I will be back to craftsman puzzles! I have received the upcoming batch of Pelikan puzzles and am going to have to work on these as fast as I can for a week. wish me luck! See the New additions page for a quick preview photo.


Sunday, 15 May 2022

Cast Valve - I Think They Need to Speak To Derek

Cast valve - level 4/6
Cast valve - Damn, these things are hard to photograph!
Last week I started with my return to the Hanayama Cast puzzles/Huzzles with the pretty easy (level 3) Cast Dice. I have not had much time for puzzling this week apart from continuing with those nice pocketable puzzles and working my way up the difficulty levels. I unfortunately have to report that my Cast Snow remains in a locked up position with only a tiny amount of wiggling possible. 

The Cast Valve seems rather oddly named - I work with several different types of valves in ventilators and obviously have valves for my car tyres and none of them look like the shape of this puzzle but, to be honest, I cannot think of anything better to name this one. It was designed by Vesa Timonen who has been extremely prolific over the years and has had nine other Hanayama puzzles produced as well as several others over the years. His designs are always fun and usually just the right level of difficulty to challenge you without putting you off. Hanayama has rated it as level 4 out of 6 and PuzzleMaster as level 8 (in their silly 5 - 10 scale).

The puzzle here is a rather attractive hexagonal shape with a frame into which there are three further pieces inserted. It is 4.5 x 4.2 x 1.6cm in size and made from a yellow brass-like metal frame and matching colour centre piece and two shiny silver semicircular pieces that fit between them. The aim is to dismantle the puzzle and then put it back together by navigating the interior moving maze formed by the pieces. Now, the master of this sort of puzzle is the genius himself, Derek Bosch, the designer of the original (and many subsequent) helical burrs which I have gone completely bananas over on this blog. Having solved this puzzle by Vesa, it reminds me of the very first of Derek's designs, the Tubular burr which is effectively a stick burr in a frame but with circular pieces that can rotate around and through each other. The Cast Valve is just like this.

My early fiddling showed a fairly constrained bit of movement as the pieces lock and unlock each other. I realised early on that I would probably need to take notes to keep track of the moves that I try so that I don't go around in circles (literally as well as figuratively) - I sort of needed to make up my own notation for it. Within about 10 minutes, I had made great progress and the pieces were rotating and rising and falling within the frame nicely. Great I thunk, I'll have this done in no time and have one in the bag for the blog. Except, I felt I had made reasonable progress and could not advance any further. I must have missed an exit of the maze pathway somewhere so time to backtrack and trace it out with pressure on different bits to try and find the hidden path. It's a fiddly bugger when you try and do that - just a bit too small to allow you to do this with ease. After an evening of playing and swearing (I seem to do that a lot!) I realised what was going on - yes, it is just like any other burr in that it has blind pathways that lead you the wrong way. Yes, of course, my first exploration had taken me completely in the wrong direction.

Having realised my error I made pretty good progress again until I reached a point where I was almost able to remove a piece but not quite. Here again I got stuck for a while. The tolerances on these are very very tight. Things need to be lined up just right to let you progress at certain points. After a couple of days I had managed this:

Not a spoiler - you cannot possibly see enough to work it out.
I put the pieces aside for a few hours before attempting the reassembly. I have to say that this would be a huge struggle if I had not spent so much time going back and forth on the disassembly. I had enough muscle memory that I was able to reassemble it with only a short period of getting lost. The level of 4/6 is just about right in my opinion.

This is a nice little puzzle which I enjoyed a lot. What it did reinforce to me was that Derek's helical type burrs would be fabulous made as a cast puzzle (the original would be a perfect difficulty level) - I am sure that Steve and Ali have looked into making one out of brass but they would be hellishly tough to mill - it would be perfect to cast. Please Hanayama, have a little chat with our friendly genius!