Sunday, 26 March 2023

A terrible memory or a fundamental failure to understand?

Juno's Grooved 6 Board Burr number 7
I’ve had a week of annual leave up in Bonny Scotland relaxing and eating far too much good food! (I can heartily recommend Dine at the Traverse  as a fabulous place to eat - afterwards I was only good for a sleep). Of course there was also the customary visit to the outlaws and even a Mother's Day afternoon tea at The Ivy (again, I was only good for a sleep afterwards!) Luckily, I brought a few puzzles to play with and even managed (with a struggle) to solve one… partially at least!
 
Yay! 6 more!
This week I am showing off the seventh in the series of Grooved Board Burrs by Junichi Yananose. Seven? OMG! But how could I resist? I have the other 6 and absolutely adored them. I have reviewed most of them (#1, #2, #3, #4, #6) over the years as they came out. Number 7 in the series was released a couple of weeks ago and is still available now. Juno himself (he’s a genius) said that the difficulty is extremely high and suggested using the photos on the site to aid with small hints during the search for the solution path.

The first thing I noticed when I unwrapped my lovely parcel was how vibrantly beautiful the puzzle is. As before the puzzle is made using Juno's home made Plywood (this provides strength and prevents warping as humidity conditions change). The wood used are PNG Rosewood and Red Gum which contrast with each other beautifully. This one is slightly larger than the first 6 and is less bevelled to try and prevent inadvertent rotational moves. The immediately obvious difference, however, is that this puzzle has considerably more complex pieces with pins on the external surfaces of the puzzle. These are also there to prevent rotational moves.

Juno wrote in his description:
"The puzzle has a unique solution in a relatively small number of 91 assemblies, and the computer program Burr Tools showed its level to be, 50-18-3-3, the highest number in the Grooved 6 Board Burr series. In the real world, the interlocking of the consisting pieces becomes unstable after around 40 moves from the assembled shape, and it allows a rotational movement shortcut that is theoretically possible. It is yet the largest number ever in the series to release the first piece from the assembled shape."
The pathway is relatively constrained initially but very quickly it becomes apparent that there is quite a lot of movement possible with many choices for what to move and at various points the puzzle gets stretched apart a very long way and still remains stable. Those external dowels/pins really do work to prevent rotations. I managed a good few moves with my usual to and fro approach backtracking to the beginning each time. Then I got stuck for a couple of days. I couldn’t spend too much time on it - we were on holiday and had stuff to do. 

After a bit of a hiatus at one position and wondering whether I had completely mistaken the correct path, I found a spectacular new move which opened up a whole new set of paths but, as is usual I backtracked to the beginning and, yes, as you’d expect I couldn't find the move to get to that place again. I’m an eejit! I spent several hours searching around the same spot desperately trying to find the single crucial move.

The difference was small… I needed to move from this position:

See how stretched out it is?
To this position:

That front board has shifted from one notch to another
This looks trivial to achieve yet it took me 2 days of swearing under my breath! The crucial factor in finding the path was the realisation that the placement of the pegs on the outside forces the puzzle to use ⅓ voxel moves! This is the reason for the title of the blog post - I thought I had just been a victim of a terrible memory but in reality, I had completely misunderstood the complexity of the puzzle. This means that instead of a 6x6x6 grid (with each board being 1x4x6 voxels), a much larger grid was needed. The whole thing would need to be tripled in size!

After that hideous/revealing discovery, it opened up again to a huge new vista of complexity and some seriously scary sequences. The puzzle did begin to become rotationally unstable but unallowed moves were always prevented from being completed by the pins. My to and fro technique worked for quite some time but eventually I got lost. I found myself going around and around in a loop unable to go forward or back until I found my way back to the beginning by accident. Phew!

At this point I stopped for a day to try and regain my nerves! These puzzles are great fun but I’m always frightened with some that I will get stuck in a position and not be able to go forward or back ever again. I have a couple of incredibly complex burrs that are stuck in an odd hedgehog-like shape and I cannot do anything about it - they’ve been stuck like that for years! I did get my courage back, however, as I figured that a 6 piece burr really should not get irrevocably stuck. Once I returned back to the second half of the solution, I systematically tried different sequences until I had my Aha! moment. My first piece came out.

I have to say that Juno's hint pictures were not in any way useful! Each one was taken with a different orientation of the puzzle making it impossible to relate one position to a later one. I tried turning my puzzle at various stages to match the photo but quickly lost any idea of what position I was in whilst rotating it about. 

In removing the first piece, I had to reach to a table to put it down and my grip on the puzzle shifted and the remaining pieces revealed themselves to be very unstable. A bunch of pieces rotated and dropped down. I had no idea how they should have been placed and it was easy to remove a pair in one go from this new position. After that, I took it apart completely for my photo.

Seriously complex pieces!
I would love to tell you that I have managed to reassemble it but there is not a hope in hell of that without Burrtools! I think even the amazing Rich (frequent MPP visitor, who is an incredible burr assembler) might struggle to assemble this from scratch.

I will need to wait until I get home to my computer (this post was done on an iPad) to program it in. It’s going to be a real challenge to enter it as I don’t actually have pictures showing where all the external grooves and pins should be on the assembled puzzle. But, trying to make my BT files is part of the puzzle fun for me. It might take several hours! Oh joy!

This fabulous challenge is still available from Juno now - go buy one before they sell out. It is seriously seriously good.
Thank you, my friend!


Sunday, 19 March 2023

A Second View Through The Window

Dick Hensel's Window Lock 2
Imagine my utter horror to be wearing the same dress to the party sorry, publishing a review of the same puzzle as good friend and much better puzzler, Allard! His post on this puzzle is much better than mine - go read it now!

I now have 3 Locks from Dick and every single one of them is Shane's fault. He keeps getting early copies (he’s a locksmith, after all) and showing them off on Facebook which, of course, tempts me into rattling off another email and once more, rattling off some PayPal. Luckily I took delivery of this whilst Mrs S was away at the outlaws. By the time she came back I had it secreted away amongst all the others. To all you men out there, you know the answer you get to the question "is that new?" (Shoes, clothes, handbags, jewellery etc.) and the answer is "oh no, I’ve had this for ages". This can apply just as equally to puzzles. When asked about whatever I’m fiddling with, I can reply: "I’ve had this one ages!" And luckily, to Mrs S they all look the same! This means I can sneak them in whilst she is away and she will never know…apart from the Ring door camera which does give things away a bit. Doh!

The middle puzzle lock in the group is the Hensel lock mark III and was the first I bought from him and even after nearly 6 years, remains unsolved. I have had it on my desk for years and can only find a few moves. I’m a puzzle lock eejit! I really enjoyed the first Window Lock - both of these are a mixture of a dexterity puzzle, a maze, as well as very constrained sequential discovery puzzle. The fact that it looks like a lock is entirely incidental.

They all look very similar in shape and size and I think this version is made from oak. It has 2 ball bearings inside and a rather complex maze of pieces which form a bewildering set of baffles. Some of them clearly block the opening of the shackle and others seem to be there for no good reason. But… everything is there for a specific purpose. The initial fiddle with the shackle shows it to be blocked by the large ball bearing so it’s time to try and move it out of the way. Easier said than done! It’s a bit of a bugger manipulating everything with just the small ball bearing as your solitary tool. Through the window you can see everything but not really knowing what to do, you end up trying a few things u til miraculously you discover some parts are held together by a magnet and you need to break them apart with nothing apart from a ball bearing. Having found the first sequence, I realised that that there was another piece holding the shackle in the locked position. Time to move the ball elsewhere and try to release it. Again, easier said than done. Trying to move the ball without losing the gain already made is a challenge in its own right and then trying to undo the path blockage you have made getting there is a fun diversion. 

I finally moved to the second challenge an unblocked the restriction only to find the shackle still had a third element locking it in place. Right then, off we go and release that. Erm…except I couldn’t! It would appear that I had done it in the incorrect order! Damn! Who would have thought that a lock needed a specific sequence of moves to open it? Not me obviously but then, as previously stated, I’m an eejit. I had to relocate the element I’d already done and move to the required position to start again. After that, time to backtrack and redo my mistaken second move. Aha! The lock opened and I was startled to see the way it actually opened. 

No clues here!
Re-examining the sheer amount of difficult moves that Dick had put into this design and the precision required to make the tiny pieces that move on each other, held by tiny magnets, I am staggered at how well it works. Re-locking the puzzle is "just" a matter of reversing the steps but because gravity and pushing/pulling against magnets is so important, this I actually NOT quite so straightforward. Slightly different pathways/moves are required and for one move in particular, quite a lot of dexterity.

I have solved this a few times over the last week and still enjoy the process. I know exactly what to do in what order but actually doing it remains a bit of a dexterity nightmare. I love it! If you can find a copy of this then it’s well worth it.

Now, who wants to help me "launder" more puzzle deliveries so Mrs S doesn’t find out about them? 
😈😈😈

Sunday, 12 March 2023

An Edge Turner That Is Not Intuitive

Eitan's Edge Turning Octahedron
I am working again (4th weekend in a row) and have produced this post in a bit of a hurry in advance. If there are any errors then please let me know.

Eitan Cher has been responsible for a lot of fun in the PuzzleMad HQ and also a LOT of angst! He has designed quite a few of my very favourite as well as the most difficult of my puzzles. Despite all the angst, I absolutely adore what he creates. The Edge Turning Octahedron (ETO) was purchased quite some time ago in the expectation of fun and very quickly shelved when I discovered that it most likely would cause angst! In general the edge turning twisty puzzles can be mostly solved with a lot of intuition and only needing one or two fairly easy to find algorithms for the very end of the solution. Overall, they have been some of my most favourite of twisties for this reason:

Edge turning cubes
Why did I shelve it so quickly? One of the features of edge turners is the fact that they jumble: that is, it is possible to perform partial turns to line up intermediate cuts and then continue turning other edges which removes pieces from their normal "orbits" and also can make pieces shapeshift wildly. This is one of the reasons that I recommend them in my "advice for a beginner" post. However, with the ETO it scared the pants off me:
 
Just one jumble!!
It was quite clear that this was going to be bloody difficult - probably too tough for a relatively poor twisty puzzler like me. Eventually, I was convinced by a number of puzzlers to give it a go and I decided to try a non-jumbling scramble first. I really hoped that it would behave like other edge turners and mostly solve by intuition. Off we go:

Oh Lord! What have I done?

Corners all sorted to ensure no parity
Attempting a single face
So far, with almost all the edge turning puzzles, I have tried and succeeded in solving almost all of it by starting at one face and working my way up the puzzle almost layer by layer until I have reached the top. Occasionally I have had to intuitively build partial components and then move them up rather than single piece at a time and then find out how to complete the endgame. Straight away with the ETO, I struggled. It is almost impossible to build even a single face by intuition without destroying previously positioned pieces. Above, was about as far as I could get and I feared for the worst. 

I thought this was going to go back on my shelf scrambled but I was fortunate enough to have a massive explosion when I tried to make a turn without fully aligning edges properly. I then had a good reason to completely dismantle it and reassemble unscrambled and seek alternative methods. I really should have done my "due diligence" first - but then I am well known for not being terribly bright!

What most decent twisty puzzlers do when they have a new puzzle is explore it before they scramble it and try and learn what different known sequences will do. Since this was an edge turner, I felt confident that intuition would be useful and did not bother with that crucial early exploration phase. Having reassembled it, I could try again and do it properly.

The first thing I often do is sequences of turns around a face or corner and see what happens after 2,3,4,...x turns and if nothing seems to be useful then I can very easily backtrack.

I very quickly found this lovely sequence which certainly looked like it might be useful - turning the blue/white edge and the purple/white edge sequentially three times cause 2 adjacent centre flat triangle swaps with the adjacent edge wings. This might be useful.

Next, I try the "edge piece series" and the "corner piece series" which are so crucial if using the "Ultimate solution" to the Rubik cube which Rline has shown off so beautifully on his Twisty Puzzling channel. The Edge piece series wasn't terribly helpful for me but a corner piece series (modified for edge turning) proved very useful.

As you can see - the end result of the simple 8 move CPS is to 3 cycle the centres (plus muck up some edge wings, but with no effect on the corners and centre flat triangles. This tells me that if I can find a way to solve the corners and flat triangles first and edge wings last then I have an approach to the solution.

3 cycle these composite corners takes 4 moves
Do the same F to B then undo
Next thing I did was look for any easy commutators. This was not terribly difficult - it is easy to perform a 4 move sequence of R, L, R, L to swap composite corners as done above left. If I can isolate one of those edge wings in the top and then undo it all then I have a commutator. Luckily isolating that edge wing is very similar (I just perform a F, B, F sequence and then I can undo the original sequence. The end result is to create a 3 cycle of edge wings. I'm getting closer. I can place and orient corners by intuition, I can place the centres and the edge wings. I now only have to find a way to move the flat centre triangles (either alone or with other pieces) and then I have my whole approach sorted. This takes me quite a while.


After a lot of fiddling around and desperately trying not to forget what I moves I have made so that I can always undo them, I discover a very similar sequence to the edge wing commutator. If I turn the front edge and then follow this with a R, L, R and then undo it all, I have another commutator. This time it is not pure - as you can see to the left, I have moved centres and flat centre triangles with an adjacent edge wing in a 3-cycle.


This gives me my whole puzzle solution:
  1. Solve the corners
  2. Solve the flat centre triangles (the sequence moves everything apart from corners)
  3. Solve the centres (the sequence doesn't upset corners or flat triangles)
  4. Solve the edge wings (the sequence doesn't upset anything else)
Is it quite as easy as that? Erm... not really! Placing the corners is very simple except that there are lots of positions that places them in positions that the flat triangles cannot reach - they are in orbits as one would expect of an edge turning puzzle. It is ESSENTIAL to get those corners right first and seems to take me quite a while to get it right. I found a parity where 2 pairs of centre flat triangles need to be flipped. This cannot be done with the 3-cycles but luckily I had found my simple technique as the first thing I had found. All that was needed was to 3 cycle the pairs so that the were either side of a single centre. The centre positioning is pretty simple and then the edge wings are just plain arduous - as you work your way through, you need more and more complex setup moves to ensure the pieces I wanted to move are in the correct positions. Eventually the setup moves are so complex that I have to write them down before I perform the algorithm otherwise I will forget what I have done and then be unable to undo it. 

In the end - I have my solved Edge turning octahedron and a huge sense of relief! I have to say that yet again Eitan has created a most fabulous puzzle and any serious twisty puzzler should buy a copy. It is not an easy puzzle (certainly no intuitive like most edge turners) but definitely solvable with a bit of experimentation. I really need to add another chapter to my advice to a beginner series to include a few of the puzzles produced since my original post. I may need some help with that if anyone wants to help me. Now I need to get the courage to try a jumbled scramble and solve. I suspect it will take me some time to get the courage together for that!!!


Sunday, 5 March 2023

Pac'ing Almost by Accident

4 PAC by Hajime Katsumoto
This one was Allard's fault! He organised an MPP and I saw the puzzle there and after a very quick fiddle decided I HAD to have one. Mrs S is gunning for Allard for causing yet another toy to arrive in Sheffield. As I wrote last week, I had seen this one receive a prize in the 2021 IPP design competition and forgotten about it until that MPP and then chatting with Tom Lensch (who had made it) and ended up buying several wooden delights. 

It is quite a chunky puzzle compared to Katsumoto-san's previous delights - these include the amazing Penta in a box and Slide packing puzzles which I reviewed here back in 2016 or the 5L Box reviewed here in 2020. Tom's lovely sturdy construction has a box with dimensions 10.4x7.4x7.0cm with the 4 Pacmen all being 6cm diameter and 3cm thick. The aim, clearly is to insert all 4 of the Pacmen into the box through a hole that is just the size to allow a single one through at a time. There are a bunch of hokes in the top, bottom and sides to allow finger poking and manipulation of the pieces. It looks pretty simple really - I could not immediately see what all the fuss had been about but knew that to achieve the accolade and reviews that it had, there must be something special to it. 

Having established early that this was not as simple as it looked, I moved onto the other arrivals so as to have something for the blog. I was relatively horrified when other puzzlers mentioned that they were significantly struggling with it. I finally got a chance to play properly and started (as I am sure that everyone does) looking for ways that the Pacmen could interlink to allow them to fill a 2x2x3 unit space before trying to find ways to get them in to said space through a small hole. It transpires that there are a few very nice pretty ways to arrange the pieces and they all looked problematic. I did wonder whether there would be enough space to make them spin on each other once inside the box and quickly found out that nope! this was not a possibility without cracking the acrylic lid.

This finding ruled out my first attempt at a solution but I had a couple of others up my sleeve and tried those one after another. This was fun until I realised that none of those solutions were achievable either. At one point, during an exhaustive search for a way to flip a pair of Pacmen, I did something that looked fabulous and then went nowhere. I then spent a good 30-45 minutes desperately trying to undo the move I had done - it was really quite tight and needed the piece arrangement just perfect to be possible. This frightened the crap out of me again and I determined not to try that again.

I was stuck - just as Allard had been stuck for a while. It is very straightforward to put 3 inside but after that there seems to be no movement possible. The placement of the last one is very obvious as soon as you begin to think© about it but leaving that space with the others seemed to be impossible. I spent another week in this position trying inside and outside the box.

I was so stuck that I took out another puzzle that has frightened me to death for a few months - Eitan's edge turning octahedron looks a fearsome puzzle and I had been too fearful to even investigate it but I needed to think about something else for a while and decided to try a few algorithms to clear my mind.

Having tried a few things on that like the edge piece series, a variant of the corner piece series and looked for a way to make a commutator. I decided it was time to go back to 4 PAC. As always, it just looked so simple. The pieces are cylinders with 90º wedges cut out, the box is a 2x2x3 container - how hard can it be? I kept fiddling and even braved my previous awkward move and worked out how to go back and forth with it. 

I was sitting with Mrs S one evening watching TV and idly placing pieces inside whilst trying various moves but not really trying very hard or even paying a lot of attention - I think that Wednesday Adams was distracting me when I suddenly looked down and realised that I had a new arrangement of the pieces and if I just rotated the last one then I would have it solved. Mrs S was not terribly impressed when I showed her (she thought it looked remarkably easy!)

Like Allard, I had almost solved it my accident. I had them inside the box arranged in a way that had not occurred to me to try when looking outside the box. The sequence of moves is particularly clever and the solution really totally unexpected. The sense of achievement (even if I solved it accidentally) was fabulous. In reality, I would say that you cannot solve it randomly, you do need to try certain distinct moves but the final assembly will hit you with a surprise.

If you get a chance to play with a copy then it is very well worth your while. Thank you Hajime and Tom for a fabulous fun challenge.


Sunday, 26 February 2023

Counting to 4 in the Correct Order

Number Blocks
Mrs S has been away for over a week visiting the Outlaws. She returned home yesterday whilst I was at work and this meant a  flurry of cleaning up my mess (with dozens of puzzles lying all over the house) and then making the place look vaguely presentable and doing a bit of my assigned DIY over the last few days. This has left me knackered but at least I have managed to solve a few puzzles to blog about. Today I have a lovely puzzle that was great fun and is absolutely perfect to take to work for "normal people" to play with. It's a little bit of a shock to have to finally admit after all these years that I am "not normal"! 😱😱

Recently, I had a little chat with Tom Lensch via email when I was seeking a copy of his award winning 4 Pac puzzle designed by Hajime Katsumoto. This had been very highly rated by Allard as well as appearing a few times in the EPP book. Of course, Tom always has a bunch of creations on the go at any one time and sometimes has a few toys lying around from previous batches. He talked me into purchasing a new version of the Melting Block puzzle (it has a bunch of gloriously coloured woods which I couldn't resist) as well as the Number blocks by Goh Pit Khiam.

New Melting Block
4 Pac
I immediately fiddled with the 4 Pac and realised that this was going to take some serious working out time which I didn't have straight away and suspected that the New Melting Block might be totally beyond me, so I started on the Number blocks. 

This gorgeous puzzle was created and entered into the IPP design competition way back in 2015 where it won a Jury honourable mention award. It has been reviewed by Jerry Loo who really enjoyed the solving. I am not entirely certain how I missed out on this one (I suspect that I ran out of budgeted funds or had been treated with terrible bodily harm by "she who frightens the bejeezus out of me"). I already have the Arrow blocks and the Road blocks already and very much enjoyed them. 

The aim of the puzzle is to convert one to orientation to another:
            1    2                1    2
                           →
            4    3                3    4
There are also several other orders that you can attempt but they are quite a lot simpler (although still a fun challenge). Obviously this cannot be like the traditional 15 puzzle - there is no gap to use to slide the pieces around with. Obviously something has to come out first and I discovered that by turning it over to look at the reverse of the tray: The 4 has no protrusions and then the other pieces can slide. Simple I thunk©, now I slide them into the correct position and reinsert the 4 piece. Of course, our good friend Pit would not have made it that easy - the sliding does move things about but you always get blocked no matter what direction you try. I guess that I had better take all the pieces out?

Now you can see why the puzzle isn't that simple
Maybe the tray needs to be rotated before trying my simple reinsertion? Nope, too easy - the tray just has a slot under the frame all the way around with no obstructions. Time to Think© again - ooh that's painful!

The challenge is not terribly difficult - I think it must have taken me about two hours over a couple of sittings. The lovely thing about this puzzle is that there are 2 very distinct Aha! moments before you can solve it. The first of them I came to quite quickly because whilst I'm not terribly bright, I am not entirely stupid! The second Aha! moment took much longer. I seemed to get fixated on trying one particular thing which was not going to work but I tried anyway...multiple times. Doh! Eventually I had my breakthrough and could count to 4:

I can finally reach 4!
I then brought this wonderful challenge to work where I tortured a few ODPs, nurses and medical students who needed a break from my barrage of information. It was really quite fun to watch them all go through the same process as me. The got fixated on the same problems and eventually had the same Aha! moments (occasionally with a little nudging) and were all delighted with the challenge.

This fabulous puzzle is well worth obtaining and sharing with friends if you can find a copy.


Dale Shows Passion Before Wedding Vows are Allowed

Passion Puzzle by Dale Overy
I have enjoyed Dale's company at many MPPs over the years. He sits quietly solving stuff with ease and enjoys showing off new finds and new creations. He has a particular penchant for disentanglement puzzles which is a delight for me because so few puzzlers seem to really love them. I had purchased a few little toys from him at the last MPP and promptly hidden them when I got home so that Mrs S did not see me moving a bunch of extra toys into the house after a day away. With so much work on my plate, I promptly forgot them and only found them again whilst "she who makes murder hornets fly away in fear" was away.

The Passion puzzle may look very familiar - it looks rather like the classic Wedding Vows puzzle which I reviewed in 2015. The aim is to move 1 bead across to the other side alongside its' lover. Of course, the bead will not fit through any of the holes in the puzzle. There are a number of similar looking puzzles that I have reviewed in the past but they have had very different solution paths. It is definitely not a hugely tough puzzle compared to the monstrosities that I have acquired from Aaron Wang or some of the worst of the sadly missed Livewire company puzzles. But the challenge is really quite fun and, dare I say it, probably suitable for beginners or non puzzlers.

The fun thing for me is the realisation that this lovely challenge is one step before the Wedding vows. You definitely need to go through the Passion puzzle stage before reaching the Wedding vows:

Very clever.
I still have a couple of others to play with from Dale that will keep me jingling and annoying "she who can freeze a lake with just a look". Whack! Ouch!

Type 4 Zig-zag design by Dick Hess

I have no idea what it is called - it's in Czech


Sunday, 19 February 2023

The Vault Has No Room Inside

I Get A TIC Trying To Open It

TIC Vault by Andrew Crowell
I sort of knew that this puzzle creation was being developed but had no idea when it would be released. Andrew doesn't seem to market his toys very much and I heard nothing about it. I guess it will have been mentioned on the Discord but I just don't have time to visit it any more than once in a blue moon which probably means that I miss out on a lot of stuff. Luckily for me, at Peter Hajek's End of Year Puzzle Party, the TIC Vault was mentioned in the list of people's favourite puzzles of 2022 six times and  was the favourite for Goetz, who has absolutely impeccable taste that very much overlaps with mine. I contacted him and was told that some were being made and would be available soon and to keep an eye out for when they go on sale. I was very lucky to get one and took delivery at the end of January.

This puzzle is a triumph of 3D printing - it is stunning! The Vault itself is a deep Navy blue and has the characteristic 3D printing layers on it with a black central area circumscribed by a red circle inlay. The sides have very smooth inlaid patterned inserts which break up the layering. It really is pretty attractive and surprisingly heavy - I suspected there might be quite a few magnets embedded in it (one can be seen on the picture above). It is 5x5x2.88 inches in size which upset Mrs S as it will take up even more space that I don't have!  

It arrived with another of Andrew's colourful cards describing the challenge:

1. Unlock the vault
2. Find Your Unique ID Number

Rules: No external tools, excessive force, shaking or spinning is necessary.
Fab, I Thunk! Reach in to the handy gripping sections for the nice quartz finish TIC in the middle. Grab and pull and nope...that ain't coming out of there that easy. Maybe the centre rotates and releases it? Nope! Maybe holding it in different angles or upside down will release it? You guessed it...Nope! My next attempt would involve spinning but that's not allowed/needed. I'm not sure that I want to waste a whole bottle of gin submerging the puzzle and really doubt that Andrew would be that devious. I am obviously missing something. But what?

And here I got stuck all of my first day of playing with it. I tried the same things over and over and over again of course but the answer was still Nope!

Maybe it would work another day? So I left it until the next day and again tried all the same tricks. Still nope!

This went on for 4 days in total and I began to think about tearing my hair out before remembering that I don't have enough to get hold of. I suspected that hair would not play a part in the solution and so I went back to Allard's think©ing trick. It hurt but I remembered a mechanism used previously by other puzzles and tried that. Initially, I tried it in the wrong place but kept at it all over the place and I had found a tool - it looked remarkably like a piece of the cube in the middle. One thing about this tool though...it had a funny shape on the end and a magnet embedded in it - Aha! I needed to try and use this tool next. Fortunately there are only so many places left for using the magnet and I found a couple of areas that caused a clicking noise. Despite a lovely and repeatable clicking noise, nothing else was changing. I could tell that I was going to exhaust my think©ing organ!

I tried something else and got my wonderful Aha! moment and visibility of a clever mechanism that had been used to lock it inside. I now had yet another tool. Now what could I do with that? Removing it had revealed some interesting stuff inside but nothing reachable with the tools I had. I know it's hard to believe but I got stuck again! Yes, being not terribly bright is not very helpful when solving complex puzzles.

After another day or so I noticed something slightly odd and tried to use it in various ways with no luck. But then the earlier clicks suddenly made sense. I had another tool/piece and then finally the cube pieces were all removable. Now I obviously had a TIC - lots of pieces. Lots and lots of pieces which had a very odd feature. Counting the voxels and the fancy features, I realised that something was missing - it was still in the vault and required a simple move to remove it. I had this:

Lots of pieces, lots of magnets and some odd slots
It was immediately clear that the TIC pieces needed assembly first. There were 3 pieces with slots in them and magnets at the end plus 3 pieces that would obviously engage into those slots and lock at the ends. BUT (a very big BUT) which went where? I am absolutely terrible at assembly puzzles and this challenge stumped me for quite a long time. Yes, embarrassingly it took me a week to work it out and get my TIC pieces assembled and then the TIC rearranged into another cube. My excuse for the long challenge is that whilst all the pieces are quite simple, it is quite tough to arrange them into a cube without interlocking them first and I struggled to visualise the shape they would make. Don't look if you don't want to see the assembled cube.


After that it was clear that the cube would interact with the vault (Nothing else was possible with the empty vault and moving the cube around the outside of it or underneath did nothing. I returned the cube to the vault and apart from a huge number of clicking noises, it did not do anything. I was obviously going to have to try other orientations. Was I going to have to try each face down and in 4 different directions? After another little think I had another a realisation that probably attempting 24 different ways to reinsert the cube was not what was intended. I thought, I saw, I conquered and another Aha! moment happened. This was really really clever. I had a coin telling me the puzzle was a TIC Vault but did not have my unique ID. Looking at what I had, a "what if I?" question occurred to me. There was a particular feature of the vault that did not seem to be necessary unless I used it in a certain way.

Aha!
Now that is absolutely wonderful! I had my unique ID and could see how the puzzle worked. It is a masterpiece and I have a candidate for puzzle of the year already! It's looking like 2023 might be a really good year!

All solved - I left my coins outside so will have to solve it again to return them
The reassembly is much easier to complete but still fun. This is an absolutely wonderful puzzle and I will challenge some people at work to play with it if we have any downtime - will go on display with the rest of my ARCPuzzles and be a centrepiece. Thank you Andrew for a wonderful odyssey that took me nearly 2 weeks to complete. Wonderful!


Sunday, 12 February 2023

Japanese Packing Causes Some Difficulty

Shutout by Osanori Yamamoto
Today will be a really really quick post - I spent 8 hours yesterday sitting at my computer doing the worst puzzle ever and I am fed up with sitting down and fed up with typing. Yes, it was that time again - time to write our consultant anaesthetist on-call rotas and it was a nightmare. This one covered Easter and various school holidays including 5 public holidays in the 2 month period. The numbers of colleagues are rather depleted and there were a LOT of requests. At the end of that I wanted to run away!

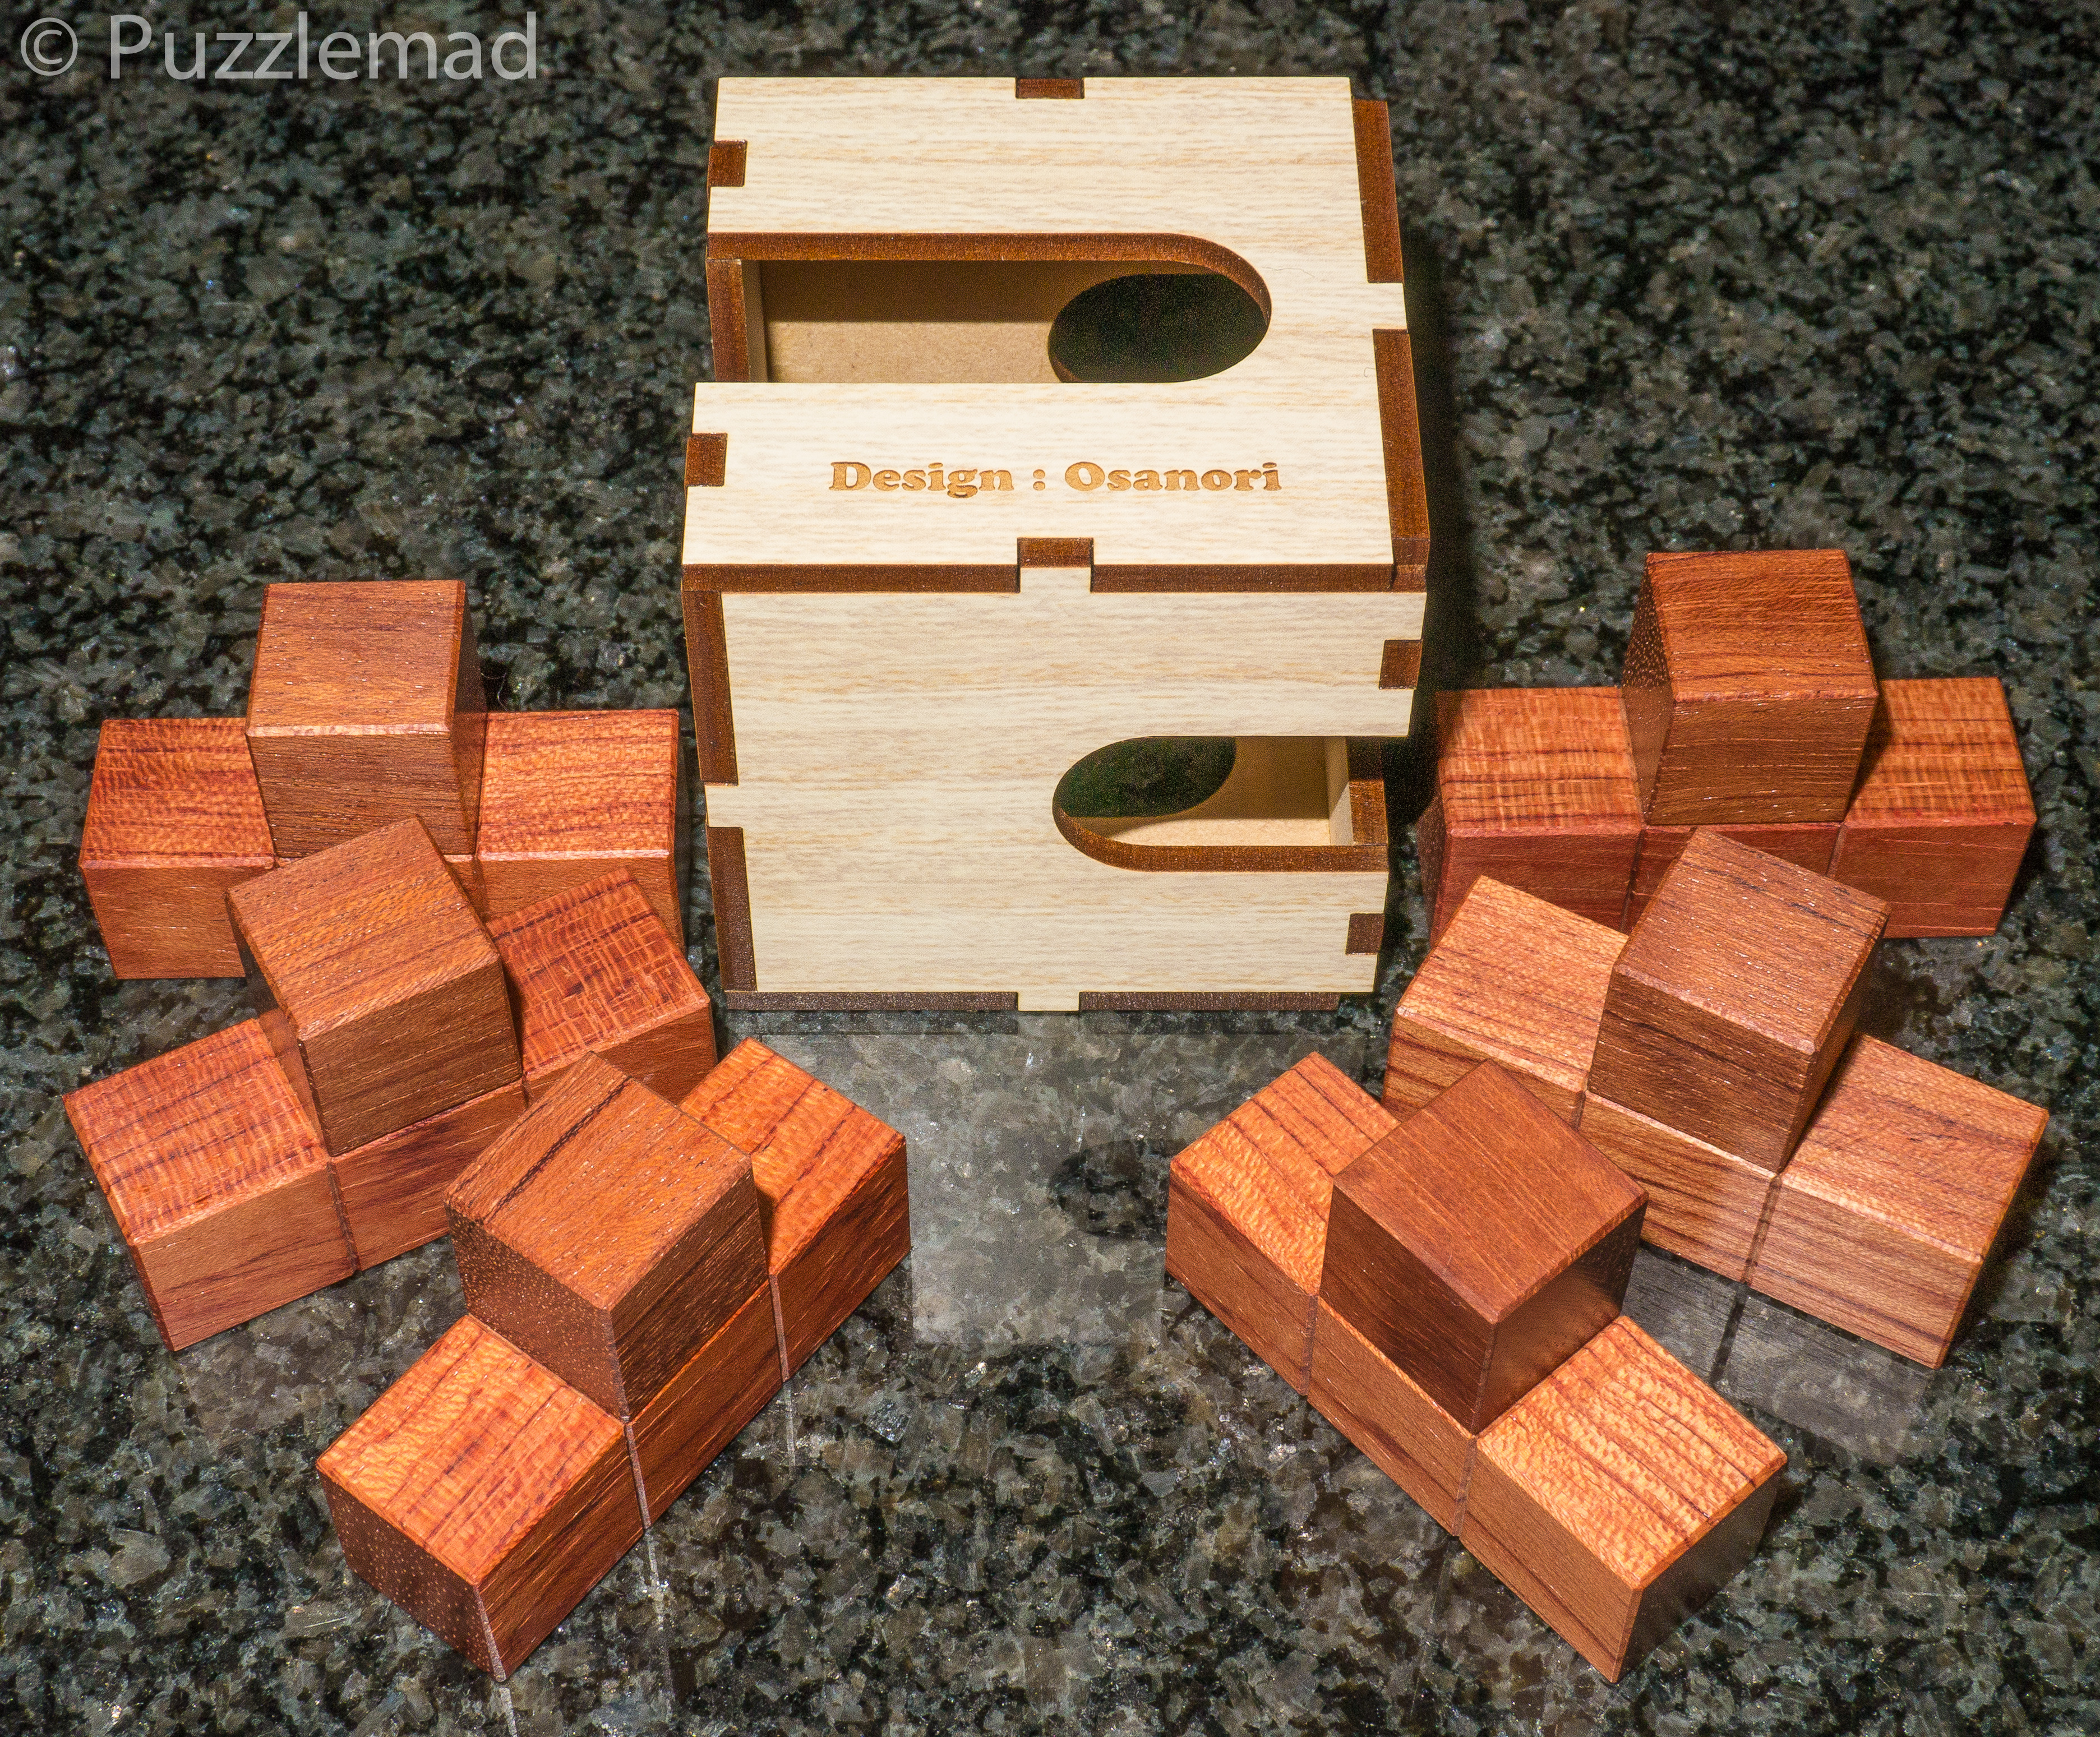
Today I will write about my first ever Osanori Yamamoto puzzle. No, not the first of his puzzles I have ever solved - this is the first puzzle that has been actually made by the master himself. I had seen that Osanori-san's Shutout design had won a "Top 10 vote getter" prize in the 2022 IPP Design competition and I had been intrigued. I have solved quite a lot of his designs over the years and only a few had either been entered into the competition and fewer still had won a prize. I sort of forgot about it until the end of last year when at Peter Hajek's end of year puzzle party the Shutout was shown off by Naoaki Takashima as one of his puzzles of 2022 and looking through the EPP book there were 3 other very serious puzzlers who had announced this as one of their best (they were Boaz Feldman, Theo Geerinck and Guy Loel). When Naoaki-san had showed it off he had announced that he had placed a few of the pieces inside and couldn't even work out how he had done it and couldn't remove them. How could I possibly resist? I contacted Osanori and asked if he would make some more and send one to me. Like a true gentleman he just asked for a bit of time and would let me know when. The postage from Japan was quite ferocious!

Delivery arrangement
It is very nicely made with an MDF box and a lovely grained set of wooden pieces. When it arrived I was slightly surprised to see that it had been sent out in the solved position and went back to the Design competition page to read the aim:
"Build an apparent 3x3x3 block inside the box. (The opening of the box is completely filled and any empty space is hidden within the box.)"

Ah, there is the difference. The arrival position had an obvious gap visible and the aim was to take them out and return them with no holes visible. With 6 tetrominoes there would be 3 gaps in the cube and they all needed to be under the sides of the box or in the centre. 

Initially I struggled to actually take the pieces out of the delivery packing which did not bode well for the main challenge. OK - start outside the box. There are a good few ways to arrange the pieces in a 3x3x3 cube and obviously each one can be oriented in lots of directions inside. First find an organisation that would leave the gaps covered - I found 2 and started to work out how to get them inside. Of course I started on the wrong one because I'm an eeejit and it only took me about an hour to realise that my proposed solution was obviously impossible. Doh! By this time I had forgotten my other arrangement and I had to find it again. I was certainly getting my money's worth.

I eventually found my arrangement and worked on assembling it inside. OMG! This was quite tough - I had failed to notice one of the cardinal features of the box which is immediately obvious from my photos - Doh again! and spent quite of time attempting the impossible. I finally realised what I was doing and tried again only be stumped for a couple of hours. There are sliding moves but also TIC moves inside the box. Solving this puzzle took me a whole afternoon of fun and frustration. I am sure that most of you brilliant puzzlers out there would manage it in about 30 minutes but little me...about 4 hours! This puzzle was at least as good as, if not better than most of the other Yamamoto puzzles that I have in my collection made by various other craftsmen.

No spoilers here!
Having taken my photos, I dismantled it and tried to put it back in the travel assembly. Embarrassingly, this took me a little while. It had been quite a while since I had taken it apart and it does require a bit of thought just for that part. This makes this puzzle doubly worthwhile. I have solved it a few times now and it has required me to work it out each time and whilst it no longer takes me 4 hours, it still takes an embarrassingly long time. I think I might just take this to work to torture some colleagues.

If you can get hold of a copy then this would be well worth your while - great for a collection and a really fun challenge. 

Sunday, 5 February 2023

Something for Everyone From Pelikan

OMG! Sooo beautiful - Plus one more that I couldn't easily arrange as I am in mid solve
I have been lucky enough yet again to get advance access to the latest creations from Jakub and Jaroslav's amazing Pelikan factory. This time we have 8 incredibly beautiful challenges varying from the simple and quirky to the unbelievably difficult. There is something for everyone here. 

Luckily for me they arrived in 2 batches. The first 6 arrived 2 weeks ago with a warning not to write anything yet due to delays of the whole release caused by sickness. This certainly made it a little less fraught for me and I have solved those first ones in a leisurely fashion over that 2 weeks. Then unexpectedly another 3 arrived with a request that Jakub would like the solutions as soon as possible. I have been feverishly trying to solve 3 of the hardest ones in the week. There is something for everyone here - if you like burrs then there is something from easy to challenging but fun right up to the OMG difficult. Packing puzzles as well with something that I managed fairly easily to another that is fabulous but really tough.

On we go:

Imogen's Cube

Imogen's Cube by Alfons Eyckmans
         Incredible design and incredible manufacture
Imogen's cube is one of Alfons Eyckmans amazing interlocking cubic designs which he names after significant people - this one was designed and named for the daughter of a puzzling friend. I had already bought this one from Alfons several years ago and have so far failed to dismantle it. I was astounded when I took this out of the box! It is stunningly beautiful made from multiple hardwoods. There is a frame and several interlocking sticks crossing each axis of the puzzle with 4 crossing one direction, 3 in another and 2 the final one. There is a lot of movement in this right from the very beginning and I have managed to get myself lost several times during my to and fro approach to solving these. On several occasions I have found myself with a stick a long way out and nowhere to go but then unable to work out how to get it back in again. The solution level is not astoundingly high but the sheer amount of movement and blind ends seems to have made this really tough for me. In fact I have yet to solve it. For those of you who are really keen on burrs/interlocking solids or those of you who want something truly gorgeous for the display then this will be a must have.

Lucia

Lucia by Alfons Eyckmans
Another incredible design showing the skills of Alfons. This seems to be something new from him. I have seen him design a number of interlocking cubes and various burrs over the years but I have not really seen him spend much time on a rather special and enjoyable type of 6 piece burr. These have the sticks based on a 3x3x8 voxel grid which allows the construction of the obstructing marts to be much more intricate and more like a maze to navigate. The first one like this was the Dracula from the last release (which is still in stock). This has been beautifully crafted from Acacia with a lovely grain. The exploration is fun and with a level 10.3.2 the disassembly is fun without being too difficult. For those of you with some real burr skill, I definitely recommend scrambling the pieces and after a break attempting a reassembly. It is tough but even I managed it with only a medium struggle.

Pin-up Box

Pin-up Box by Lucie Pauwels
This delightful little packing puzzle by the amazing Lucie Pauwels really packs quite a punch. It is surprisingly heavy for its' size (85x36x46mm) which I presume is due to the density of the Jatoba box. The pieces are made from Wenge and there is a beautifully made pin made withMaple and Bubinga. The pieces are a small subset of the Soma pieces with 4 of them having a hole drilled through. The aim is to assemble the pieces inside the box leaving space for the pin to be poked though the hole into the piece which lines up with it. There are obvious 4 different solutions depending on which piece you wish to pierce. I found this a delightful little challenge to try in the evenings and finding the final one took me a surprising amount of time (but then I am usually terrible at packing puzzles). This is a lovely puzzle for beginners and experienced puzzlers alike.


Lucie has contacted me free I posted this to correct me and tell me the true aim:
"The goal of the Pin-Up Box is to pack everything inside and fix with the pin, in a way that nothing drops out when you hold the box upside down. Four pieces with a pin-hole, each giving a solution."

Time to try again! 

Turtles

Turtles designed by our very own Jakub
This one is very cute. Jakub decided that he wanted to turn his hand to puzzle design himself and created something delightful. Turtles reminds me of the Bison puzzle from Xmas 2021 - it is a sequentially interlocking puzzle created from Wenge and Acacia. The secret is to find the way to remove the first piece and then it will serially disassemble. In the end you are left with a bunch of rather interesting pieces and a genuine laugh out loud moment when you suddenly realise what the guys have done. When I showed Mrs S, even she was delighted with the end result. It is not a difficult puzzle but it is genuinely delightful.

Timburr

Timburr by Christoph Lohe
There seems to be no end to the design skills shown by Christoph Lohe. His interlocking/burr puzzles are always relatively simple in basic outline shape but the design of the solution is always a wonderful and very fun challenge. Over the years he has produced a bunch of burrs with frames and they have all been brilliant. I think that the Timburr (beautifully recreated here by Jakub from Purpleheart, Padauk, Wenge and Ash) is one of his very best designs. The solution level is a very high 31.3.1.3.3.3 which is astonishing for just a 6 piece burr. Despite the high level and a fair number of dead ends at first, finding the pathway is a pleasant exploration and has 2 or 3 lovely Aha! moments in the process. It took me a couple of evenings to dismantle it.

It looks so simple!
Unfortunately for me, having balanced the pieces on my cat as I sequentially removed them, he rolled over and they all slid off into a pile. Despite this, I was actually able to reassemble the puzzle from scratch with only a couple of days attempting to place the pieces the wrong way around. I found the reassembly challenge even more fun than the initial disassembly (although I very much doubt I could have managed it without having done that first). This puzzle is simply fabulous - one of my favourites in this batch.

Cerberus

Cerberus by Girish Sharma
Girish is a relatively new name to me. I noticed that he suddenly appeared in the IPP design competition winners list this year with what looks like either a TIC or sequentially interlocking cube puzzle. Here we have another interlocking cube puzzle made from Wenge, Padauk, Acacia and Maple. I have always adored these puzzles ever since I got hooked by Richard Gain's microcubology puzzles way back at the beginning of my puzzling career. Initially, I could only disassemble them and over the years got better and better and even enjoy them as assembly puzzles. One of my all time favourite interlocking puzzles is one of Juha Levonen's designs - the Juha's 12. This puzzle has a special piece which marches up and down through the other pieces during the solve process and is absolutely wonderful to play with. The Cerberus by Girish left me with a similar feeling. The pieces move all over the place and one piece in particular marches through. Once it has been removed (after 25 moves) it takes another 5 to remove the second and then 4 to finally separate the last 2 pieces:

Absolutely stunning design and beautifully made
This puzzle was probably my absolute favourite from this release. I am really looking forward to any new creations from Girish in the future.

Umbrella

Umbrella by Tamás Vanyó
On Facebook, Tamás has been designing and producing some absolutely incredible challenges and has worked with Pelikan over the last year to bring them to reality for us all to enjoy, however, I have not seen him design a packing puzzle before. I was surprised and delighted to see the Umbrella amongst the latest arrivals. This packing puzzle has something special which is just what I would expect from Tamás - all the pieces have a unique box like design which allows them to be changed into 2 different shapes. The workmanship required to create this puzzle is astounding - the American Walnut L shaped pieces have a stem and a box round that stem which slides freely into each of the two positions. All the pieces need to be placed into the Ash box. There are quite a lot of solutions and it is a rather delightful soothing process to try and find them. There is always a single voxel gap inside and I have attempted to find solutions which have that gap in various different positions. This is a lovely idea and fun for all experience levels.

Just one of the solutions

Stuffing Burr

Stuffing Burr by Volker Latussek
It would seem that no release from Pelikan is complete without something from Dr Latussek and you will not be disappointed this time. We are all delighted when the good doctor creates yet another of his impossibly difficult packing puzzles (I have still not solved Fermat or Euklid for Nick) but here we have something completely different. It is called a burr but is it really? This nice chunky puzzle is made from absolutely gorgeous Purpleheart and consists of 2 pairs of identical L-shaped pieces which have notches cut into them. The aim is to assemble a shape that allows all the notches to be filled. Only four pieces in the burr and only 8 notches...it must be easy? Not for me it wasn't! Would you expect Volker to release an easy puzzle? This was one of the puzzles that arrived earlier this week and I had limited time to play. There is a shape that absolutely screams to be assembled from these pieces - I tried and tried to assemble it and got nowhere. Back to the drawing board and time to totally change my approach - think© differently which is not one of my strong points. It took me a couple of evenings of play before I had my Aha! moment. It really is quite elegant and, in the end, not as tough as I had imagined but really quite clever.

Tube in Cube

Tube in Cube by Volker Latussek
The name of this was at the suggestion of Allard who I assume must have helped with some prototyping. This name is much better than the original and whilst the pieces are not hollow, it is a good description of what needs to be done. Dr Latussek was heavily influenced by the now classic puzzle by Vesa Timonen, Lox in Box which has cylindrical wooden pieces to be packed into a tray. Volker with his amazing 3D design skills really wanted to turn this into a more difficult packing puzzle more than just fitting pieces into a tray. When he knew that I was going to receive a copy he contacted me with his origin story:
“Place the eight logs into the box.” This is the simple goal of the wonderful packing puzzle LOX IN BOX by Vesa Timonen. These round rods, beveled on one side, are just crying out to be twisted out of the plane. I wanted to find eight round rods that would fit into an open cube-shaped box. And to do it in a unique arrangement. For this job, I needed to understand the shape of these round rods. At times I was convinced a nice mix of eight round rods would fit into the cube in a particularly clever way, only to learn that by tilting, rotating and swapping, other fillings could be obtained. Those round beveled rods can hurt. In the end, a mix of round rods with only two different lengths won out. Unfortunately, after that, I wondered why I wasn't using my typical box. A new problem was formulated and an intensive collaboration with Pelikan ensued.

The result is TUBE IN CUBE. For this, one round rod had to be shortened. This is not pretty, but in return the round rods unfold their full beauty in the restricted box, at least the part I was allowed to discover. If you want to experience the beauty of the round beveled rods, I highly recommend practising with two rods first and only then successively increasing the number...and so my story ends as it began: “Place the eight logs into the box.”
An amazing design and wonderfully brought to life
Volker was not wrong! This puzzle is a fabulous creation and is tremendously difficult without being impossible. The shapes scream out for experimentation in pairs and different combinations but assembly outside the box is impossible because everything is very unstable and rolls all over the place. However, despite this, you get enough ideas to then start assembling in the box. It is also a dexterity puzzle - the pieces just do not want to stay in place (in fact I have really struggled just to get the thing back to the travel position). As you play, it becomes obvious how the short pieces can interact and then it is a matter of working out how to get them inside. Lots of different ideas spring to mind as you play but always the last piece cannot be inserted - not just because the lid gets in the way, but because there is simply no room inside for that piece. Eventually there is an incredible Aha! moment and with a lot of fiddling about the final piece can go inside. The precision is amazing and they only just fit inside the box. This is also my pick from the bunch.

Moving Castles

Moving Castles by Tamás Vanyó
Yes, I am sure that this is one of the puzzles that you would expect from the amazing design brain of Tamás Vanyó! This is the third of his castle collaborations with Pelikan. I have to admit that I have not had much time to try this one yet. It consists of 9 pieces to fit on a frame. Each piece has the same basic structure with a waist that is 2x2 voxels in size which will fit into the frame and then on either side of that waist are the wonderful characteristic castle shapes based on a 3x3 grid. This puzzle is not quite as straightforward as that because they have added an extra twist. There are 8 ways to place the pieces on the frame but the extra challenge is to organise them in such a way that can walk through the entire castle from START to STOP (i.e. create one continuous path using both sides of pieces). There is a start mark on the frame and a small arrow which serves as a sort of "checkpoint" telling you to flip over as it's on the opposite corner of the start and end. 

So far I have managed to assemble all the pieces on the frame which alone was a nice fun challenge but I have certainly not gotten anywhere near creating a path all the way around the puzzle from beginning to end. I think this might well take me several weeks to complete. The assembled puzzle on the frame looks like one of MC Escher's impossible 3D creations and even unsolved looks beautiful on display.


There are some absolutely amazing puzzles here and all have been created with the precision we have come to expect of Jakub, Jaroslav and their team. You will not be disappointed! My favourites from this batch are:
  1. Cerberus - just for the wonderful progressive movement and because I am addicted to interlocking cubes.
  2. Tube in Cube - Volker does it again and uses a new shape to make something incredibly clever.
  3. Timburr - I love Christoph's special burrs.
  4. Turtles - the Aha! moment made me laugh out loud.