Sunday, 24 December 2023

I Can See Why Elon Wants To Go To Mars...

Jupiter is MUCH too hard!

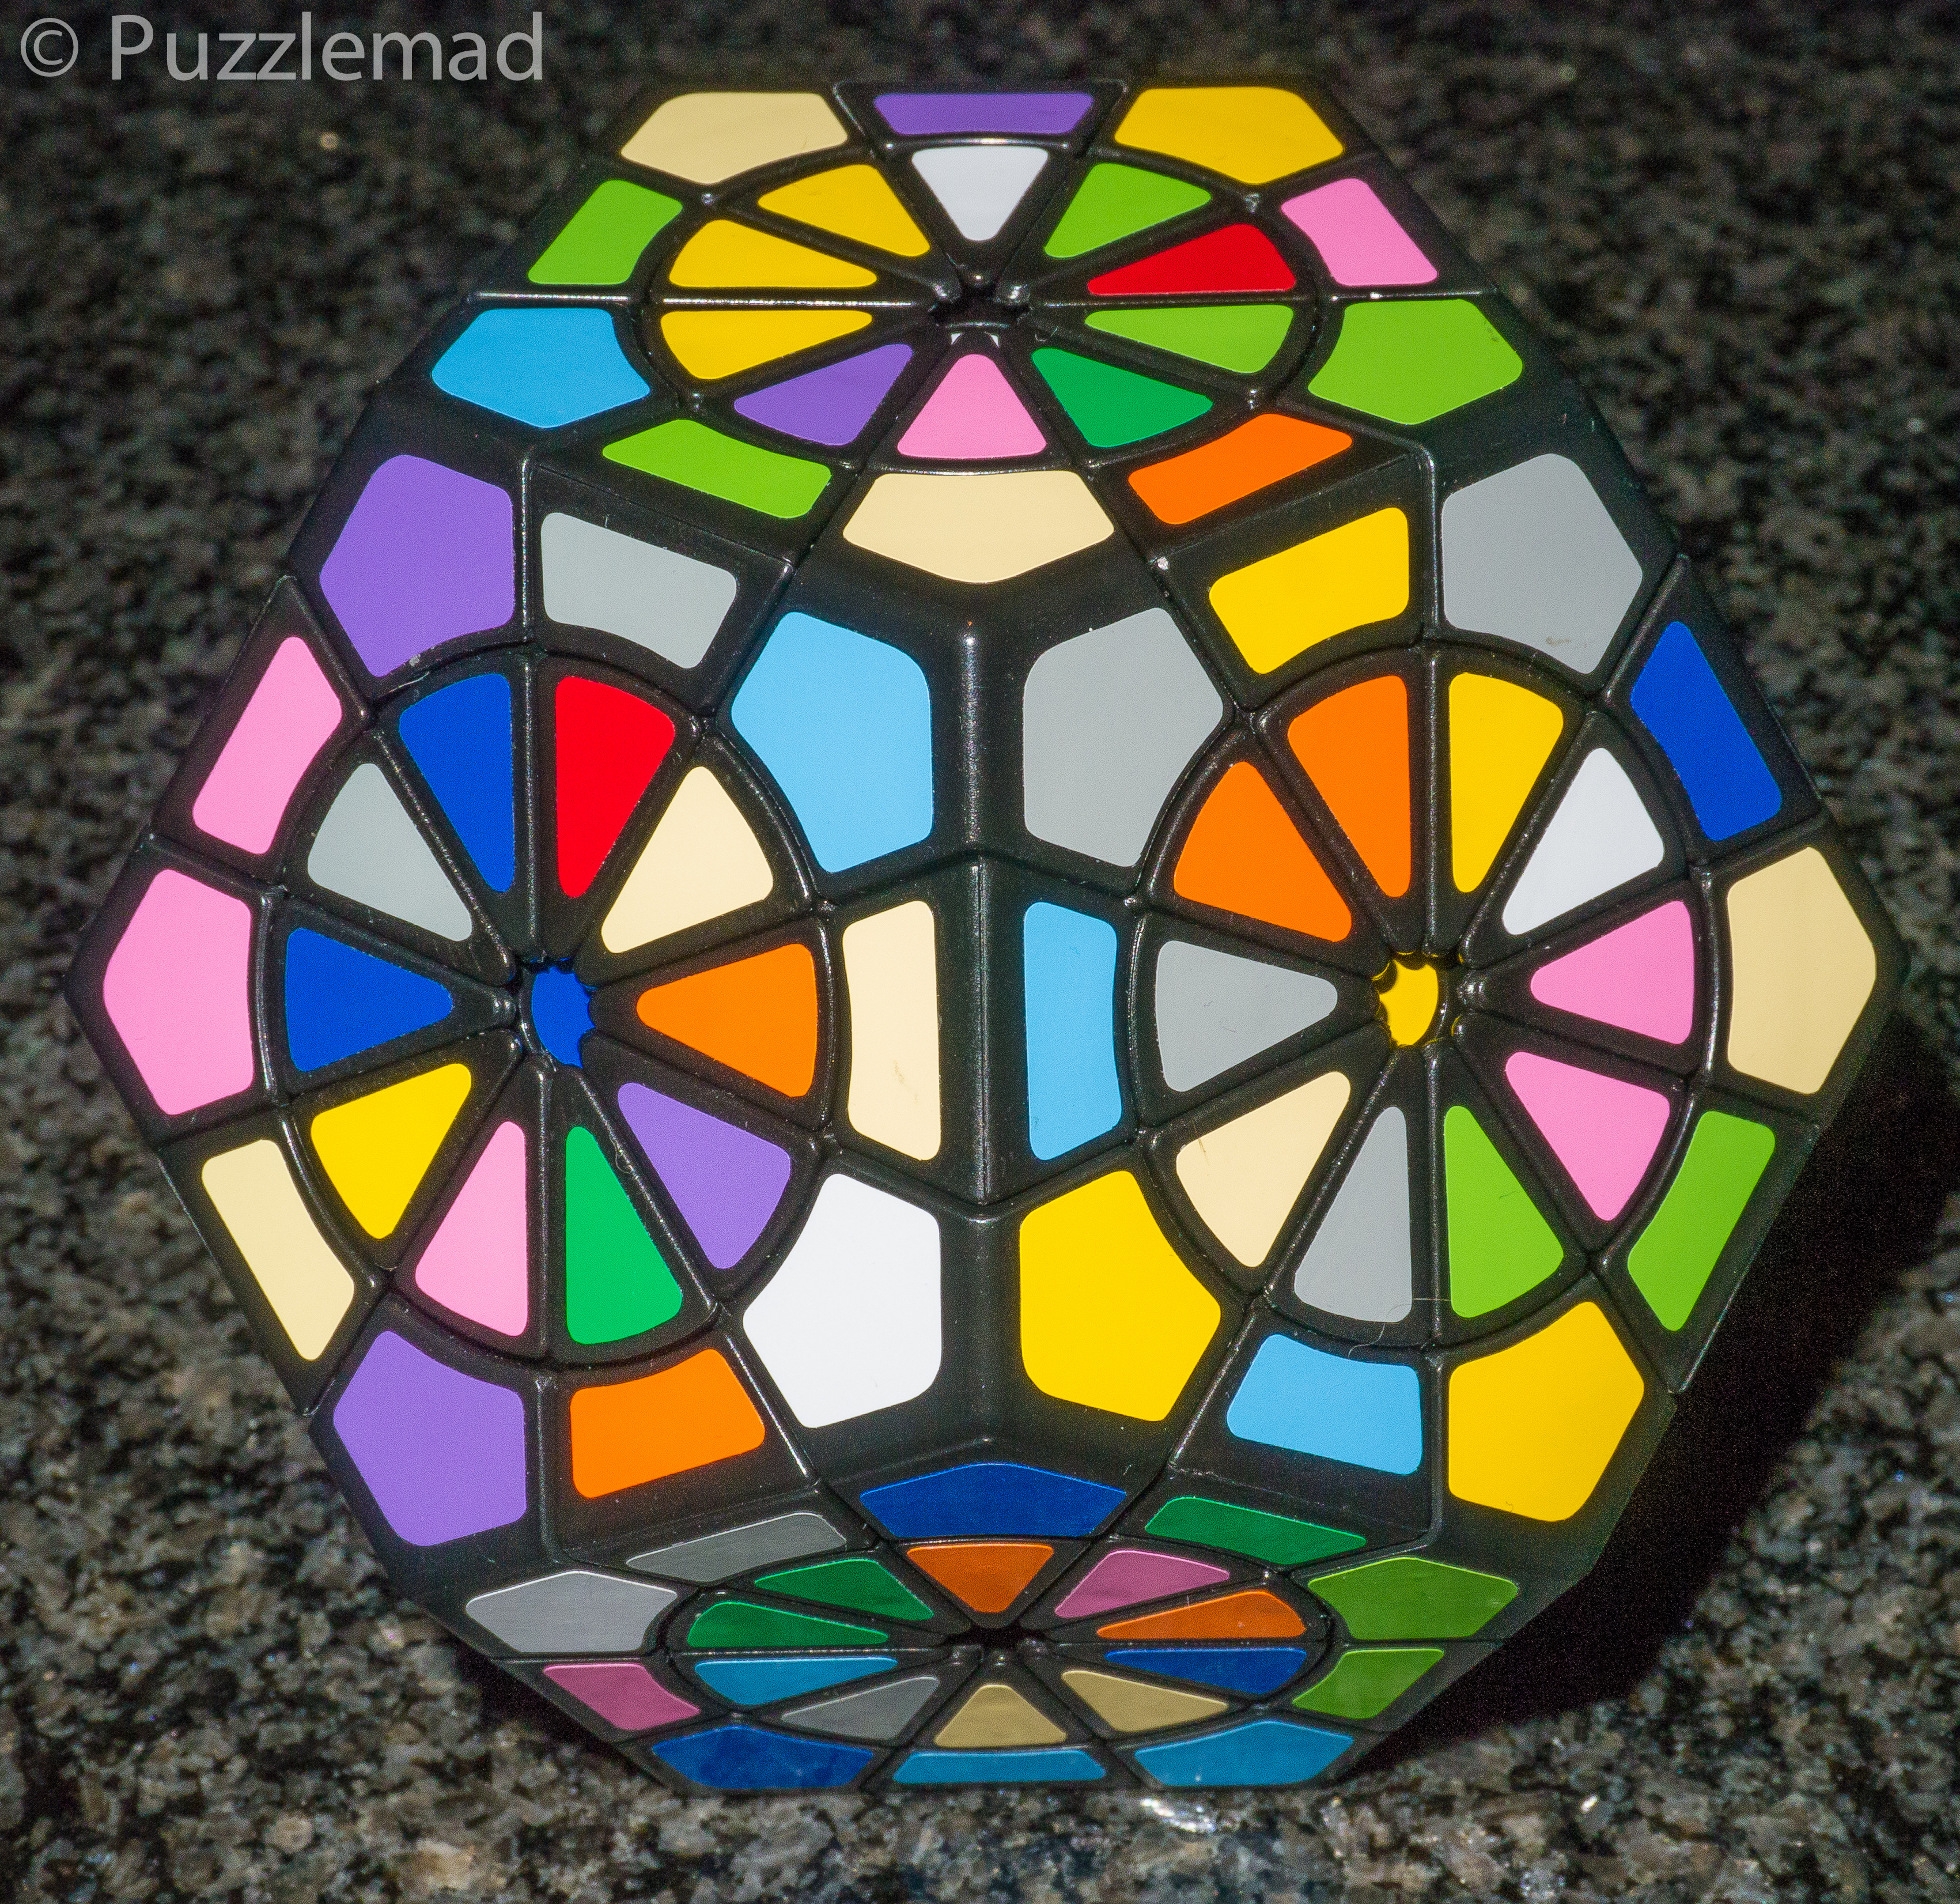
Crazy 2x2x2 Plus cubes
Thank you for your well wishes after last weeks' "too spaced out" post. I had completely forgotten how painful a hernia repair is and how long the pain lasts. I am recovering well and have stopped the stronger pain killers to allow me to think a little straighter (let's face it - my thoughts are never what one would really refer to as......ordered at the best of times). I had bought these Sengso Crazy 2x2 cubes a while ago and thought they could not be too hard and I was kinda wrong.


I reviewed the 0,0,0 variant at the end of October after spending quite a long time working out how to understand the odd way it moved. It should have been fairly easy as all the circles on the cube were zero faces (that means the inside is fixed and the outsides move around them - this means it is what is called a "circle cube" and should require just turning the outer faces and solving them having fixed the inner parts. The complicating feature was that there are ONLY outer faces and the inner circles are a sort of bandaged 3x3x3. Yes, my head hurts just typing about it!

I then scrambled the 0,1,1 version thinking that with only a single fixed centre then it should effectively solve like the Jupiter Crazy cube and Jupiter Crazy Megaminx which looked absolutely horrific but were surprisingly easy to solve as they needed only a tiny bit more than a standard cube and standard megaminx (which solves like a cube).

Crazy cube Jupiter
Crazy Megaminx Neptune reconfigured as Jupiter
The whole point of the Jupiter cube and Megaminx is that there is just one single face that will allow the inner and outer circles to be split apart. This means it takes a while to scramble the puzzle properly because all the pieces need to be moved to that 0 face and turned at least once before being moved elsewhere. But then it has the extreme solving advantage that "all" that is required to do to solve the puzzle is move all the pieces onto that 0 face and align the inner and outer parts before moving them off for storage elsewhere until all of them have been aligned with their partner pieces. After that solve the zero face before turning it to the bottom and solving the rest of the cube without moving the bottom face. If you know the beginner's approach or the "Ultimate solution" then it's pretty simple to solve the puzzle without having to move that bottom face again.

I set to the crazy 2x2x2 (0,1,1) thinking that this was effectively just a Jupiter version of the 2x2x2 crazy cubes and would involve the same sort of approach as described above. In my particular version all the faces were effectively turning as 1 faces with inner and outer parts turning together and the white face alone had the outer part turn leaving the inner circle unmoved. With my theory loudly bailing in my empty head, this meant that I scrambled it straight away without any preparatory exploration and stared trying to pair up the inner and outer pieces using just the white face. 
Oh dear, what had I done?

I suddenly realised that this was definitely not a Jupiter 2x2! It was MUCH more complex than that. The reality of this puzzle is that the zero face can change. 😱😱😱
The zero face is actually which ever face holds the white inner piece that is opposite the blue/red/yellow cube (which itself cannot ever be scrambled). OMG what do I do now? 

I have learned over many years from Allard that I mustn't just stop and give up, I must Think© - that's a pretty impressive thing to learn considering that he doesn't do twisty puzzles. Luckily, I was working on this before I had my little operation and started the mind-altering medication so think©ing was still possible. I quickly realised that, with a bit of "fannying around" (that's a twisty technical term!) I was still able to use my Jupiter face to pair everything up as I should and leave myself with what looks like a 2x2x2 cube to solve. 

This looks promising! Or is it?
Having done this, I tried the "simple 2x2x2 solve and quickly realised that it was NOT the same as the 3x3x3 Jupiter puzzle - I did not have the ability to move all faces apart from that 0 face. Any movement of a face that included the bandaged corner (blue/orange/yellow) would move the crucial white corner and move the zero face about. In reality, I had to solve the 2x2x2 using ONLY two faces - on the photo above, I could only move the front right and front left faces to solve the cube. This is a HUGE restriction and proved a massive problem. Almost every single approach that I know requires at least 3 faces to be movable. I was stuck! 

After a week or so of playing about and remembering the large corner bandaged 3x3x3 cube with one huge 2x2x2 fused corner and three movable faces, I did manage to solve the puzzle just once after multiple scrambles and failures and realised that this would be possible about 1 in 12 scrambles by just sheer chance arriving in the right solvable state. I needed more think©ing time and to work out a restricted way to solve the 2x2x2 this way. It is quite simple to solve the back 4 corners leaving just the front 4 using just intuition. At this point I realised that there was a very neat feature of this puzzle. I could not always solve that from 4 corners every time because they had been recreated incorrectly mismatching the centres and outsides. All I needed to do was use my two faces to rotate the faces correctly on that top white face and rotate out the incorrect pairing and put them back in again correctly. This then leaves you with a solvable 2x2x2 cube:

All corners placed but not oriented
Orienting the corners is a trivial thing to do when you know the SUNE algorithm - it only needs to move 2 sides. It's not quite trivial because some setup moves need to be done and undone but it is a fun thing to do (I need a notebook by my side to keep track of the moves). Using this technique, I was able to solve the puzzle multiple times - it was quite mind bending but did not require a lot more than standard cube techniques and the ability to warp my mind a lot. I was soooo pleased with myself until I did this:

All solved with 2 pieces to be swapped - impossible!
Anyone who solves cubes knows that a single 2 way swap is an impossible situation. What had I done here? In the end I had swapped out 2 pairs of pieces but one was not easily seen being the centres that move but not easily visible. 

With a little thought© and planning, I was able to move bits around (fiddly little bugger) and finally could say that I properly understood this puzzle.

These Crazy 2x2s were bought with the initial thought that they might be a little easy entry into the crazy cube series being only 2x2 cubes - I initially felt that this might a nice Jupiter solve. But in reality, having now solved 2 of them, they are definitely not a gentle introduction at all. The hidden internal bandaging makes these incredibly challenging and properly interferes with the ability to move pieces where you want them to be and use basic algorithms. If you are into Twisty puzzles then these are in the "MUST BUY" category.

Sunday, 17 December 2023

Sorry, too spaced out!

Yes, it’s time for my weekly blog post and I’ve only let you down 3 or 4 times in the last 13 years. Unfortunately, I had some surgery on Thursday and am much too spaced out on the pain killers to write anything coherent. I know that coherence is never my strong point but just now, I’m quite off my face which is amusing for Mrs S but not great for puzzle reviewing.

Hopefully back next weekend.

Sunday, 10 December 2023

Interlocking Heaven and Hell

Do you recognise those shapes?
Peanut puzzle by Stewart Coffin
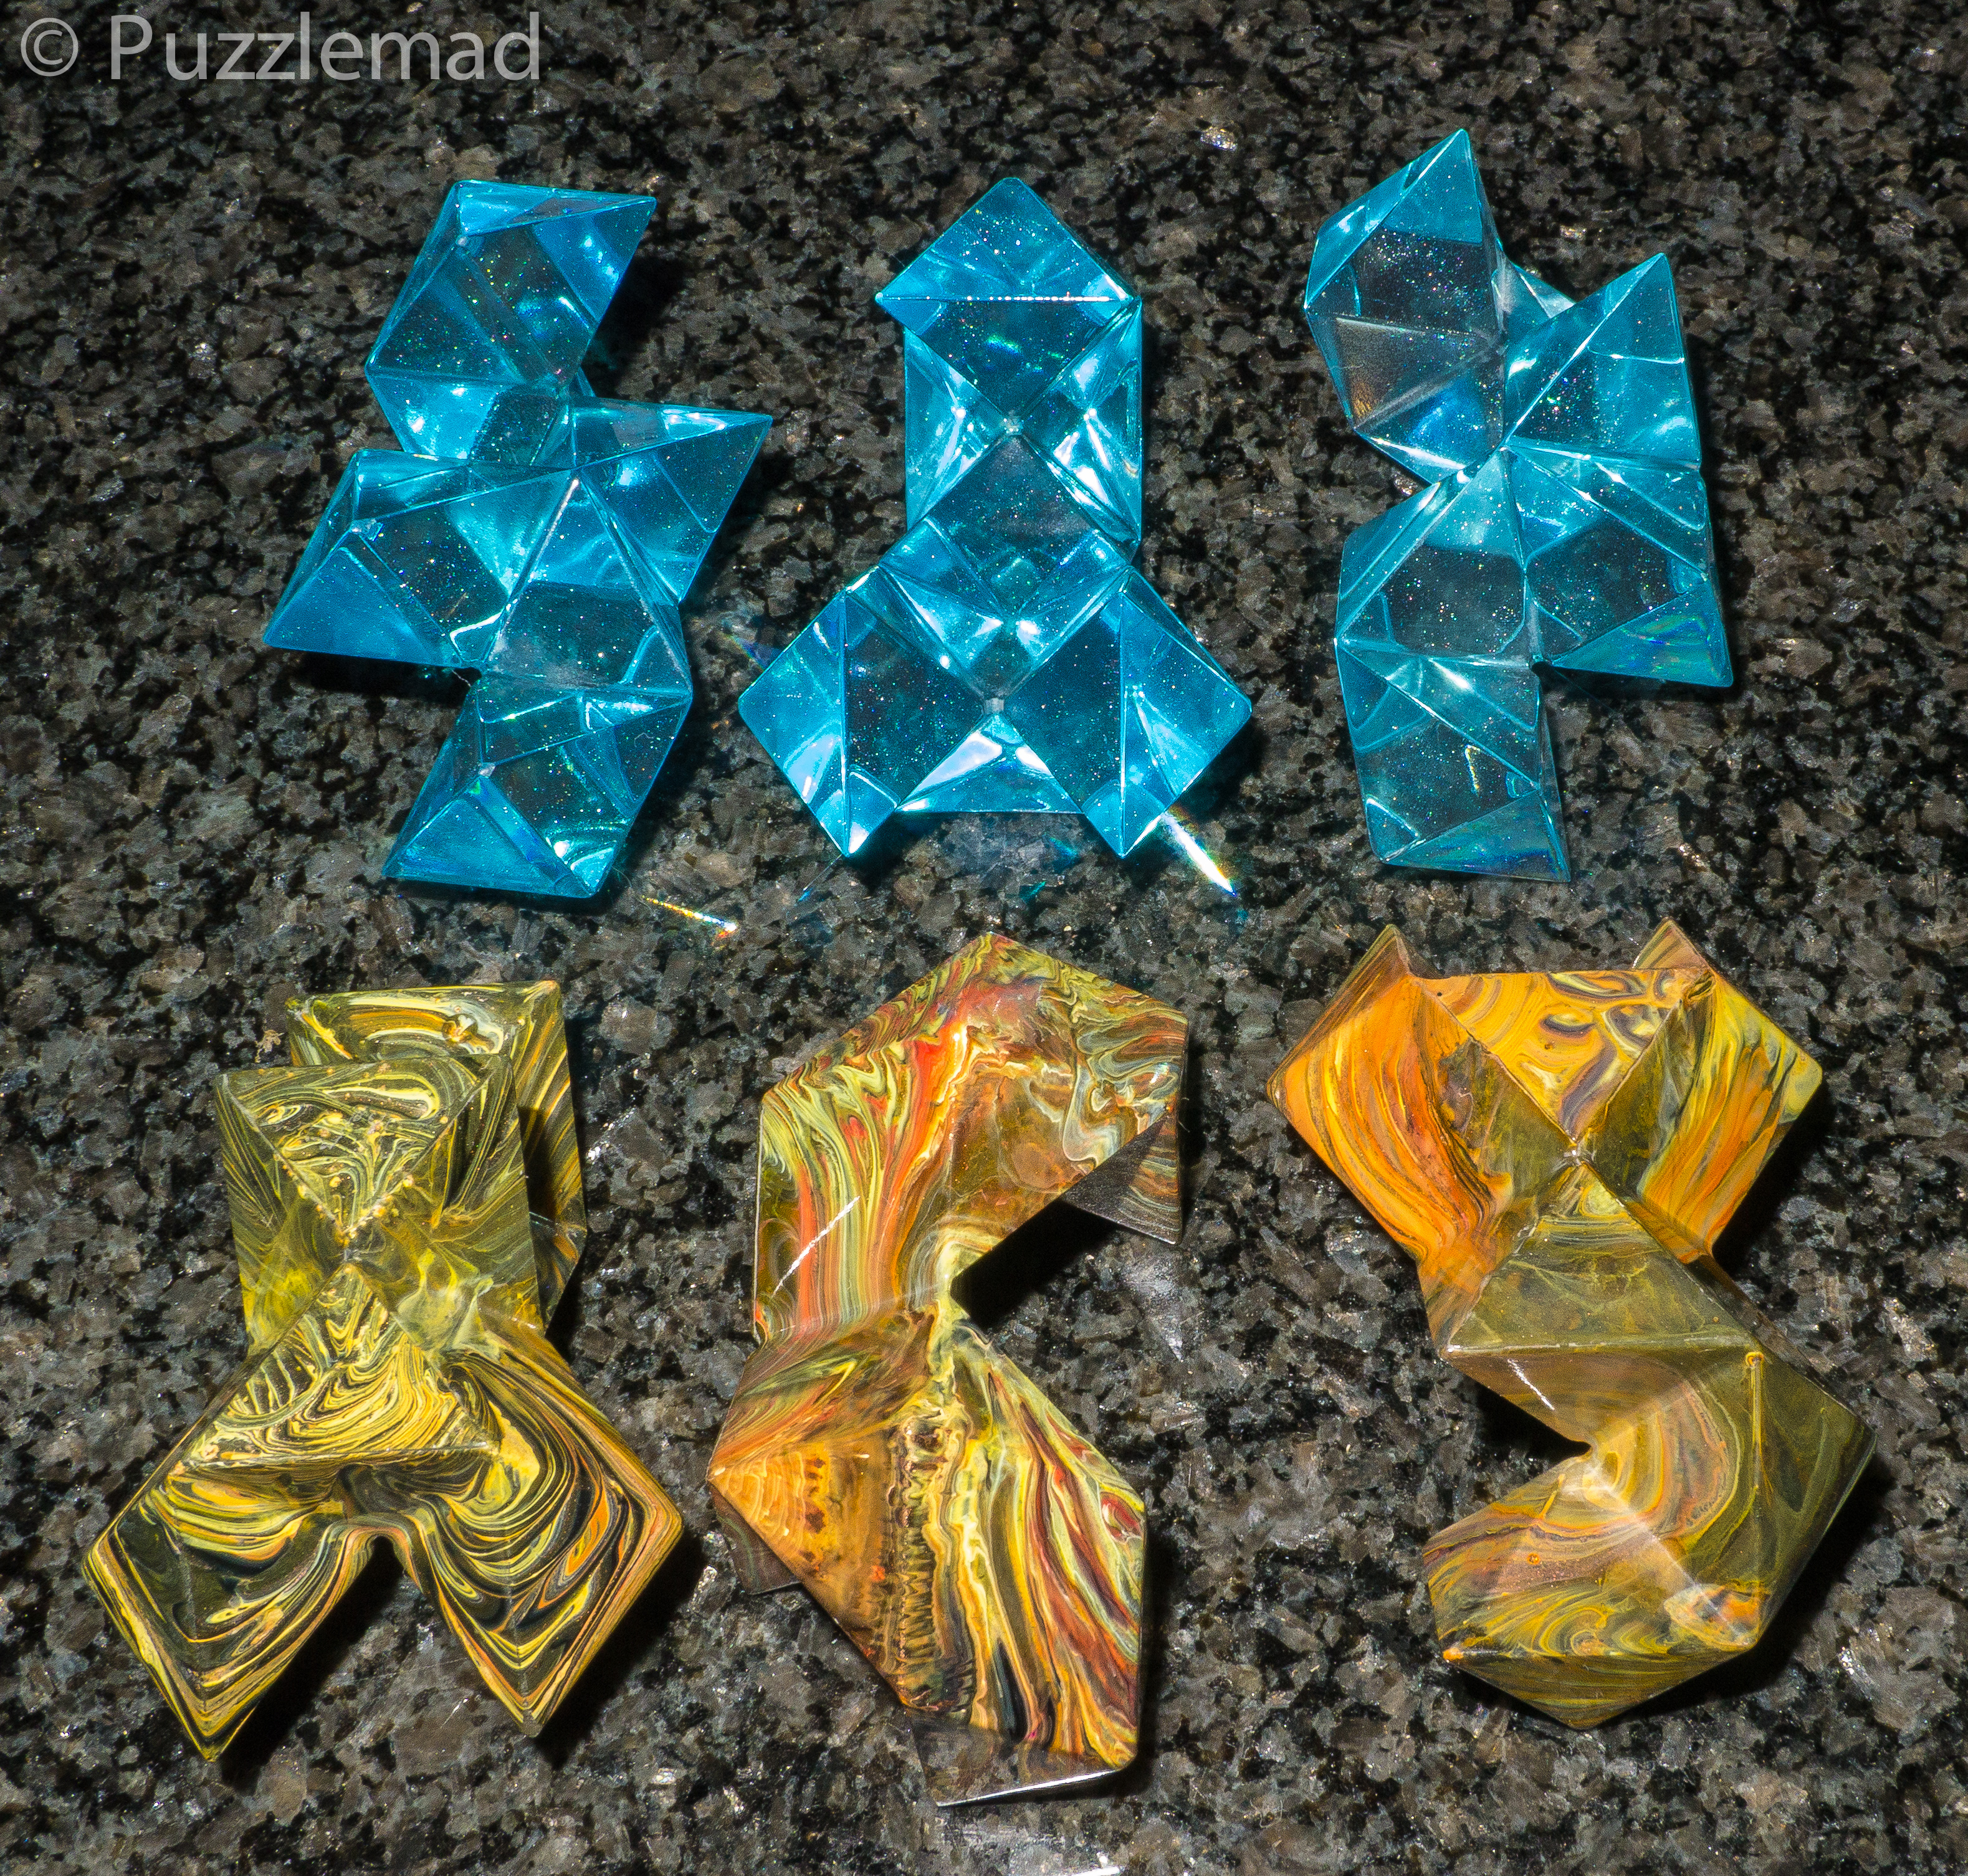
I saw this on Facebook a few months ago and, despite the fact that it is not a wooden version (which I have lusted after for years and never managed to acquire) I fell immediately in love with it. Lewis has gotten into casting beautiful puzzles using acrylics and had managed to model the pieces of the Peanut puzzle (#67) well enough to make moulds and and then create his pieces using one lovely clear transparent blue acrylic and another using a mixture of yellows and reds and black acrylics made into a gorgeous swirly pattern. I do already have a copy of this puzzle 3D printed by big Steve which I got a few years ago and which I completely failed to solve having dismantled it from the ring shape it arrived in. This was my motivation to try again. It looked heavenly but would I be in hell?

One of the features of this version that particularly excited me was that Lewis had recreated a booklet of construction problems to go with the puzzle. I had had no idea that there was any other challenge other than to use the 6 pieces to make the ring but apparently there are at least 31 achievable challenges. I say achievable with no real hope of this being achievable by me as I am absolutely hopeless at assembly puzzles. Stewart's original instruction sheet said:
From Stewart's original instruction sheet:
"The Peanut Puzzle is based on a two-piece dissection of the rhombic dodecahedron. The half pieces are joined different ways to make this set of six Peanut Puzzle pieces. There are twelve ways that the half-pieces might have been joined in pairs to make usable pieces having no axis of symmetry. This special set of six was found by Mike Beeler, using a computer, to be the only one of 924 possible sets that will construct all the symmetrical shapes below.
If any closed loop is considered a Peanut Puzzle construction of sorts, then many others are possible, some having symmetries and some not. See how many you can discover; then sketch them and invent names for them."
Also from Puzzle Craft 1992:
"The object of this puzzle is to join the pieces together in a closed loop to construct all sorts of different geometrical figures, such as those shown below, using three, four, five, or all six pieces. Or you can invent your own. The pieces are fun to just play with. In order to fit together all different ways, the pieces must be very accurately made, so this is not a project for the beginner."
The quality of the casting of the pieces and their sheer beauty is breathtaking and it even makes me forget about gorgeous wood for once. The booklet shares the same attention to detail. Beautifully printed and spiral bound with instructions on what shape to try for and how many pieces to use. For example puzzle one is as follows:

Excuse the poor photography
This just invites you to have a play. I struggle with assembly puzzles when the pieces are rectilinear and the pieces used here are anything but... they use a rhombic grid and the interlocking of the pieces is an interesting diagonal mating process. Each piece can unite with two others at each end. Therefore to make whatever shape is required you need to effectively make a ring form for them all. Embarrassingly, it took me about 45 minutes to solve the first and easiest challenge! Aargh!

Yay! Solved one!
It is hugely satisfying to do this and unbelievably difficult for a man of my scant brains. Challenge 2 was slightly harder:

How hard can it be?
Blush! Took me 2 hours!
OMG! This is humbling. The first two challenges should not have been so difficult as they are effectively planar challenges. Obviously the interaction is in 3D but the shapes to be created are all in the 2D plane and I was spending enormous amount of time trying to find the right interactions and with my Goldfish memory probably trying the same interlocking over and over again. Sigh - not terribly bright. The following day it was time to venture into 3D shapes with just the basic Tetrahedron:

Still "just" 4 pieces!
Took me a whole day!

I was seriously intimidated! I had a little try at the 4th challenge of a Diamond shape and after another whole day, had completely failed to manage an assembly even remotely close! It is great fun trying but after a while I had to put it down. Then I decided to be a complete sucker for punishment and attempt the hexagonal ring which is the shape most commonly associated with it. The picture to the left is from John Rauch's Puzzleworld site.

And of course, you guessed it! I have completely failed to assemble this shape. Is it just me? Or are these seriously seriously difficult puzzle challenges. I am fairly certain it is me!

I then wondered whether the puzzle could be modelled in Burrtools and maybe I could create a full set of the assemblies in BT format. Do I consider this a "cop out"? Only a little bit. It is all about having fun and I have said many many times on the site that the making of a BT file for a puzzle is a crucial part of the fun for me. I have no real experience of using the non-rectilinear grids with BT so this would be a good chance to try it out. And here is where I hit a brick wall for a while. When starting a new design the options are:
  • Brick
  • Triangular prism
  • Spheres
  • Rhombic tetrahedra
  • Tetrahedra-octahedra
I had no clue! I started with the obvious Rhombic tetrahedra grid and could not manage the creation of any useful shapes. I cannot recall which grid O settled on but I think it might have been the triangular grid which allowed me to model the 6 pieces (with huge difficulty). 

Two of the pieces successfully modelled in Burrtools
Time to model the challenges then - this is a whole lot harder! In fact so hard that I cannot do it. I think I will need to ask an expert for advice on how to go about it. The difficulty I am finding is that the shapes in the 2D representation of the grid change with each layer as you go up the z-axis.

If anyone is able to help with this then please let me know. It would be a fantastic resource for the puzzling world to have a BT file with all the challenges in it. Please use my contact page.

This is a fantastic puzzle design by the Master, Stewart Coffin and has been fabulously recreated by Lewis. They are quite time consuming to make but I am sure that he will be making more if you want to buy one from him. 


Sunday, 3 December 2023

Maybe a Xmas Present is Here?

Pelikan release for December 2023
On Tuesday, I received 6 more beauties from Jakub with a request to review them as quickly as possible because he is already being asked about when they are to be released. The pressure is on.
From Back left we have:
Rug Rug by Alfons Eyckmans
Who Filled The Sorter Cube by Volker Latussek
Kreeft by Alfons Eyckmans
Padlock by Tabor Mikloš
Kuchenstuck by Tyler Hudson
Rhino by Theo Geerinck (and the late Symon Hovinga)

I have worked my little fingers off to do as many as possible in the 4 days I have had them and have managed to solve 4 and play with the other 2 for a bit.

Rhino

Rhino by Theo Geerinck (and the late Symon Hovinga)
I had gotten used to the Pelikan own designs for their continuing series of animal shaped puzzles and was expecting another one. This time I was delighted to see a wonderful design by Theo with his good friend Simon to accompany the earlier creation of the Bison from Jack Krijnen. They obviously had been either working together or competing to create puzzles on the theme. The Rhino has been beautifully crafted using American Walnut and Maple and is scarily realistic with a white horn and even pupils in the eyes.


The sequence for disassembly is not terribly difficult since the puzzle is mostly a series of plates on a spine but they don't just slide off and there are a couple of gotcha moments during the disassembly and a nice Aha! moment as well. Once it is apart, the reassembly is not hugely tough but having left it for a while, I had forgotten the orientation of a few of the plates and struggled to get them back in line on the spine. It's a lovely idea and will look amazing on display with the Bison (don't tell Mrs S!)

Kuchenstück

Kuchenstuck by Tyler Hudson
Yes, it's a piece of cake complete with layers of sponge and a glacé cherry on top! Beautifully made from Wenge, Maple, Padauk and Cherry woods, this design from Tyler Hudson is anything but a piece of cake to solve. The puzzle is actually a trio of maze plates that interact with each other and with the outer box producing a maze that effectively changes as you navigate it. Initially there are a few options for the pathway before you will find the one that proceeds further into the solution. 


Once you have set out on this path the options open out. I found mapping impossible because everything changed with every move. The exploration is fun and gradually you get a feel and then a glimpse for how the plates are interacting with each other and even can see the gaps in the pates where presumably they will come apart from each other. There are quite a few dead ends and loops in the solution and I got lost many times. Despite this, it seems to always be quite easy to find your way back to the beginning again.

I was beginning to lose hope because I could not find any new openings and put it down for a while. I picked it up again the next day and suddenly found something new and a whole new section of the puzzle pathway opened out. The sequence is a huge 28.2 for disassembly and will leave you with a whole new sense of achievement when you finally manage it. This one definitely required the use of Burrtools for the reassembly.

Kreeft

Kreeft by Alfons Eyckmans

This is a lovely chunky 9 piece burr by Alfons made from Wenge, Acacia and Purpleheart. It has a lovely size to allow easy play and from the outset there is a nice exploration. There are 3 possible moves as the first move and only one leads anywhere but it quickly becomes apparent that all of the found moves will be useful at some point. The progress is delightful right up until you can't find where to go next and you wander round and round in circles. Again, I had to put it down for a couple of hours to rest my weary brain and then start again later. The rest did me good and after following my previous paths, I found another lovely Aha! moment as another sequence opened up and shortly afterwards I removed the first piece. This did not lead to a sudden sequence of disassembly and there was a fair bit more backtracking and looking for another path to remove the next piece.

As is usual with Alfons' puzzles the difficulty level and exploration is just perfect at 15.5. The puzzle remains quite stable for quite a long time and I was even able to reassemble it without Burrtools. Of course a Burrtools file challenge is all part of the fun after you have done it.

Padlock

Padlock by Tabor Mikloš
Tabor has been designing interlocking puzzles for a few years now and they do look interesting. This stunning puzzle, made from Wenge and Limba resembles one of those little combination padlocks that we use everywhere to secure lockers etc. There are 6 keys and a shackle which need to be manipulated to open the lock. There are a few that can move immediately and one or two straight away open up some much more interesting moves involving the shackle. This then opens up a whole lot more choices and you need to decide what is the best way to go. I chose wisely and made good progress. After 13 moves the first piece can be removed and the rest follows in a nice sequence.


I was staggered to see that the buttons of the burr are only of 2 very simple types and this should mean that the reassembly without Burrtools should definitely be a possibility. I did not have time this time to attempt it but had a lovely time with Burrtools making the reassembly. If you collect padlocks then this is a must buy. I have quite a few wooden padlock puzzles now and this one is a very welcome addition to the collection.


Now onto the two puzzles that I have not yet had time to work on and only just had a little play with so far:

Rug Rug

Rug Rug by Alfons Eyckmans
This gorgeous and chunky burr from Alfons is made from Wenge and Limba. It is formed from a 6 piece burr that contains a smaller 12 piece burr inside. I suspect that this will be a huge challenge. The disassembly level is "only" a meagre 13.2.1.2.2 but with so many pieces interacting with each other the number belies the actual difficulty of the disassembly. My initial exploration has showed only a single initial move being possible and then a whole array of choices for moves 2 and 3. The solution will need to use my too and fro approach. I am greatly looking forward to it.

Who Filled The Sorter Cube

Who Filled The Sorter Cube by Dr Volker Latussek
This incredible creation almost made my heart stop! There seems to be no end to the amazing manipulation of geometric shapes by Dr Latussek. It consists of the same box (albeit a good bit larger) as the wonderful Bastille puzzle. Packed inside are prisms made from the first 6 simple regular polygons (Circle, Triangle, Square, Pentagon, Hexagon and Octagon). They are made from Wenge, American Walnut, Bubinga, Jatoba, Walnut and Maple and the box made out of American Cherry. It is gorgeous!


My first thought when I received this was "thank goodness that this is an unpacking puzzle and not a packing puzzle! It is almost a disentanglement puzzle. I look at this and marvel at how Volker's mind must work. It is 9cm in each dimension and the holes are all 4cm across in the middle of each face.The holes in the sides are big enough to hook your fingers in and manipulate the pieces but not big enough to allow a decent grip. You must use gravity as well as your fingers to make the pieces roll over each other to make space for the first one to be pulled out through a hole. It looks incredibly tough and I am worried that I will never manage it but it will be a lot of fun trying.

If you are looking for a Xmas present for you significant other puzzler or even a big hint for your non-puzzling significant other to buy you then you will not be disappointed with these. Also, the last time I looked there were still a few of the designs from the last release available including most of the Flop puzzles from Volker and the lovely Octopus.


Sunday, 26 November 2023

Hanayama Hyrule Crest

Hanayama Hyrule Crest

Following on from last week's review of the Hanayama Master Sword puzzle, I finish the trilogy with a quick review of the Hyrule Crest. This puzzle obviously has the shape of the emblem found everywhere in the Legend of Zelda game from Nintendo and not quite so clearly visible is the Triforce knotted up by the chain. At the ends of the chain are 2 more Triforce shapes which prevent the chain passing through the emblem. The aim is to remove the large triangular Triforce from the puzzle and then put it back.

This puzzle is rated as 4 out of 6 by Hanayama and 8 out of 10 by PuzzleMaster and I think that is a little high - it is not a really simple puzzle but I would make it a 3/6 or 7/10. It is a very nice bronze type colour and a good size for playing with at 10.4 x 1 x 6.2 cm. 

Details of the knot revealed
It is not clear from the initial positioning how the chain is fastening the Triforce in place and so I pulled it down to reveal that there are 3 holes in the crest and the chain loops through them all and around itself to hold the Triforce in place.


It may be that I have gotten to be quite good at disentanglement puzzles over the years but as soon as I looked at the configuration the solution just screamed out at me - I knew immediately what the sequence should be. But something was bugging me... I usually have a terrible memory and can find myself solving the same puzzle several times with absolutely no recollection of having done it before (don't tell Mrs S) but I distinctly remember that the Cast Heart (also a level 4/6 or 8/10) has a very similar configuration (I am very impressed with myself because I reviewed that puzzle way back in 2014). Going back to my pictures of the solved puzzle I can see that it is identical but with modified pieces. At $18 CAD the Heart is considerably cheaper but I would say a bit less attractive and is also a good bit smaller and more fiddly if you have fat fingers. If you are a Nintendo or Zelda collector then you will have to get the more expensive one.

Just like the Cast Heart, I was able to see the solution straight away and had my Triforce removed very quickly. The hardest part was manipulating the fiddly chain through some rather small holes:

Solved
I left the puzzle for a day or so and reassembly was still pretty straight forward for me. Is it worth buying? If you are a Zelda freak then definitely, if you are a Hanayama completionism then definitely again. If you already have the Cast Heart then probably not. This is a nice puzzle for newbies and definitely looks good in a display.

Sunday, 19 November 2023

Hanayama Master Sword

Hanayama Master Sword
The box is more beautiful than the puzzle!

I just realised that the photo above is not actually a terribly good pic! Depth of field issues - sorry about that. At the end of October I reviewed the Hanayama Triforce puzzle which I broadly enjoyed even if it was actually much easier to solve than the advertised level of 5 out of 6. The other two in the series have been sitting in my pile of to be played with toys but I seem to have had very limited time this last week and I only managed to start playing with this last night.

This is another in the Legend of Zelda series produced in collaboration (or maybe just with permission from) Nintendo. The Master sword is Link's weapon and here it is captive in a stone with the Hyrule crest insignia on it. Your aim is to free the sword from the stone. I think this might be better marketed in the UK as an Arthurian legend puzzle and called Excalibur.

The puzzle has a sort of pewter coloured metal for the base and collar and the sword is a chromed metal. The base has a weird sort of feel to it - I felt that I was going to get a discolouration or staining of my hands (this did not happen). It is 9.5 x 4.4 x 3.4 cm in size which makes it a little fiddly to grip the parts of the collar and has been ascribed a difficulty level by Hanayama of 6 out of 6 and by PuzzleMaster as 10 out of 10. I sort of agree with this assessment.

On the underneath of the puzzle you can partially see inside but the view does not help during the solve. There is a collar around the sword which is split into two halves. These collar pieces can move up or down and intermittently rotate in either direction depending on position of all the various pieces. This effectively makes the challenge a hidden maze type puzzle which is made more difficult by the fact that there are 4 pieces that can all move independently with certain restrictions which you cannot see. With my puzzle origins being with the Revomaze, I expected to enjoy this challenge and begin mapping fairly early. With such a limited size, I did not expect it to be anywhere near as tough as a Revomaze.

Fiddling early on, it is worrying to discover that the collar can rotate in either direction and also one of the pieces can be pulled up to allow more limited rotation with the piece in this position. I started taking some notes and very quickly realised that there were lots and lots and lots of possible moves after each decision that you make. It is really hard to make a decision tree for it to help keep track. This was rather disheartening and then at some point (not that far in), I must have either allowed a piece to move without me realising or forgot to note a move and I was lost in the maze. Aaaargh! 

I was unable to go back to the beginning by following my notes and I was now left blindly wandering around a maze in the hope that I could either randomly get out or find my way to a reset. I got quite close to a disassembly a few times with everything protruding from the base quite a long way but not enough to allow a release. After about 30 minutes of fiddling blindly I managed to release the pieces:

The sword has been released (spoiler free)
It is interesting to see how the pieces are able to interact and also interesting to look in the prism at the maze obstructions but this is singularly unhelpful in attempting a reassembly.

To put it back together, obviously, the exact reverse of the movements done is required. Except, I had absolutely no idea what I had done. So far I have failed to get this back to the start after an hour. I have got frustratingly close but each time been blocked and ended up inadvertently dismantling again (with a fair while being lost in the maze). I am sure that I will get there eventually but I have to say that I didn't really enjoy this puzzle. It was too random for me with very little thought.

Obviously, if you are a seasoned puzzler then you will be better at it than me and have no problem with it and probably find it quite enjoyable. If you are a collector then this along with the rest of the set is an essential purchase. Zelda fans should probably buy as well.

Sunday, 12 November 2023

Crazy Pyraminx Crystal

Crazily Logical Solve

Crazy Pyraminx Crystal
OMG! What have I done?

Having spent a good 10 days desperately working on the wooden puzzles from Pelikan, I decided to take a completely different puzzling track after that and play with something that scared the living daylights out of me but weirdly, enticed me as well. The Crazy Pyraminx Crystal looks absolutely horrific but the reality of it is that it is an entirely logical puzzle that can be solved by anyone who can use either the beginner's solution to Rubik cube or the Ultimate solution. Yes, it literally requires nothing more than a standard approach to a simple puzzle and a bit of thought.

I had absolutely adored the original Pyraminx crystal and even bought a shape modifications of it from Traiphum - the Hexaminx crystal. 

The most important thing I learned from the Pyraminx crystal solution was that, despite having so many pieces, it actually solved as 2 completely different puzzles which were solved one after another. Neither of those puzzles, individually, were terribly hard to solve. 

Hexaminx crystal 

My initial worry with this enhancement of that original puzzle was that the crazy centres which split all the pieces in half would completely confuse me and make it impossible to solve. Before I embarked on the odyssey, I did quickly have a look at the Twisty puzzles forum posts on it to see the general approach that others had taken. Everyone seemed to have worked out a fancy commutator to cycle 3 of the inner circle pieces around and I found one myself which was not hard to do in reality. As is usual for me, during my exploration, I inadvertently scrambled the bloody thing and in the end went all the way. As you can see from the picture above, it is really quite attractive when scrambled so would not be the end of the world if it stayed that way.

My memory of the non crazy version was that all the corners were solved as a Kilominx (i.e. a 2x2 version of the Megaminx) which can be done by anyone who can solve a standard Rubik cube. Then the  edges of the non-crazy version were solved independently of the corners using just the usual up, up, down, down algorithm to cycle them around. Maybe the approach with the crazy version would be similar?

Aha! YES!

There are a couple of wonderful Aha! moments with this puzzle. The first was that the 2 separate puzzle approach would work and the second, even bigger Aha! moment was that the crazy version is not based on the Kilominx - it is actually based on a Megaminx. If you can solve a Rubik cube then the first part of the solution to this is definitely possible for you. It will require you to alter your orientation when looking at it but certainly no worse than any other shape modification.

So what am I talking about? The corners are still the corners of a Megaminx. The edges that look like they should be part of the Megaminx are NOT! Just like the original Pyraminx crystal, you need to ignore the obvious edges just now. The true edges of the Megaminx are actually the inner circle corners.  When turning the faces, it quickly became apparent that the inner circle corners moved with the corners and the ones on opposite ends are effectively bound together. The edges of the Megaminx are effectively internal with only the very ends visible. Having realised this, I refreshed my Megaminx solve and started on it.

Top and middle faces solved all edges and corners
Final face to be solved
As you can see in the pictures above, the corners are solved everywhere apart from the grey face and the apparent edges (which are not edges) have been ignored. The real Megaminx edges are the inner circle corners. To help you visualise - in the left pic, the frontmost edge with the blue and red corner pieces on it has a red/pink edge which we are ignoring just now but the inner circle corners with a white at the top and the pink at the bottom is the real edge that I am visualising. It is hard to get your head around thinking this way but once you can do it then it is literally JUST a Megaminx. Just like a standard Rubik cube, the top face takes a bit of work but it is just standard cube algorithms (slightly altered for the pentagonal faces. The end result is solving the Megaminx:

Megaminx solve completed
Having solved your Megaminx and completely ignoring the crazy circle part of the puzzle you can see that quite a lot has been done. Time to focus on the true edges of the puzzle. I was not sure how best to go about it. I had a commutator worked out so I could just solve the outer edges like the original pyramids crystal and then move the inner edges later using that but it would require a lot of setup moves and could be fraught with the danger of inadvertent scrambling. Just for giggles, I thought I would try to reduce my edges one at a time and then place them. As long as I always just do my up, up, down, down algorithm and undo the setup moves then the Megaminx solve should NEVER be disrupted.
Focus on R/W edge
Twist to pair it with W inner
Move edge over and reset twist
Working systematically, pairing up inner and outer edges, flipping it over and then doing the other side
Move it to face with R inner
Pair them up
Place completed edge
Here I have reduced and placed one single Pyraminx edge. All that is required is to use my up, up, down, down sequence to move the edges around and then twist in place and move them back out and into place. Simple! Do this repeatedly over and over again being careful not to ruin what you have done before - luckily with a dodecahedral shape there is plenty of space for most of it.

The final few require a bit of thought and planning and will usually require you to break up some of your nice careful placement but nothing too catastrophic:
Final face of edges to reduce
Last one will need some extra moves
All reduced but placed ones moved
Once the triple edges have all been recreated and most of them placed then the end game is just like the original Pyraminx crystal:
In the end just have a 3-cycle
Re-solving the equatorial edges that had been dislodged will eventually leave you with just 3 pieces to be cycled. Yet again, it's just an up, up, down, down move to have it completed. Yesssss!

I have carried out multiple solves using this technique and there is nothing extra to it. The end-game occasionally needs a bit of fiddling to get to the last 3-cycle but if you can solve a Rubik cube and by extension the Megaminx then you can solve this puzzle without learning anything new. A truly wonderful puzzle design and puzzling challenge!
A puzzle progression
Can you solve the 3x3 Rubik cube using Beginner's approach? Then a simple progression through Kilominx, Megaminx and Pyraminx crystal is just a matter of thought and no new techniques.