The Little Portico is a nice little sampler for these puzzles - I think it is made from beautifully contrasting Maple and Purpleheart and measures 45x55x77mm. I solved it on Xmas day after a bit of sparkly to lubricate my "bwain" and managed it fairly easily in about 30 minutes - there are only a few short blind ends to get lost in. There were no surprises but the movements were beautiful and the fit of the pieces top notch. The really fun part of this easier one is to take it apart and immediately scramble the pieces and then try to reassemble it without having the muscle memory of the pieces and their orientation - I actually did not do this on purpose but the cat on my lap turned around to sleep in a different direction and scrambled the pieces for me before I could set everything in my head! Assembly from scratch is perfectly possible and really quite fun - I think it took me about another hour and there was only a small amount of muttering under my breath which Mrs S seemed not to notice! I must ply her with alcohol more often - it certainly mellows her mood and softens her laser stare! I wanted to pace myself so just played with this one for the rest of the day and it does make for a delightful little worry bead! If you are a beginner to burrs then this is a nice little starter puzzle, if you are experienced then this will be a breeze but still enjoyable, and if you are a collector then you know you need it!
 |
| Portico J |
|
 |
| Pieces of Portico J |
|
After a couple of days, I moved onto the more complex of the two - Portico J (I am not sure I understand the rationale for the naming - maybe Jakub or Stéphane can leave a comment). This one is even more beautiful in my eyes as I am a sucker for darker contrasting woods - I think this is made from Wenge and Cherry and measures 45x55x100mm. With only one extra burr stick in the taller frame I did not expect this to be too much harder - Oh boy was I wrong! There are quite a few possible starter moves and they can lead quite a long way. There did seem to be one particularly long pathway which I moved along several times - every time I reached the end I could not find a further move and either backtracked or (much to my surprise) went around in a little circle. After all these years of my spouting my nonsense on the internet, you all know that I am seriously not terribly bright! So to confirm Einstein's definition of insanity, I continued to carry out the same movements again and again and again in the vain hope that something might change - I even wondered whether there were rotations in the solution because at one point it is possible to swing one of the board pieces through 90º! After several days of this Jakub posted a picture of the partial disassembly and the pieces on his Facebook page and I quickly compared it to mine. No extra information was obtained and I posted that I was seriously struggling with it. I was actually thinking of taking his picture and making my own Burrtools file for it when he emailed me the BT file out of the blue.
I was determined not to use it and continued to try to solve it the correct way but just could not find the next move anywhere. This might make you wonder whether the required move was impossible due to a manufacturing flaw making the required movement impossible. Let me assure you that this will
NEVER occur with one of the Pelikan puzzles - they are always perfect. After 10 days of trying to solve it I finally succumbed and to my shame I opened the file and looked at the beginning of the solution -
SOB! I went through it step by step and to my amazement I found where I had gone wrong and hence the title and subtitle of this blog post. I had chosen the correct path but the next move was absolutely perfectly hidden -
camouflaged so well that I could not see it despite it being right in front of me!
Just like last time, the damned cat dumped all the pieces all over my chair and I ended up with seriously scrambled up pieces again - Aaaargh! I shouted out loud in horror and the cat took off (I'll not mention where he scratched!) this caused Mrs S to squeal in fright before giving me a very large
Whack! Ouch! This time I was
seriously afraid - the Portico J is much higher level than the mini at 20.5.2.6.2 and I was not at all sure I would be able to get it back together without resorting to the computer. After such a long time of going back and forth over the first part of the solution I had gained a fair knowledge of possible moves - this gave me enough information to be able to deduce all the piece positions with just a little trial and error.
Yesssss! I actually reassembled the puzzle from scratch. It took me about 30 minutes but I am very proud to say that I managed it. Since then I have solved and unsolved it many times and it still causes me a little trouble - I love it!
This is an absolutely fabulous burr puzzle with just the right level of difficulty - it is made harder by the superbly camouflaged critical move but even once you have found that it is still a very enjoyable challenge. This is one of my favourites from Jakub in a very long time. It should be available quite soon from their
website.
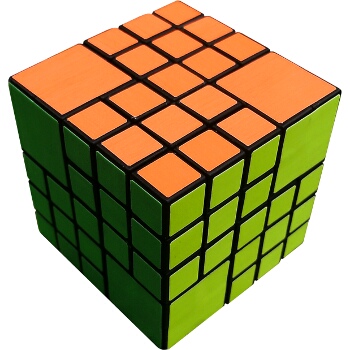
Nathan's 3x4x5 Floppy iCube
.....how is this linked to the theme of camouflage?
 |
| Not just another Rubik Cube |
In August last year Nathan Wilson from Oz showed off a new puzzle that he had designed and made on his YouTube channel and asked for bidders if they wanted to buy it. I couldn't resist and offered an amount of cash that I thought the work that went into this would deserve and I was lucky enough to win. It arrived in September and after my initial look I put it away in terrible fear! Plus, in my defence, I also had rather a lot on my plate at the time with my Mum's illness and death and the continued arrival of quite a few extra puzzles!
 |
| This explains the odd name! |
Now the naming of this puzzle seems rather odd - what constitutes an iCube and why is it floppy? On this rather
old blog post I discussed the different types of cuboid and at the bottom I described the Floppy group which have a form such that turning 2 faces through 180º causes no offsetting of pieces and no shapeshifting. I discovered straight away that turning the 3x5 faces on Nathan's cuboid causes no change in shape or bandaging and hence gave the puzzle what looked like Floppy cuboid features.
BUT (and it is a very big
BUT) the puzzle also shares features of the iCubes. The iCubes have been commercially produced by
Calvin's puzzles in the form of the
centre shifted 3x3x4 iCube which is a fantastic puzzle and is definitely not too tough (it's really fun to play with) - if you can solve a 3x3 then this is just a small extra step up in difficulty. I also described a couple of hand made versions from
Dan Fast (aka CrazyBadCuber) who hand made a bunch of 4x4x5 icubes:
 |
| Dan Fast's iCubes - notice the offsetting |
Then Liapis Nikos from Greece (
Gr_cubed) made me the superb 5x5x4 Floppy iCube (I discussed it
here) which was another tremendous challenge - this one had the offsetting that we see above but also shared Floppy cuboid properties because it's height is less than it's side length:
 |
| Floppy dimensions |
|
 |
| But still offset |
|
Dan's iCube added significant challenges but was not particularly tough - if you can solve a 4x4 then you can solve the "iCubed" version. The floppy one above added a significant extra challenge - the addition of the Floppy geometry to the iCube problem meant that this could not be solved using techniques of either! I needed to design a whole new methodology to approach this completely new group of puzzle. Anyone who loves twisty puzzles adores this sort of new challenge!
It got even worse/better when I received my number 3
favourite puzzle of 2014 from Gr_cubed - the 5x6x7 Superfloppy iCube Extreme.
 |
| 3 different side lengths |
|
 |
| Offset in every direction |
|
The 5x6x7 was a phenomenal challenge and required a similar technique to the 5x5x4 Floppy icube but because it was "iCubed" (is that a verb?) on all sides (not just 4), it was a
much tougher solve.
I am sure you are all wondering - what on earth is this to do with the word
camouflage from the title of my post? Actually I can hear your voices (those damned voices in my head just won't leave me alone!) - you actually are saying that I have finally lost the plot! And one of you just called me an old windbag! That's not nice even if it is true! The connection is that the 2 floppy iCubes above needed to be solved in exactly the same manner as the original
Camouflage cubes which I don't believe I have ever mentioned before -
AHA! This was a series of puzzles of varying sizes which looked like normal cuboids but were all offset (my favourite was the 4x4x3 pictured below).
 |
| Camouflage cube (4x4x3 version) |
|
 |
| Offset shown here |
|
 |
| 4x4 AI cube |
The Camouflage cubes and the two Floppy iCubes described so far effectively needed to be reduced to a 2x2 cube. Blocks were built up on each corner of the puzzle until all 8 different sized and shaped blocks were built and then a 2x2 cube solve was all that was required. The techniques involved were simply the block building techniques from the 4x4 AI cube. The camouflage cubes required you to work out where the 2x2 split occurred and with the more complex ones you could choose the split yourself. The 5x5x4 Floppy iCube was pretty simple to build the blocks once the realisation had been made and then the 5x6x7 extreme version showed that it was impossible to proceed entirely with that technique - the small centre pieces were too blocked up to be added to the corner blocks straight away so I ended up having using the camouflage technique to ONLY align edges and corners and then solve as the 2x2 before finally ending with the centre pieces, which needed to be solved separately using increasingly complex commutator moves. These commutators had to be designed on the fly for each different scramble - hence a stupendous challenge earning a slot as one of the puzzles of the year.
I finally decided just after the New Year that it was finally time to attempt to solve Nathan's 3x4x5 Floppy iCube. When I came to solve it, I first tried the Floppy cuboid approach and immediately saw that it would not work. This wasn't too much of a worry for me, I was expecting it. I also saw that simple iCube techniques like those I used with Dan's iCube also could not possibly succeed. As I expected, this was going to need a
camouflage cube approach (
see - I did say I would bring it all together somehow!) of building blocks up and solving as a 2x2. I felt very full of confidence and quickly began to work on it - only be to be shot down in a heap! The diminutive dimensions meant that the puzzle got too blocked to build the 2x2 blocks up. The centres would not play ball for me.
 |
| Now this looks like a challenge! 3x4x5 Floppy iCube scrambled |
If it wasn't a straight forward camouflage solve then what was it? At this point I remembered a video from my friend Rline of
Twistypuzzling YouTube fame. He had showed off a wonderful chimaera cube - this was also called the 5x5 AI cube and it needed to be solved using AI/Camouflage techniques but was reduced to a 3x3 - the central stripes were a completely separate reduction.
 |
| Notice the central strip on every axis? It requires a 3x3 reduction |
At this point I had enough knowledge to attempt a full solve of Nathan's marvelous little puzzle - the small dimensions made it hard to move pieces about but after about 8-10 hours of experimentation, it was solved. This was a fantastic little challenge - not for beginners to twisty puzzles but anyone with a bit of experience should try and either get Nathan (or another modder) to make one or make it for make one themselves.
Finally.....
Anyone watching me solve this would have thought that I was positively potty! Nathan had filled with white Milliput and then painted the surface with black paint. Unfortunately the white Milliput did not take the paint properly and my first play ended up with me having hideously black hands! Mrs S was
VERY unhappy and I got a
laser burning stare AND a BIG
Whack! Ouch! At that point I was banished from the living room with it and I was forced to wear a pair of latex gloves to continue my solve! My moment of triumph was a lonely one - she didn't want to know! All she cared about was that the puzzle never came into the living room again! Hopefully future versions will have the correct paint used.
Whew! That was a rather long blog post and the link between the puzzles was tenuous at best - I hope you enjoyed it? It did take me several hours to write it. Let me know in a comment below or via my
contact page whether you prefer these long posts or would like me to cut them down to a more reasonable size and not such a massive essay!
Do be sure to watch the Pelikan site for the Portico puzzles coming up for sale.


Great blog post Kevin, thanks once again for another very entertaining read! I have just made (very DIY) a chimaera cube site I'm on my way!
ReplyDeleteGood luck Paul! Let me know how the solve goes?
Delete